4-Ingredient Healthy Spelt Crepes (Clean)

dsc_1168

dsc_1166

I love crepes. To be honest, I probably love making crepes as much as I enjoy eating them. They’re honestly one of my favorite things to make. Call me a loser, but it’s just so cool to see the silky batter cook to form lacy edges and these beautiful, golden brown designs.

dsc_1163

dsc_1119

You’ll almost always find crepes in my fridge, just because I can’t eat them as fast as I make them! I’ll usually make a large batch on Sunday and eat them for breakfast or (my current favorite snack) make banana sushi! It’s basically where you spread a generous layer of peanut butter over a crepe, add a banana, roll it up, and then cut it like you would cut sushi. I’m not sure why, but I’ve been really obsessed with that lately.

dsc_1165

Anyways, I tried to make these crepes a little healthier. I used to make healthy buckwheat crepes, and those are amaazing! If you’re looking for a gluten-free crepe recipe, then definitely go for that one. Anyways, these spelt crepes give you a thinner, more flavorful crepe. The ingredients for both crepes are essentially the same, but with one addition to the spelt crepes – applesauce! Yes, you heard that right. Crepes are generally made with butter. In my buckwheat crepe recipe, I chose to omit it entirely, but here, I’ve added a little applesauce, which gives the crepes a lighter consistency, but keeping them just as healthy!

dsc_1159

dsc_1172

4-Ingredient Healthy Spelt Crepes

Makes approx. 10 crepes

Ingredients

  • 2 eggs
  • 1 cup almond milk
  • 1/2 cup water
  • 1 cup spelt flour
  • 3 tablespoons applesauce

Method

  1. Whisk all the ingredients together until smooth
  2. Place the batter in the fridge and allow it to rest for 1 hour, or up to 48 hours
  3. Heat a non-stick pan over medium-high heat and spray the pan with cooking oil or brush on a little coconut oil
  4. Turn the heat down to medium-low and pour 1/3 cup of the batter into the pan. Swirl the batter around so that it spread into an even, thin layer
  5. Cook until the crepe is dry before flipping it over and cooking briefly on the other side
  6. Repeat with the rest of the batter

Banana Chocolate Chip Oatmeal Cookies (Clean)

dsc_0940

dsc_0996

Happy New Year, everyone! (yes, I know, it’s been like two weeks but still).

dsc_0945

dsc_0984

I hope that you all had an amazing Christmas and New Year’s. I definitely did. I spent the first Christmas at home for as long as I can remember. It was full of good food and good times and was probably one of the best ones ever.

dsc_0972

dsc_0979

dsc_0959

Now, it’s back to school. To be fair, workload was alright in the first week back, but I’m also training for a swim meet, which requires waking up early sometimes and leaves me tired all the time. So, you could probably guess (and if you follow me on Instagram, you’d know) that I’ve been pretty lazy with breakfast and food in general these days. I’ve just grabbed a Squarebar and a couple bread rolls for breakfast, but also – these cookies!

dsc_0961

I’ve always had my doubts with making healthy cookies. Cookies are just so technical, but these turned out beautifully. They aren’t super sweet, so they make a perfect on-the-go snack. I’d definitely want to have a batch of these in my fridge at all times. They’re healthy and delicious and studded with chocolate and they’re perfect.

dsc_0952

These cookies are soft, but hold their shape very well. They’re also slightly chewy thanks to the added oats.

And of course, chocolate makes everything better, so there’s that…

dsc_0997jpg

dsc_0992

Banana Chocolate Chip Oatmeal Cookies

Adapted from Ambitious Kitchen

Ingredients

  • 1/3 cup melted coconut oil
  • 1/2 cup coconut sugar
  • 2 teaspoon vanilla extract
  • 1 large egg
  • 2 large overripe bananas, mashed
  • 1 1/4 cups white whole wheat flour
  • 1/4 teaspoon salt
  • 3/4 teaspoon baking soda
  • 1 1/4 cups rolled oats
  • 2/3 cup chocolate chips

Method

  1. Preheat oven to 190 degrees Celsius or 375 degrees Fahrenheit
  2. In a medium bowl, whisk together flour, salt and baking soda
  3. In another bowl using an electric hand mixer, or in the bowl of an electric mixer, beat the coconut oil, coconut sugar, vanilla extract, and egg together until smooth
  4. Mix in the mashed banana
  5. Fold in flour mixture until just combined, before folding in the oats and chocolate chips
  6. Use a cookie scoop to drop dough onto prepared baking sheet, flattening them down slightly
  7. Bake for 10-13 minutes until edges are golden brown

Whole Wheat Banana Muffins with Dark Chocolate Chunks (Clean)

 dsc_0639

Ooh been a while since I’ve posted a muffin recipe. Been a while since I’ve posted at all, to be honest. Sorry about that, end of semesters are always ridiculously chaotic, but at least Winter Break is just around the corner! One more day!!

dsc_0611

dsc_0620

dsc_0647

Let me start off talking about the muffins so that you can skip directly to the recipe later without having to read all my random rambling.

I’ve made plenty of muffins in my life, and I have to say, that this is one of my all-time favourites. The crumb is absolutely perfect. It’s not dense, and it doesn’t fall apart when you bite. It’s soft and light and perfect.

And the flavour! It has a very distinctive banana bread flavour, but these are just so much easier. With banana bread, you have to wait over an hour for the banana bread to bake! With these, you need less than 20. Not to mention, muffins are the perfect snack size and easier to bring along as a to-go snack or even breakfast.

But of course, my favourite part would have to be the chocolate. I have a rule when it comes to muffins with chocolate in them. I either eat them cold – straight out of the fridge, or hot – microwaved or baked. When the muffins come straight out of the fridge, the chocolate chunks become so distinct in their tempered texture, demanding you to notice the chocolate chunks and appreciate them fully. On the other hand, when the chocolate chunks turn into melty globs of perfection…well then, they’re melty globs of perfection. It’s quite simple, really.

I happened to have hazelnut dark chocolate on hand, which I thought would add texture and contribute a nutty texture, and I’m really glad I did. Nevertheless, if hazelnuts aren’t your thing, then dark chocolate works fine as well.

dsc_0635

dsc_0641

dsc_0654

I’m so excited for break. Like, so excited. It’ll be the first time in forever that I’ve spent Christmas at home, and it’ll be extra special now because my family is rarely together nowadays. My brother’s off at university and my dad comes home once every two weeks because he was relocated. My mom is really excited too, going out and buying all sorts of Christmas decorations and gifts while I plan all the Christmas activities and movies and desserts. It’s going to be a good one.

And of course, this weekend my friends and I are going to have the best time ever. They’re both leaving quite early on in the break, so we’re making the most of this weekend – movie nights, visiting TianAnMen square, dinner dates, hot pot…

dsc_0651

dsc_0655

If you’re still reading this, which I doubt many of you are, I have a question for you: Would you rather know how you die or when you die?

My friends and I were discussing the question. One friend and I wanted to know when, and the other wanted to know how. It’s an interesting topic and a question worth discussing.

I’d rather know when I die. My reasoning was that I would be able to truly cherish my last moments, whereas, if I knew how I would die, I’d just be paranoid of everything relating to that. For instance, if I knew that I would die by getting hit by a car, I’d just have a fear of cars for the rest of my life.

But then I asked someone else while walking home and he said that he’d rather not know anything about his death. I can’t believe it hadn’t crossed my mind, but as soon as he pointed it out, I realized that it’s not necessarily a good thing to know anything about your death.

If I did know when I would die, I’d see my life as a ticking bomb. I’d feel guilty every second I don’t do something “meaningful” and I’d live in constant terror of finding meaning to life. It’s better to just sit back and go with the flow. Enjoy life, friends xx

dsc_0638 dsc_0658

Whole Wheat Banana Muffins with Dark Chocolate Chunks

Adapted from How Sweet Eats

Ingredients

  • 2 cups white whole wheat flour
  • 1 teaspoon baking soda
  • 1/4 teaspoon salt
  • 1/4 teaspoon cinnamon
  • 1/8 teaspoon freshly grated nutmeg
  • 1 large egg
  • 1/2 cup coconut sugar
  • 1 teaspoon pure vanilla extract
  • 1/3 cup coconut oil, melted and cooled
  • 3 large bananas, mashed (about 1.5 cups)
  • 2/3 cup almond milk
  • 6 ounces dark chocolate, chopped (I used hazelnut dark chocolate)

Method

  1. Preheat oven to 170 degrees C or 350 degrees F
  2. In a bowl, whisk together the flour, baking soda, salt, cinnamon, and nutmeg
  3. In a separate large bowl, whisk the egg and coconut sugar together until smooth. Whisk in the vanilla extract, coconut oil, and mashed bananas until combined
  4. Gradually add in dry ingredients, mixing until just combined
  5. Stir in the milk and mix until just combined
  6. Fold in the chopped dark chocolate
  7. Fill each muffin liner 2/3 of the way full with batter. (Optional: Place a very thinly sliced banana slice on top of the muffin and a little chopped chocolate before baking)
  8. Bake for 15-17 minutes, or until tops are slightly golden. Remove and let cool


Chunky Coconut Granola (Clean)

dsc_0825

dsc_0854

How is it already Saturday? I was so looking forward to using this October break productively. I was going to finish all my college essays and come up with a Math IA topic and finish my Extended Essay and study for my upcoming math integration test and my psychology socio-cultural level of analysis test and get started on writing my psych IA and oh god I’ve done nothing. Well, then again, I didn’t do nothing. I mean, I did watch more movies than I’d normally watch in half a year, and I finished a book. Oh – and I ate a lot of food. That counts for something, right?

dsc_0861

I just read my first Lee Child book – Killing Floor. It’s the first book in the Jack Reacher series and I have to admit that I was mildly disappointed. Maybe my expectations were too high, or maybe the book just wasn’t as good as it’s hyped up to be. I watched the movie afterwards, which was based on a different book in the series, and I feel like I could pretty much predict aspects of every story in the series. Always has to be a damsel in distress (or any hostage really), a betrayal, a car being tailed, and Reacher shoving his thumbs in someone’s eyes. Has anyone read the whole series? Am I close?

dsc_0822

dsc_0859

Oops I haven’t even told you anything about this recipe yet. I’m tired and cold. Forgive me.

Now, I have a lot of granola recipes, but this one is definitely a favourite. I’m not usually the biggest fan of coconut-flavored things, but this is seriously amazing. The granola is suuper chunky. You know granola’s gonna be chunky when the whole sheet of it just sticks together and you can break it into chunks as big as you’d like. Check this out (warning – bad quality phone pictures incoming):

img_0604

img_0608

“Is that what I think it is?” YES. It’s a giant sheet of granola. You could’ve broken it in half and called it reaaally chunky granola.

Point is, this granola gives you the clusters of your dreams, and is infused with such an aromatic and sweet coconut flavour that you will not be able to resist.

dsc_0837

Chunky Coconut Granola

Adapted from Minimalist Baker

Ingredients

  • 1 1/2 cups (135g) old-fashioned oats
  • 1/2 cup (40g) toasted and salted coconut flakes
  • 3/4 cup (80g) raw almonds, chopped
  • 1/4 cup (25g) raw pecans, chopped
  • 1 tablespoon (12g) coconut sugar
  • 1/4 teaspoon salt
  • 3 tablespoons (45ml) coconut oil
  • 1/3 cup (80ml) maple syrup or honey
  • 1 teaspoon pure vanilla extract

Method

  1. Preheat oven to 160 degrees Celsius or 325 degrees Fahrenheit
  2. In a large mixing bowl, stir together the oats, coconut flakes, almonds, pecans, coconut sugar, and salt
  3. In a small saucepan, heat the coconut oil and maple syrup over low heat and whisk until fully combined. Add in the vanilla sugar and whisk to combine.
  4. Pour the coconut oil mixture over the dry ingredients and stir together until the dry ingredients are thoroughly coated in the coconut oil mixture
  5. Spread the granola mixture evenly on a baking sheet lined with parchment paper or a silicone baking sheet and bake for approximately 20 minutes. At 20 minutes, turn the pan around so that the granola bakes evenly, and bake for another 5-7 minutes. Granola has a tendency to be a little unpredictable in the oven, so keep and eye on it to make sure it doesn’t burn.
  6. When the granola is golden brown, remove from oven and allow it to cool completely before breaking it into chunks. Store in an airtight container at room temperature. Enjoy!

Fruity Rainbow Fro-Yo Popsicles (Clean)

Expect lots of ice cream recipes these days, ’cause my freezer it literally full of it right now.

DSC_0962.

DSC_0931.

Also – I figured out a problem to that Photoshop problem. I had a bunch of recipes with unedited photos, but my laptop died and my brother’s laptop doesn’t have Photoshop. My solution – using a 7-day trial. Hell yes.

So instead of working on my college apps and my math IA, I’ll gladly spend these next 6 days editing all the photos I had procrastinated.

DSC_0969..

DSC_0985.

These fruity popsicles are perfect for the killer heat this summer. I haven’t left my house for the past week until today, when I took my dog for a walk. I had only been outside for about 5 minutes before I started sweating and my dog was panting like crazy. Needless to say, it was a short walk. When I got home, the first thing I went to grab was one of these popsicles. I gave my dog her water, which she lapped up, but then she just stared at me longingly as I enjoyed my cold popsicle. Poor puppy.

DSC_0972.

DSC_0974.

Feel free to sub in whatever fruit you want, depending on what you have on hand. Oh, and no – blueberries do not make a blue layer, but you could experiment around with spirulina powder to get a turqoise-colored layer.

DSC_0968.

DSC_0982.

Fruity Rainbow Fro-Yo Popsicles

Ingredients

  • 3 cups greek yogurt
  • 1/2 cup cherries or raspberries
  • 1/2 cup pineapple chunks
  • 1/2 cup chopped kiwi
  • 1/2 cup blueberries
  • 1 tablespoon açai powder
  • Honey, to taste

Method

  1. Distribute the yogurt evenly among 5 bowls
  2. In a food processor, blend each fruit separately and set aside. Start off with the lightest colors and gradually use darker ones to avoid washing your food processor/blender every time (pineapple -> kiwi -> cherries/raspberries -> blueberries
  3. Stir the pineapple, kiwi, and cherry/raspberry fruit purees into the bowls of yogurt. For the two distinct layers of purple, stir about a tablespoon of blueberry puree in one, and the rest into the other. Add the açai powder to the yogurt with more blueberry.
  4. Stir in half a teaspoon or so of honey into each bowl, if desired.
  5. Layer the yogurt into popsicle moulds. If your yogurt is runny, it may be easier to freeze the yogurt in between layers
  6. Freeze for 4-6 hours

Coconut Chocolate Chunk Cookies (Clean)

I think I found my new favorite cookie recipe.

DSC_0811.

DSC_0742.

DSC_0747.

DSC_0750.

DSC_0753.

DSC_0794.

I pulled my first batch out of the oven and omg the chocolate was all melty and it looked so good. Seriously, this recipe is definitely not short of chocolate. I grabbed a cookie without letting it cool and gobbled it down. It was delicious. I did burn my fingers on the melted chocolate, but all was worth it. I knew this was a killer recipe. But then, after I had let the cookies cool for a bit, I went to grab another one and – would you believe it – this one was better than the first!! The chocolate doesn’t set very easily, as it’s been in such a high temperature, so the chocolate was still ooey and gooey, but the cookie itself had firmed up. The straight-out-of-the-oven cookie was still a little crumbly and had a very even texture throughout. The cookie I’d left to cool for about 10 minutes had a crispy exterior layer with a soft inside. I know it doesn’t sound like much, but it made it so much better.

Then? I had another cookie. Yeah, that’s like three cookies within 15 minutes. #noshame

DSC_0799.

DSC_0780.

DSC_0789.

The next morning, I added two cookies onto my papaya smoothie bowl, and yet again the cookies awed my taste buds. Either they had gotten better or I was just really hungry – and I had just eaten half a large papaya, so I’m pretty sure they’d gotten better. I couldn’t stop myself. I ate another two. That’s four cookies within 15 minutes. Are you starting to see a pattern?

DSC_0823.

The weird thing is, I’m not usually a fan of coconut in sweets. Macaroons? Bounty bars? Never liked them. Never even really liked coconut yogurt (then again, I only had that once). But undoubtedly, this cookie wouldn’t be the same if it weren’t for that coconut. It adds texture and flavor that is addicting and irresistible. Hence, why I’ve been eating about a dozen of these a day…

DSC_0920.

By the way, you might notice some darker chunks of chocolate in these photos that don’t seem to have melted. In case you were wondering, for my first batch, I mixed in some chunks of chocolate date fudge, just as an experiment. It was fine, but it didn’t really make the recipe any better or anything, so I omitted it in the second batch.

DSC_0783.

DSC_0822.

These photos do not do the cookies justice. You have to eat one to know how insanely and unexplainably delicious they are. Please make them now. They’re suuper easy to make too! One-bowl and you basically just dump all the ingredients together.

Coconut Chocolate Chunk Cookies

Adapted from Half Baked Harvest

Makes 20-30 cookies

Ingredients

  • 2 cups old fashioned oats
  • 2 cups white whole wheat flour
  • 1 1/4 cup coconut sugar
  • 1 teaspoon baking soda
  • 1 teaspoon salt
  • 1/2 cup melted coconut oil
  • 1/2 cup canola oil (or another 1/2 cup coconut oil)
  • 2 large eggs
  • 4 teaspoons vanilla extract
  • 2 tablespoons unsweetened coconut or almond milk
  • 2 cups dark chocolate chunks
  • 1 cup unsweetened shredded coconut*

*You can also use sweetened, depending on how sweet your chocolate is as well

Method

  1. Preheat oven to 175 degrees Celsius or 350 degrees Fahrenheit
  2. In a large bowl, stir together all the ingredients except for the chocolate chunks and shredded coconut until well combined
  3. Stir in the chocolate chunks and shredded coconut
  4. Clump together a tablespoon or two of the dough into a ball (if it’s a little too crumbly, add another tablespoon of oil) and place it onto a lined baking sheet
  5. Repeat with the rest of the dough
  6. Bake for 8-10 minutes, until set and golden

4-Ingredient Healthy Chocolate Chip Cookie Dough (Clean)

DSC_0421.

I’ve been making cookies a lot these days, and I’ll admit that I’ve been eating a lot of the raw cookie dough as well (*gasp* salmonella!), but hey – I’m not sick yet!

DSC_0409.

Anyways, you can stop making excuses for eating the raw cookie dough (“I’m making sure the cookies will taste good…”). Instead – you may as well just make an entire batch of safe-to-eat cookie dough. Wait, no…sorry, I meant an entire batch of safe-to-eat healthy cookie dough!

DSC_0412.

DSC_0422.

I swear, this healthy cookie dough is healthier than any baked-cookie dough you’ve ever had, but it tastes just as good. It has the same sweetness and flavor and texture and it’s studded with plenty of chocolate chips. Except, with this one, you don’t need to worry about raw eggs or raw flour or any other bad stuff.

DSC_0424.

All you need is to grab 3 ingredients, throw them all into a food processor, throw on some chocolate chips, grab a spoon, and dig in!

DSC_0423.

DSC_0426.

4-Ingredient Healthy Chocolate Chip Cookie Dough

Ingredients

  • 1 (400g) can white beans or garbanzo beans, drained and rinsed
  • 1/2 cup peanut butter, crunchy or smooth
  • 2 tbsp honey (can sub with any liquid sweetener of choice)
  • 1/2 cup dark chocolate chips
  • 1 tsp vanilla extract (optional)

Method

  1. In a food processor, process the beans, peanut butter, honey, and vanilla extract until fully combined and smooth
  2. Stir in the chocolate chips
  3. Eat! Store leftovers in an airtight container in the fridge.

Vegan Chocolate Truffles (Clean)

Last week, I posted a recipe here for these amazing silky chocolate truffles. God, that’s got to be one of my absolute favorite recipes. It’s not very healthy, but treating yourself to a little delicious melt-in-your-mouth chocolate truffle every now and then doesn’t hurt.

DSC_0721.

DSC_0724.

Nevertheless, it’s definitely not vegan, and wouldn’t it be great if there was a healthy version of those truffles…chocolate truffles so healthy that you could eat multiple at a time and not feel bad about yourself? Not that I ever feel guilty about overeating chocolate truffles, but y’know, for the people who do.

DSC_0722.

DSC_0725.

So now, I present to you…healthy, vegan, and naturally sweetened chocolate truffles!!! Ooh – and they come together using just 5 main ingredients.

DSC_0731.

DSC_0727.

These are actually very similar to the other chocolate truffle recipe. They melt in your mouth as long as you keep them at room temperature (they weren’t at room temperature when I took these photos, so if they don’t look super duper smooth and velvety in the photos – that’s why. Trust me, they were silky AF later on!)

DSC_0732.

DSC_0730.

Oh, and there’s a bonus element to this recipe. Thanks to the dates, you get this touch of caramel flavor next to the chocolate. Win!

DSC_0734.

DSC_0737.

Vegan Chocolate Truffles

Adapted from Harriet Emily

Makes 24 little truffles

Ingredients

  • 3/4 cup (165g) medjool dates (about 16 dates), pitted and roughly chopped
  • 3/4 cup (185ml) boiled water
  • 1/2 cup (90g) extra virgin coconut oil
  • 3/4 cup + 1 tablespoon (90g) raw cacao powder
  • 1 teaspoon powdered stevia (or 1/2 teaspoon liquid)
  • 1/2 teaspoon pure vanilla extract
  • Pinch of salt
  • Toppings of choice (e.g. cacao nibs, shredded coconut…) (optional)

Method

  1. Soak the pitted and chopped dates in the boiling water for 5-10 minutes to soften them
  2. Add both the dates and the water into your food processor, along with the coconut oil, and blend until smooth
  3. Add in the cacao powder, stevia, vanilla, and salt. Blend until smooth
  4. Transfer mixture into a container with a removable base, or a container lined with parchment paper/plastic wrap, smoothing it out
  5. Chill in fridge for at least 4 hours
  6. Remove from container, slice into squares, and serve. They taste best when served at room temperature

Chocolate and Walnut Breakfast Cookies (Clean)

I usually try to keep things from being repetitive on this blog, and by that, I mean I never post two muffin recipes without at least 4 other types of recipes in between. Yeah….that’s changed. It’ll probably be a one-time thing, but nonetheless, I’m guilty.

DSC_0129.

DSC_0130.

Two posts ago was the recipe for these AMAZING cranberry and dark chocolate oatmeal cookies. In that post, I told you guys that my new favorite go-to snack were cookies, and I still stand by that. I am literally eating one of these cookies as I type.

DSC_0141.

DSC_0123.

DSC_0120.

These cookies have the classic chewy texture of any other oatmeal cookie, with a slightly crispy exterior, especially when you re-heat them in the oven. When heated, they get so aromatic thanks to the walnuts, and the chocolate chunks melt and go all gooey and you will find yourself eating more cookies than you planned, but that’s okay, cause they’re pretty damn good for you.

DSC_0140.

DSC_0128.

Chocolate and Walnut Breakfast Cookies

Adapted from Half-Baked Harvest

Makes 25 cookies

Ingredients

  • 1 1/2 cups white whole wheat flour
  • 1 1/2 cups old-fashioned oats
  • 2 tablespoons ground flaxseed
  • 1 teaspoon baking soda
  • 1/4 teaspoon sea salt
  • 1/4 cup coconut oil
  • 2 tablespoons peanut butter or almond butter
  • 2 medium ripe bananas, mashed
  • 1 large egg
  • 3 tablespoons honey
  • 2 teaspoons vanilla extract
  • 1/2 cup dark chocolate chips or chunks
  • 1/2 cup chopped walnuts

Method

  1. Preheat oven to 175 degrees Celsius or 350 degrees Fahrenheit
  2. In a mixing bowl, whisk together the flour, oats, flaxseed, baking soda, and salt
  3. In a microwave safe bowl, microwave the coconut oil and peanut butter together for 30 seconds, then whisk to combine. Add in the mashed bananas, egg, honey, and vanilla extract and whisk until combined
  4. Add the wet ingredients into the dry and stir until the dough comes together. Fold in the dark chocolate and walnuts until well combined
  5. Scoop out a heaped tablespoon of the cookie dough and roll into a ball. Place onto a greased or lined baking sheet and flatten into your desired shape. They will not spread while baking. Repeat this for all of the dough
  6. Bake for 10-12 minutes

Cranberry and Dark Chocolate Oatmeal Cookies (Clean)

Healthy oatmeal cookies are my life right now! My old go-to snack were healthy muffins, but now, cookies have undoubtedly taken first place (sorry, muffins, I still love you).

DSC_0057.

DSC_0045.

Where do I start with these cookies?

They’re gluten-free, and aren’t insanely sweet like your average cookie, which means that you can eat two (or three!) without feeling sickly full. Nevertheless, they’ve definitely got that comforting oatmeal flavor, which pairs beautifully with the subtle, fruity flavor of cranberries and the undeniable richness of the dark chocolate chunks.

Gotta say – the dark chocolate chunks are probably my favorite part. Chocolate chunks in any recipe will be my favorite part.When it comes to chocoholics like me, it’s inevitable, and when I say chocoholic, I mean chocoholic. I can’t (okay, rarely) go a day without eating chocolate. I just indulged in a decent bunch of chocolate truffles, the ones with the crispy little pieces inside. They’re so good, and apparently each one is over 100kcal but that didn’t stop me from eating 5. You see where I’m going with this? If I ever decided to do a calorie-restricting diet (FYI: never happening), I’d insist that chocolate doesn’t count towards my daily calorie count. How could it? Chocolate is a joy in life that must not be denied.

DSC_0051.

But moving on from the chocolate, these cookies are seriously the perfect snack. They’re filling, and satisfy your sweet tooth. I actually like to stick them into my nana ice creams, mostly because aesthetics, but I’m always incorporating these cookies into my nana ice creams and it’s become an obsession. I can’t get enough. I’ve been luxuriating in nana ice cream with cookies and the weather’s still hanging around the negatives. See? I’ve been willing to sacrifice my scarce warmth for the sake of nana ice cream with these amazing oatmeal cookies. I hope you’re convinced – these cookies are the s**t.

DSC_0055.

Oh, and LEO WON AN OSCAARRR!

Fun fact: He’s a vegetarian

DSC_0047.

One last side note – be gentle when chopping up cranberries. They do not go down without a fight. As I was chopping them up, I had to gently squish them with the knife. If I dared to get aggressive, they would too, shooting out streaks of deep red juice, leaving every object within a 2-meter radius (including me) covered in red dots. Lesson learned: cranberries like to die a slow, gentle death.

DSC_0054.

(Update Mar 8. 2016:  I made another batch of those cranberry and dark chocolate oatmeal cookies three days ago, and now there’s only one left. They’re that good. That’s like, 5 cookies a day. I have no regrets.)

Cranberry and Dark Chocolate Oatmeal Cookies

Adapted from Amy’s Healthy Baking

Ingredients

  • 1 cup (100g) quick-cooking/instant oats (gluten-free, if necessary)
  • ¾ cup (90g) whole wheat or gluten-free flour
  • 1 ½ teaspoon baking powder
  • 1 teaspoon cinnamon
  • ¼ teaspoon salt
  • 2 tablespoons (28g) coconut oil, melted and cooled slightly
  • 1 large egg, room temperature
  • 1 teaspoon vanilla extract
  • ½ cup (120mL) maple syrup or honey
  • ½ cup (55g) cranberries, chopped*
  • 3 tablespoons (42g) chopped dark chocolate or chocolate chips
*You can also use frozen cranberries that have been thawed
Method
  1. In a medium bowl, whisk together the oats, flour, baking powder, cinnamon, and salt
  2. In a large bowl, whisk together the coconut oil, egg, vanilla extract, and maple syrup. Fold in the flour mixture until just combined, before folding in the cranberries and 2 tablespoons of the dark chocolate
  3. Chill the cookie dough in the fridge for at least 30 minutes. Preheat the oven to 325 degrees Fahrenheit or 160 degrees Celsius
  4. Place the cookie dough in 12-15 rounded scoops onto a baking sheet lined with parchment paper and flatten them into desired thickness and size. The cookies won’t spread much or change shape as they bake. Press on the remaining chocolate pieces on top and bake for 9-12 minutes
  5. Cool on baking sheet for 10 minutes before turning out onto a wire rack to cool completely. Store in an airtight container in the fridge for up to two weeks

Sugar-Free Chocolate Chip Quinoa Muffins (Clean)

School is starting up again, and as always, I’ve got a batch of muffins in my fridge to allow for easy school-snacking. A muffin (or two) a day keeps the school stress away.

DSC_0375.

DSC_0361.

So – why are these chocolate chip quinoa muffins so perfect as on-the-go snacks? Let’s talk quinoa.

Quinoa (pronounced keen-WAH) is a seed, though it’s often used as a grain. It’s gluten-free, with a tiny amount of fat, but more importantly, it’s a complete protein, making it an ideal protein source for all the vegetarians and vegans out there. A cup of quinoa gives you 222 calories, along with 8.1g protein and 58% of your RDA for magnese. It’s fibrous with a low glycemic index, keeping you full for a longer period of time, which is why I am oh-so-grateful for having these with me during school and getting me through the classes leading up to lunch.

DSC_0395.

DSC_0391.

DSC_0399.

Sugar-Free Chocolate Chip Quinoa Muffins

Ingredients

  • 2 cups (240g) cooled, cooked quinoa
  • 1 cup (120g) white whole wheat flour
  • 1 cup (130g) light rye flour (Or more white whole wheat)
  • 2 tablespoons powdered stevia
  • 1 1/2 teaspoons baking powder
  • 1 teaspoon salt
  • ¼ cup coconut oil, melted and cooled
  • ½ cup buttermilk
  • 1 large egg
  • ¼ cup plain Greek yoghurt
  • 1 teaspoon vanilla extract
  • ½ cup mini chocolate chips

*If you want a sweeter muffin, feel free to add in a bit of honey/coconut sugar and adjust to taste

Method

  1. Preheat oven to 175 degrees Celsius or 350 degrees Fahrenheit
  2. In a medium mixing bowl, whisk together quinoa, flours, stevia, baking powder, and salt
  3. In a separate mixing bowl, whisk together coconut oil, buttermilk, egg, greek yoghurt, and vanilla extract until smooth
  4. Pour the wet mixture into the smooth mixture and stir until just combined, before folding in the chocolate chips. Do not over mix
  5. Transfer the mixture into a lined muffin/cupcake tin and bake for approximately 25 minutes, until a toothpick inserted into the middle of one comes out clean. Allow to cool and enjoy!

Unbelievably Healthy Beetroot Chocolate Microwave Cake (Clean)

Every year, millions of people make new year’s resolutions in determination to live a healthier year, and every year, millions of people cry. Personally, as you may have noticed from my little new year’s rant, I’m rather indifferent to new year’s resolutions. Nonetheless, I’m here to help out those in distress; sugar-free, gluten-free, oil-free, and veganize-able beetroot chocolate microwave cake under 200 calories to the rescue!

Beetroot_Chocolate_Microwave_Cake-8

Beetroot_Chocolate_Microwave_Cake-2

Let’s start off with the nutritional breakdown of this golden nugget – each serving has 186 calories, 1g of saturated fat, and 2g of sugar! On the other hand, 8g of protein! *Does happy dance*

Beetroot_Chocolate_Microwave_Cake-3

Beetroot_Chocolate_Microwave_Cake-7

There was a point where I was absolutely obsessed with using beetroot puré. Hence, the beetroot nut butter chocolate cups and the beetroot vanilla rice pudding with dark chocolate and the pink beetroot crepes and the skinny fudgy-cakey beetroot brownie bits. All of which, by the way, would work in benefit for that new year’s resolution of yours. Just sayin’.

Beetroot_Chocolate_Microwave_Cake-5

Beetroot_Chocolate_Microwave_Cake-10

This chocolate microwave cake is honestly one of my all-time favorites. It’s a shame that I can’t make it everyday, as beetroot purée isn’t exactly a staple in my house. Hence, there was a point where I just got a good load of beetroot and boiled it up and puréed it and made a ton of recipes with it, which you can do as well! Plus, adding it to your smoothies and oatmeal turns it bright pink, which always brightens your day.

Beetroot_Chocolate_Microwave_Cake-6

This cake is so insanely soft and decadent and sweet and chocolately and it’s seriously what I’d eat everyday if I were in heaven. The beetroot purée keeps it ridiculously moist, and the egg white (can be substituted for vegans) keeps it fluffy and prevents it from getting too dense or spongey the way some microwave cakes get. Also, you gotta love the fact that this is sweetened with stevia only, which is a naturally sweet plant that I love using in baking. This recipe calls for 3 teaspoons of the powdered version, but you may need to change this around if you’re using pure stevia (you’ll need like, 1/10th of a teaspoon in that case – that stuff is strong!) or liquid stevia.

Beetroot_Chocolate_Microwave_Cake-4

Beetroot_Chocolate_Microwave_Cake-1

The smooth, rich, glossy layer of melted chocolate that sits atop the cake is optional, obviously, but come on. Just look at that chocolate! I’d very very highly recommend throwing a sizable square of chocolate on top of the mixture just before you microwave it, because that just turned the cake into a gooey chocolate mess, and nobody can deny the fact that gooey chocolate messes taste better than single-textured chocolate cake, no matter how moist and fluffy and decadent.

Beetroot_Chocolate_Microwave_Cake-9

Beetroot Chocolate Microwave Cake

Makes 2 cakes

Ingredients

  • 1/4 cup beetroot purée*
  • 1/3 cup milk of choice
  • 1 egg white or 2 tbsp aquafaba (the water from a can of chickpeas)
  • 1/2 teaspoon pure vanilla extract
  • 3/4 cup oat flour
  • 2 tablespoons raw cacao powder
  • 3 teaspoons powdered stevia (adjust to taste)
  • 1 teaspoon baking powder
  • Pinch of salt
  • Large square of dark chocolate (optional, but highly recommended)
  • Powdered sugar (optional)

*To make the beetroot purée, stick the beetroots (unpeeled) in a big pot of boiling water until they’re soft, peel them, and purée them in a food processor. Use leftovers for any of these recipes calling for beetroot purée.

Method

  1. In a small bowl, use a fork or whisk to combine the beetroot purée, milk of choice, egg white/aquafaba, and vanilla extract until fully combined.
  2. Add in the oat flour, cacao powder, stevia, baking powder, and salt, and mix until just combined. Do not over-mix.
  3. Transfer mixture into two greased ramekins or mugs. Place the dark chocolate on top of the mixture if desired.
  4. Microwave the ramekins/mugs on high for 2-3 minutes (depending on the wattage of your microwave and how gooey/cooked you want your cake to be). Dust with powdered sugar and serve immediately.


Nutrition Facts
Servings 2.0
Amount Per Serving
calories 186 
% Daily Value *
Total Fat 3 g 5 %
Saturated Fat 1 g 5 %
Monounsaturated Fat 0 g
Polyunsaturated Fat 0 g
Trans Fat 0 g
Cholesterol 0 mg 0 %
Sodium 91 mg 4 %
Potassium 266 mg 8 %
Total Carbohydrate 30 g 10 %
Dietary Fiber 6 g 23 %
Sugars 2 g
Protein 8 g 16 %
Vitamin A  2 %
Vitamin C  3 %
Calcium  10 %
Iron  14 %
* The Percent Daily Values are based on a 2,000 calorie diet, so your values may change depending on your calorie needs. The values here may not be 100% accurate because the recipes have not been professionally evaluated nor have they been evaluated by the U.S. FDA.

Peanut Butter Granola (Clean)

It’s my first post of 2016! And I’ve decided to post….peanut butter granola.

DSC_0046.

DSC_0055.

Okay, I know, it doesn’t sound like the most fancy and impressive thing, but sometimes it’s important to enjoy simple things…like peanut butter granola, which as a matter of fact, is absolutely delicious and awesome. If you follow my Instagram you may notice that it’s in practically every recent photo of nana ice cream or smoothie bowls.

DSC_0056.

DSC_0062.

Now, homemade granola is something that I’ve been making for forever and it’s a staple in my pantry, but I get it if it seems a little intimidating at first. Just trust me on this one. Homemade granola’s are the best. They’re cheaper than store-bought granola, not to mention way healthier and crazily customizable. You could make pineapple-almond-cinnamon-nutmeg-matcha granola at home if you wanted, but you wouldn’t see that on a grocery store shelf! Speaking of customizable granola, you can check out all my other granola recipes here, which include mocha chocolate granola, cinnamon banana nut granola, oat-less granola, 7-ingredient granola chunks, and honey almond “quinola”.

DSC_0038.DSC_0052.

Peanut Butter Granola

Adapted from Whole and Heavenly Kitchen

Ingredients

  • 3 1/2 cups old-fashioned oats
  • 1 cup peanuts
  • 1 cup unsweetened shredded coconut
  • 2 tablespoons chia seeds
  • 2 tablespoons flax seeds
  • 1/4 cup unrefined coconut sugar
  • 1 teaspoon ground cinnamon
  • 1/2 teaspoon salt
  • 1/2 cup coconut oil
  • 1/2 cup creamy peanut butter
  • 1/2 cup maple syrup
  • 1 egg white, lightly beaten until foamy
  • 1 teaspoon vanilla extract

Method

  1. Preheat oven to 150 degrees Celsius or 300 degrees Fahrenheit
  2. In a mixing bowl, stir together the oats, peanuts, shredded coconut, chia seeds, flax seeds, coconut sugar, cinnamon, and salt
  3. In a medium saucepan, heat the coconut oil and peanut butter and stir until melted and smooth. Remove from heat and add in the maple syrup, egg white, and vanilla extract
  4. Pour the liquid mixture into the dry mixture and stir until combined
  5. Spread the mixture in an even layer on a baking sheet lined with parchment paper and bake for 25-30 minutes*. Allow to cool completely before breaking into clusters. Store in an airtight container at room temperature.

*Baking time may vary. I’ve made granola many times and sometimes they’ll take longer than others, so use 25-30 as a general guide to when your granola should be done, but trust your instincts and use common sense as well 🙂

White Chocolate Dipped Cherries (Clean/Cheat)

Here it is: the last post of 2015.

DSC_0706.

DSC_0675.

DSC_0686.

DSC_0688.

I know I should probably be all like “The year flew by so quickly!” and all, but truthfully, it hasn’t. I’m not saying it wasn’t a good year, but man, it sure has been one unique and memorable year. In 2015, I’ve truly accomplished things that I never thought that I would – or could. Granted, there were plenty of low moments, but those bad moments are essential for balance.

DSC_0694.

DSC_0704.

As I sit here typing in the comfort of my house with my little pup fast asleep beside me, I’m realizing that damn, it really has been quite a year. The two main things that come to mind when I think Greatest Accomplishments 2015 is a grade that I got at the end of grade 10, and the fact that two of my recipes have been featured on Buzzfeed. In that sense, it’s been a lame year, especially in comparison to the fact that the workload and stress is piling up with the IB and that my brother’s gone for college, but that’s that.

Enough about last year, let’s talk next year.

DSC_0693.

DSC_0701.

I can’t help but continue to think about an artificial, man-made idea that has collared humankind and taken control of: Time. We created time, yet it burdens us. It’s stresses us and presses us to no end. New Year’s is one of the few times when we truly celebrate time. We celebrate a “new year” when in reality, January 1 00:01 is no different from December 31 11:59, yet everyone strongly insists that it’s a new year and things can and will be better when any changes will be completely dependent on the individual as opposed to time. Time is a weird thing, and I could sit here and just be all philosophical about time for hours, but moving on to the part that you actually came here for: CHERRIES!

DSC_0701.

DSC_0699.

I’m sure all of you guys will be having some sort of New Year’s celebration, whether it be a party with a hundred people or just a fancy dinner with your family. Either way, chocolate-dipped fruit should be a go-to when it comes to light bites. You can leave these around as you chat and appreciate 2015, or serve them for dessert alongside some fancy vanilla pots de creme or something (which would actually be such a fancy and aesthetically pleasing dessert with minimal effort).

Furthermore, these white chocolate dipped cherries look gorgeous and they’re so easy to make. If you’re out of cherries, any fruit will do! Well, maybe not like durian or avocado, but you know, blueberries, strawberries, banana… whatever you have.

White Chocolate Dipped Cherries

Makes 20-30 cherries

Ingredients

  • Approx. 100g high quality white chocolate
  • Approx. 20-30 cherries with stems, rinsed and dried
  • Toppings: Edible glitter, sprinkles, sugar pearls etc. (optional)

Method

  1. Line a plate or tray with baking paper and place in fridge*
  2. In a bowl, melt the white chocolate in a double boiler (or a bowl over a pan of simmering water) or in the microwave at 30-second intervals, stirring at each interval until fully melted
  3. Remove plate/tray from fridge
  4. Dip the cherries one by one into the white chocolate, and roll in toppings of choice or sprinkle toppings on the chocolate before it sets and place onto the plate/tray to set
  5. Repeat step 4 with the rest of the cherries
  6. Serve!

*If you’re using high quality white chocolate and you melt it gently enough, you won’t need to place anything in the fridge as the white chocolate should set at room temperature

3-Ingredient Avocado Banana Chocolate Mousse (Clean)

Who says healthy chocolate mousse can’t be festive?

DSC_0024.

Alright, fine, “avocado banana chocolate mousse” doesn’t exactly scream Christmas, but hey, the red background is quite festive, no?

DSC_0021

Either way, this is a recipe that I make on almost a weekly basis. Granted, I don’t always make it look all pretty in a coffee cup, but still. It literally takes like 2 minutes to throw together (which is less time than the average smoothie because you don’t actually have to rinse anything…).

DSC_0018.

DSC_0025.

This is the perfect kind of breakfast you’d want to have in preparation for perhaps a huge-ass Christmas brunch or dinner or both. For one – it’s light and sweet without making you feel loaded and without giving you major energy crashes. Also – it’s vegan and sugar-free and raw and gluten-free and will fit pretty much every other dietary restriction you have.

DSC_0069.

The idea of eating blended avocado purée may seem horrifying to some, but I guarantee that you can’t taste it whatsoever. The flavor of chocolate and the light sweetness of the banana mask the taste of avocado, while still retaining its creaminess and superfood powers – win-win!

DSC_0037.

*You can get a 10% discount off of ALL products at Creative Nature Superfoods (no minimum!) with the discount code CHIAC10

Avocado Banana Chocolate Mousse

Makes 1 serving

Ingredients

  • 2 overripe bananas
  • 1/2 avocado
  • 3 tbsp Creative Nature Superfoods raw cacao powder*
  • Pinch of powdered stevia or maple syrup (to taste) (optional)
  • 1/2 tsp pure vanilla extract (optional)
  • Toppings (banana, raspberries, cacao nibs, shredded coconut etc.) (optional)

Method

  1. Throw everything in a blender and blend until smooth
  2. Serve with toppings of choice

Chocolate Chia Mousse (Clean) + Creative Nature Superfoods Discount Code!

This post is sponsored by Creative Nature Superfoods. All opinions expressed here are my own.

DSC_0002.

DSC_0082.

I have a new favorite favorite way to eat chia seeds, and I’ve also found a new favorite chia seed and cacao nib brand! Creative Nature Superfoods.

DSC_0009.

This company generously sent me some samples to try out their products. I was ecstatic and super excited to try out their cacao powder and chia seeds, but when the package arrived, I saw that they’d given me a few of their colorfully-packaged superfood bars as well – which seriously made my day. So far, I’ve tried ‘Tropical Treat’ and ‘Sublime Seed’ (saving the chocolate one for last, of course…), and they’re both incredibly delicious.

DSC_0005.

Their superfood bars are cold-pressed bars that are great, healthy on-the-go snacks. They’re made purely out of natural ingredients, with no added sugars, syrups, sweeteners or other unhealthy additives. They’re also free from gluten, dairy, wheat, soya, nuts, and GMO. Overall, these bars are absolutely perfect.

DSC_0003.

As for the chia seeds, well, chia seeds are naturally nutrient powerhouses. Low in calories, but full of protein, fibre, and other essential nutrients that keep you feeling full for a sustained period of time. Honestly one of the best superfoods ever!

DSC_0005.

DSC_0004.

I used both their chia seeds and cacao powder in this recipe.

If you want to recreate this recipe with the same ingredients as I did, ensuring that your tastes just as delicious as mine, you can buy your ingredients at www.creativenaturesuperfoods.co.uk and get 10% off with the discount code CHIAC10.

Affiliate image 2 Chia Cathy

Anyways, continuing with the recipe.

DSC_0051. DSC_0054.

This isn’t just your average chia pudding. There are tons of chia pudding recipes. Don’t get me wrong, those are delicious, but this one is a chia mousse. I love chia pudding now, but when I had my first one, I couldn’t finish it. Not because of the flavor, but because of the texture. It just felt weird, but now, I’ve gotten used to it and I love chia pudding.

DSC_0055. DSC_0059.

This recipe starts off as any old chia pudding recipe, but the trick is to blend it.

DSC_0045.

Chia seeds generally form a liquid-y gel around them, so when you blend the whole thing up for long enough, it becomes this beautifully smooth and perfectly thick mousse, which I found to be super decadent. It’s a million times healthier than a regular chocolate mousse, yet tastes just as delicious!

DSC_0067. DSC_0074.  DSC_0088.

What are you waiting for? Head over to Creative Nature Superfoods and grab some cacao powder and chia seeds, getting 10% off your orders with the discount code CHIAC10!

Notes: You will probably need to adjust the liquid content (water/coconut milk) of the mousse. This is partially due to different thickness of coconut milk and how much liquid your chia seeds absorb, and also so that you can have a mousse of your desired thickness.

Chocolate Chia Mousse

Makes 1 serving

Ingredients

  • 2 tablespoons chia seeds
  • 1 tablespoon cacao powder
  • 6 tablespoons coconut milk lite
  • 1 tablespoon honey or agave syrup
  • Water (start with 2 tbsp, but add more as needed)
  • Toppings (I used flourless chocolate fudge avocado brownies (recipe coming soon!), unsweetened shredded coconut, and cacao nibs)

Method

  1. In a small bowl/jar, stir together the chia seeds and cacao powder. Add in the coconut milk, honey/agave, and water, and stir until combined
  2. Cover with plastic wrap (if using a bowl) and place in fridge for at least 30 minutes (or overnight), until it thickens and the chia seeds have absorbed all the liquid
  3. Place in blender and blend until smooth, adding water as needed
  4. Transfer into bowl or cup and top with flourless chocolate fudge avocado brownies (recipe coming soon!), unsweetened shredded coconut, and cacao nibs

Creamy White Coffee Hazelnut Oatmeal (Clean)

As the days grow short and nights grow long

As the wind blows ice and not summer breeze

As the lakes crystalizes over and force the ducks to flee (where do ducks go?)

I have one recipe that will overcome your winter blues.

One single recipe that will warm you from the inside out.

Oatmeal.

DSC_0594 copy

DSC_0568.

DSC_0559.

Oatmeal so creamy, it begins to take on a thick texture that makes you want to shovel spoonfuls of the steaming hot stuff in your mouth. Full of soft, textured oats and paired with the luscious flavors of white coffee and hazelnut, with a hint of sweetness from a bit of mashed banana. To top it off, with the aromatic white coffee scents, you won’t be able to resist eating the oatmeal straight from the saucepan while it’s still bubbling away, reducing the liquids until they’re thick and creamy . It’s the most comforting thing in the world.

DSC_0569.DSC_0570.

You know how hot chocolate is super comforting when it’s cold out? Yeah, this recipe does the same. I swear, if you make this once – just once – you’ll start craving oatmeal instead of hot chocolate when the coldest days start rolling in.

DSC_0555.

And for those in the Southern Hemisphere – try it! This is an oatmeal recipe that I have year-round. Sure, I make this more often in the winter time, but trust me, this recipe is good enough to be made in the summer as well.

DSC_0574.

Well? What are you waiting for? Go and seek comfort in food!

1.pic_hd

2.pic_hd

DSC_0589.

Notes: This recipe can easily be doubled/tripled/quadrupled

Creamy White Coffee Hazelnut Oatmeal

Makes 1 serving

Ingredients

  • 1 cup milk of choice
  • 1/2 cup old-fashioned oats
  • 2-3 tablespoon white coffee hazelnut powder (to taste, *see bottom of post)
  • 1/2 teaspoon salt
  • 1 ripe banana
  • Raspberries, hazelnuts, and cacao nibs (optional, for topping)

Method

  1. In a medium saucepan, heat the milk and oats over high heat, until the milk begins to boil, then turn the heat down to medium
  2. Stir in the white coffee hazelnut powder and salt
  3. While the oats continue to cook, mash up half the banana, saving the rest of it for topping
  4. Stir the mashed banana into the oats and continue cooking until the oatmeal has thickened to your desired consistency, approx. 5 min
  5. Transfer into bowl (or just eat out of the saucepan) and top with desired toppings. Serve immediately.

*If you want to experiment with other coffee powders, feel free to do so, but this is what I mean by white coffee hazelnut powder:

DSC_0529.

Whole Wheat Double Chocolate Muffins (Clean)

DSC_0808.

Considering the fact that healthy muffins and brownies are a staple in my house, it’s quite abnormal that I haven’t posted a muffin recipe in a while.

To make up for the lack of muffin posts, I’ll give you one of my favorites.

DSC_0815.


DSC_0805.

Now, I have a few chocolate muffin recipes, but this is one that I favor in particular. They’re chocolatey, super fluffy, light, and perfectly sweet.

DSC_0810.

While making these, I was baking two recipes at a time – the other being blueberry bagels. I pulled these muffins out of the oven and planned on letting them cool before going back to the bagels. But they looked so incredibly fluffy, I couldn’t resist, so I ate one of the mini muffins.

It was a bite of fluffy, yet moist, chocolate-y goodness studded with gooey pockets of melted chocolate chips. H-e-a-v-e-n.

Naturally, I had another one.

Then it was back to bagels.

Then my mom came in and eyed the muffins, asking if I had taken photos yet. I told her I hadn’t, but let her have one anyways. She took one and happily left the kitchen.

About five minutes later, she came back and asked if I had taken photos yet. Again, I said no. She told me to hurry up and take them, because she wanted another one, and wanted me to share some with my grandparents. So I took my photos, ate another mini one (as seen in the second to last pic), and then gave my mom, grandpa, and grandma a full muffin each. They loved them.

Mission Fluffiest Chocolate Muffins: Success.

DSC_0809.


I love them chilled, straight out of the fridge, or steaming hot.

When I grab one straight from the fridge, the chocolate chips are slightly cold and aren’t soft, which provides great contrast compared to the softness of the muffin. The chocolate chips are colder, too, and you get that satisfying bite as if you were eating a bar of chocolate.

Whereas, if you choose to microwave a muffin for half a minute or so, the muffin begins to steam and seems like it’s just been taken out of the oven. The chocolate chips melt and get all gooey while the muffin itself becomes more tender and moist, resulting in a big, pillow-y, melty-chocolate-y bite.

Whichever one floats your boat. I love them equally.

DSC_0819.

DSC_0803.

Whole Wheat Double Chocolate Muffins

Adapted from Whole and Heavenly Kitchen

Makes 12 standard + 6 mini muffins (or 15 standard muffins)

Ingredients

  • 1/2 cup coconut oil, melted
  • 2 large eggs
  • 1/4 cup unsweetened yoghurt
  • 1 medium ripe banana, mashed (approx. 1/2 cup)
  • 3/4 cup buttermilk
  • 2 teaspoons pure vanilla extract
  • 2 cups white whole wheat flour
  • 3/4 cup unrefined coconut sugar
  • 1/2 cup raw cacao powder
  • 3 teaspoons baking powder
  • 1/2 teaspoon salt
  • 1 cup dark chocolate chips

Method

  1. Preheat oven to 200 degrees Celsius or 400 degrees Fahrenheit
  2. In a medium bowl, whisk together the oil, eggs, yogurt, mashed banana, buttermilk, and vanilla until smooth
  3. In a separate bowl, whisk together flour, coconut sugar, cacao powder, baking powder, and salt until combined.
  4. Fold the dry mixture into the liquid mixture until just combined. Do not over mix. Fold in chocolate chips.
  5. Transfer the mixture into a greased or lined muffin tin until almost full and bake for 5 minutes before reducing heat to 190 degrees Celsius or 375 degrees Fahrenheit, and bake for 15 more minutes, until a toothpick comes out clean
  6. Allow to cool in muffin tin for 5 minutes before transferring to a wire rack to cool completely
  7. Serve. Store in an airtight container at room temperature or in fridge, and reheat in microwave if desired

Chocolate Oreo Ice Cream Cups (v) (Clean)

As the summer days turn to fall, I do have one last ice cream recipe to share with you.

DSC_0392.DSC_0405.

Unlike the 3-ingredient no-churn cookies and cream ice cream, or the no-churn biscoff cookie butter ice cream, this one’s guilt-free, healthy, and nutritious.

Sure there’s still the black forest nice cream and the chocolate-covered mint avocado banana ie cream squares that you could indulge in without guilt, but neither of those have oreos, now, do they?

DSC_0385.

Disregarding the oreos, this recipe is pretty good for you. As for the oreos, there’s plenty of recipes for homemade healthy oreos out there, so you could use those if you want. If not, (and only if you’re reaaalllyyyy picky), then you could omit the oreos, but come on. It’s one oreo per ice cream cup, and it really makes it so much better, so just accept oreos, alright?

Moving on.

DSC_0404.DSC_0393.DSC_0401.

The base of these ice cream cups is the classic date-and-nut crust with a bit of cacao for the bonus flavor and antioxidants. The crust is soft and chewy thanks to the dates, but the nuts bring in an opposing, firm-to-the-bite texture. Throw in some cacao powder and you’ve got yourself a winning, healthy-as-f— crust.

The filling is made from coconut milk and raw chocolate. The mixture is combined and cooked at a low temperature, thus preserving all the nutrients in both ingredients.

DSC_0401..

 Chocolate Oreo Ice Cream Cups

Makes 12 ice cream cups

Ingredients

Crust

  • 2 cups soft dates, pitted (approx. 300g prior to pitting)
  • 1/2 cup almonds
  • 1/2 cup cashews
  • 1/3 cup raw cacao powder
  • 1 teaspoon vanilla extract
  • Pinch of salt

Filling

  • 1 can full-fat coconut milk (approx. 400ml or 2 cups)
  • Pinch of salt
  • 100g raw chocolate
  • 12 whole oreo cookies

Method

  1. Place the ingredients for the crust (dates, almond, cashews, cacao powder, vanilla extract, and salt) in a food processor and process until well combined. If you have a weaker food processor, process the dates until smooth before adding the other ingredients
  2. Press the mixture into silicon/flexible mini cake tins or into the bottom of a cupcake pan lined with cupcake liners. Set aside.
  3. For the filling, in a medium saucepan, heat the coconut milk until just boiling.
  4. Remove the coconut milk from heat, and add in the salt and raw chocolate, broken up into small pieces. Stir until smooth.
  5. Place a full oreo in the center of each crust
  6. Pour the coconut chocolate mixture over each oreo until the oreo is fully covered
  7. Freeze for 6 hours/overnight, until firm. Store in freezer.

Healthy 5-Minute Vegan, Gluten-Free, Oil-Free Chocolate Microwave Mug Cake (Clean)

When life throws stress at you, eat chocolate. Chocolate cake. microwave chocolate cake that’s oil-free, gluten-free, and vegan-izeable. Thrown together in just 5 minutes. Eaten straight out of your favorite mug while it’s still steaming hot.

Oh, and I haven’t even gotten to the best part…

It’s healthy, too?!?

DSC_0612.DSC_0609.

DSC_0620.

DSC_0640.

When you’re doing all your stressin’ out, this cake ain’t gonna add any stress. Hell yeaaah.

Just so you guys know, this is a recipe from my free ebook, “Health-ified Chocolate“. In other words, if you take 5 seconds to download it, you’ll get your hands on a whole collection of recipes featuring guilt-free, nutritious chocolate recipes for all situations, whether you need comfort in times of stress, or celebration in times of success.

DSC_0642.

Let me explain why this recipe’s so good for you. The type of flour that I chose to use in this mug cake is buckwheat flour. Why? Find out in my ebook. Jk. I’ll tell you:

Buckwheat flour is a great alternative for regular, refined, all-purpose white flour. It is gluten-free, so it can be used in place of wheat flour for those who are gluten intolerant or prefer to eat a gluten-free diet. In addition, it’s a great source of protein for vegetarians, containing a range of 11-14 grams of protein per 100g. They’re great for digestion, and reduce plasma cholesterol, body fat, and cholesterol gallstones. They’re high in B-complex vitamins, especially riboflavin (vitamin B2) and niacin (vitamin B3).

Yup.

DSC_0610.DSC_0630.

The rest of the ingredients are nutritious, too. Raw cacao powder is full of antioxidants. Coconut sugar, although still a sugar, doesn’t cause the infamous ‘sugar spike’ as regular cane sugar does. Unsweetened applesauce is basically just fruit that replaces any oil. Etcetera.

DSC_0643.

DSC_0618.

Healthy 5-Minute Vegan, Gluten-Free, Oil-Free Chocolate Microwave Mug Cake

From my free ebook, Health-ified Chocolate

Makes 1 serving

Ingredients

4 tablespoons buckwheat flour

2 tablespoons raw cacao powder

2 tablespoons coconut sugar

1/2 teaspoon baking powder

1 small egg (or flax/chia egg)

2 tablespoons unsweetened applesauce

1 tablespoon soy milk (or milk of choice)

Method

  1. In a medium microwavable mug, mix together the buckwheat flour, raw cacao powder, coconut sugar, and baking powder
  2. In a separate small bowl, whisk the egg, applesauce, and milk together
  3. Pour the egg mixture into the mug and stir until fully combined
  4. Microwave on high for 90 seconds
  5. Serve hot with desired toppings (e.g. nana ice cream, berries, and cacao nibs)

Best Ever Healthy Chocolate Chip Cookies (Clean)

~ These one-bowl, best ever healthy chocolate chip cookies are utterly perfect. You’ll never believe that they’re healthy! Gluten-free, flourless, no white sugar, no butter. ~

DSC_0463.

DSC_0454.

DSC_0464.

I didn’t think that chocolate chip cookies could be so healthy and so delicious at the same time. These cookies gave me so much reassurance that you can have a baked good taste amazing even with the absence of white flour, white/brown sugar, and butter. In addition to that, they’re ridiculously easy to make. You just need one bowl, and you don’t even need an electric mixer of any sort!

DSC_0458.

I keep track of all my recipes on Stickies, and under each one, I usually write a little comment. Sometimes it’ll be ‘sub stevia?’ or ‘too sweet/too dry – but worth adapting’ etc. For this recipe – and I kid you not – I simply wrote, ‘utterly perfect’. I intend to make these cookies countless more times in the years to come and I do not intend to change a single component of the recipe. DSC_0459.

DSC_0464

Best Ever Healthy Chocolate Chip Cookies

Adapted from Chelsea’s Messy Apron

Makes 10 cookies

Ingredients

  • 1 large egg
  • 2 teaspoons vanilla extract
  • 4 tablespoons coconut sugar
  • 1/2 cup coconut oil, melted and cooled
  • 1 and 1/2 cups oat flour*
  • 1 teaspoon baking soda
  • 1/2 teaspoon cinnamon
  • Pinch of salt
  • 1/2 cup dark chocolate chips

*To make oat flour at home, simply process rolled/old fashioned or quick oats in a food processor until the consistency resembles flour

Method

  1. In a medium mixing bowl, stir together the vanilla extract, egg, coconut sugar, and coconut oil until combined
  2. Stir in the oat flour, baking soda, cinnamon, and salt until just combined
  3. Fold in the dark chocolate chips
  4. Cover the dough with plastic wrap or a clean tea towel and place in the fridge for at least an hour
  5. Preheat oven to 175 degrees Celsius or 350 degrees Fahrenheit
  6. Using a cookie or ice cream scooper, scoop out balls of the chilled dough and press them together (otherwise the cookies will come out too crumbly), before placing them onto a lined baking sheet. Make sure that the cookie dough hasn’t warmed up too much, and if they have, then place them back in the fridge for 10 minutes before baking
  7. Bake for 8-10 minutes, or until the cookies are beginning to brown around the edges
  8. Remove from oven and allow to cool on the baking sheet, or transfer them onto a wire rack after 5 minutes to cool fully. They taste amazing fresh out of the oven, but they won’t hold their shape very well.
  9. Enjoy. Keep the cookies stored in an airtight container in the refrigerator. If you want a warm cookie, you can microwave a cookie for 10 seconds before eating. I quite liked the cookies chilled, but that’s up to you.

Black Forest Baked Oatmeal (Clean)

~ Black forest baked oatmeal. A healthy, dessert-like breakfast oatmeal, with cocoa, cherries, and cream. ~

Black_Forest_Baked_Oatmeal-6Black_Forest_Baked_Oatmeal-1

Black forest is one of my ultimate favorite flavor combinations. Thus far, I’ve posted three black forest recipes. There’s black forest pancakes, black forest cupcakes, and black forest nice cream. All of the black forest recipes have been healthy ones, and this one is no exception.

Black_Forest_Baked_Oatmeal-2

Although they are both forms of “oatmeal”, baked oatmeal and regularly cooked oatmeal have quite different textures. Cooked oatmeal is generally creamy, while baked oatmeal has a cake-like texture. I usually prefer regular oatmeal on weekdays, as they’re much quicker, but every other weekend or so, I’ll treat myself to baked oatmeal.

Black_Forest_Baked_Oatmeal-3

Black_Forest_Baked_Oatmeal-4 Black_Forest_Baked_Oatmeal-5 Black_Forest_Baked_Oatmeal-7

Black Forest Baked Oatmeal

Makes 1 serving

Ingredient

  • 1/2 cup old-fashioned oats
  • 1/4 tsp baking powder
  • 1 tbsp cacao powder
  • 1/2 tsp espresso powder/instant coffee granules
  • Pinch of salt
  • 1/4 tsp vanilla extract
  • 2 tbsp maple syrup/honey, or 1 tsp powdered stevia
  • 1/4 cup sweet, dark cherries, pitted and chopped (about 4 cherries)
  • 1/4 cup milk of choice
  • Whipped cream/whipped coconut cream, to top
  • Cherries, to top

Method

  1. Preheat oven to 175 degrees Celsius, or 350 degrees Fahrenheit
  2. In a small bowl*, stir together the oats, baking powder, cacao powder, espresso/coffee powder, and salt
  3. Stir in the vanilla extract, sweetener, and chopped cherries
  4. Stir in the 1/4 cup of milk
  5. Transfer the mixture into a greased ramekin or ovenproof dish and bake for 16-18 minutes, until the top is baked
  6. Remove from oven and top with cream and cherries

Easiest 3-ingredient Avocado Pasta Sauce (Clean)

I have a problem.

2014-12-07 06.23.02.

I love pasta. I love it to death. It’s got to be one of my favorite staples, next to bread and maybe rice too.

That’s not the problem, though. The problem is that pasta doesn’t taste good plain. When I was younger, I did eat spaghetti and pasta without sauce, but thankfully, my taste buds have evolved.

IMG_0921.IMG_0926.

2014-12-07 06.27.24.

So here’s the thing. Pasta itself is easy enough to cook. You boil some water and throw in a few handfuls of pasta and a pinch of salt, then you wait for the pasta to cook. Sauces are the difficult part, because they require so many ingredients.

2014-12-07 06.27.44.

IMG_0924.

IMG_0925.

And that’s where this recipe comes in. It only requires 3 ingredients and a blender. Did I mention that it tastes pretty amazing as well? It’ll take you under 5 minutes to whip up this pasta sauce and it’ll save you from the terror of eating un-sauced pasta.

2014-12-07 06.24.38.

Notes: Feel free to use any other seasoning to taste, or to use less lemon juice/garlic if you don’t like the taste of them

Easiest 3-ingredient Avocado Pasta Sauce

Makes 2 servings

Ingredients:

  • 1 avocado
  • 1 tbsp freshly squeezed lemon juice
  • 1 clove garlic, minced
  • Salt/pepper, to taste

Method:

  1. Throw everything in a blender and blend until smooth
  2. Serve with your favorite pasta!

Chocolate-Covered Mint Avocado Banana Ice Cream Squares (Clean)

~ These healthy, gluten-free, vegan chocolate-covered mint ice cream squares are super easy to make and perfect for cooling down or just to have as a low-calorie treat. ~

2014-12-17 04.24.16.

I’m sharing another recipe from my free ebook! They’re chocolate-covered mint avocado banana ice cream squares, and they are so good (and healthy)! Absolutely perfect for the summer heat.

2014-12-17 04.31.12.

2014-12-17 04.24.57.

I don’t know about you, but everywhere I’ve been this summer has been super hot. I’ve already shared a recipe for this quick and easy no-churn biscoff cookie butter ice cream, but that’s different from this recipe. That’s an ice cream recipe, and it’s not vegan or healthy or snack-shaped anything. This one? This one is.

2014-12-17 04.26.18.

2014-12-17 04.28.14.

2014-12-17 04.22.36.

It’s made up of a regular date base with dates and almonds and a bit of cacao powder, but the filling is the really amazing part. You guys all probably know about nice cream now – frozen bananas puréed into a soft-serve ice cream. In this recipe, I added a bit of coconut oil so that when it freezes, it resembles regular ice cream more than soft-serve.

2014-12-17 04.26.11.

Oh, and you know how I love watching chocolate set over nice cream? Yeah, this is 10x better. With the layer of chocolate at the perfect thickness, the chocolate satisfyingly breaks when you bite into it, and you’ll basically think that you’re biting into mint chocolate chip ice cream bar – but without any of the guilt.

2014-12-17 04.22.26.

Not only does are these guilt-free, but they’re nutritious, especially thanks to the super healthy fruit – avocado! Bananas are great, too, but avocados, man. I love them. You can’t taste them in this recipe, which is good for people who don’t like the taste of avocado (???). Either way, at first glance, avocados appear to be a fruit disguised as a vegetable that should be avoided at all cost. It is true that these green fruits are high in calories, but this is only because they are made up of fats – healthy fats. They’re also prized for their high nutrition value and their wonderful textures. Avocados have more potassium than bananas, and are loaded with fiber. In fact, a serving of 100g contains 14% of the recommended daily allowance, as well as 26% of the recommended daily allowance for Vitamin K. Also, avocados stand apart from other fruits because unlike most fruits, avocados are incredibly low in sugar, with only approximately 0.4g of sugar per whole avocado.

Interesting? I have one of these little about-the-ingredient paragraphs with every single one of my recipes in my free ebook, so go download it!

2014-12-17 04.21.16.

2014-12-17 04.31.02.

Chocolate-Covered Mint Avocado Banana Ice Cream Squares

(From Health-ified Chocolate)

Makes 15 squares

Ingredients

Chocolate Almond Base

  • 1 cup medjool dates, pitted
  • 1 cup raw almonds
  • 2 tbsp raw cacao powder
  • 0-2 tsp water, as needed

Ice Cream Filling

  • 1 avocado, peeled and pitted
  • 3 tbsp coconut oil, melted
  • 4 tbsp maple syrup
  • 2 medium, ripe bananas
  • 1/2 tsp vanilla extract
  • 5-10 drops peppermint extract, depending on how strong you want the mint flavor to be
  • Pinch of salt

Chocolate Glaze

  • 3 tbsp raw cacao powder
  • 3 tbsp coconut oil, melted
  • 2 tbsp maple syrup

Method

  1. For the chocolate almond base, add all the ingredients into a food processor and process until the mixture sticks together, adding water as needed
  2. Press mixture into a 8x8inch or 20x20cm baking pan lined with parchment paper
  3. For the ice cream filling, add all ingredients into a food processor and process until the mixture and blend until smooth
  4. Spread an even layer of the ice cream filling over the base and freeze while making the chocolate glaze
  5.  Mix all the ingredients for the chocolate glaze together until smooth
  6. Pour the chocolate glaze over the ice cream layer
  7. Freeze the squares for at least 5 hours, until firm
  8. After freezing, allow the squares to thaw at room temperature for about 20 minutes, before cutting into squares using a hot knife
  9. Serve. Keep leftovers stored in the freezer


Easy Cinnamon Banana Nut Granola (Clean)

I haven’t posted anything in the last week. I know. I’ve been in Singapore. I had an insanely awesome time there. We had three upgrades. We got a seat upgrade in the plane, an upgrade at Four Seasons, and most importantly, we got randomly upgraded from some 700SGD hotel room at Marina Bay Sands to a freaking 6000SGD suite that David Beckham stayed in. The suite has a gym, massage room, karaoke room, an insane view, and even a grand piano?!?! It was insane.

DSC_0041.DSC_0026.

Anyways, I’m home now, and it’s back to baking.

DSC_0032.

As you might already know, granola is very important to me. It’s always a pantry essential to have at home. I’ve stopped buying granola ever since I discovered how incredibly easy it is to make homemade granola. You throw in a bunch of ingredients into two bowls that you don’t really have to measure too precisely, add the wet stuff to the dry, mix, and then you spread the whole lot on a baking sheet and bake it. It’s too simple, really.

DSC_0028.

DSC_0040.

Another good thing about granola is that it lasts forever – even the homemade stuff. It’s perfect to store at home for an easy, healthy snack paired with fresh fruit, or for when you come home from vacation and your fridge is empty but for a couple of apples.

DSC_0035.

DSC_0037.

DSC_0045.

Easy Cinnamon Banana Nut Granola

Ingredients

  • 2 cups old fashioned oats
  • 1 cup walnuts or pecans, chopped
  • 1 1/2 tsp ground cinnamon
  • 1/4 tsp ground nutmeg
  • 1/4 tsp salt
  • 1/4 cup coconut oil, melted
  • 1/4 cup raw honey or agave syrup
  • 1 small banana, mashed
  • 1 tsp vanilla extract

Method

  1. Preheat oven to 170 degrees Celsius or 340 degrees Fahrenheit
  2. In a large mixing bowl, mix together the oats, walnuts/pecans, cinnamon, nutmeg, and salt
  3. In a medium mixing bowl, mix the melted coconut oil, honey, mashed banana, and vanilla extract
  4. Add the banana mixture into the oat mixture and mix until fully combined
  5. Spread the mixture evenly on a lined baking sheet and bake for 20-25 minutes, until browned (and until your kitchen smells like cinnamon). Remove from oven and allow to cool fully before breaking into chunks. Store in an airtight container.

Black Forest Nice Cream (Clean)

Nice cream, or “Nana ice cream”. It’s one of the best discoveries of healthy-food history. I’m sure that pretty much everyone has heard of it by now, one way or another. 1 ingredient ice cream? Who could miss a headline like that?

DSC_0360.

This is my current favorite flavor, which can’t really be much of a surprise, since I’ve been going crazy with black forest recipes lately (cough black forest pancakes and cupcakes and more to come)

DSC_0365.

DSC_0378..

DSC_0370.

DSC_0378.


Black Forest Nice Cream

Ingredients

  • 2 bananas, chopped and frozen for at least 4 hours, or overnight
  • 5 frozen, pitted cherries
  • 2 tsp cacao powder
  • Toppings (optional. E.g. cacao nibs, shredded coconut)

Method

  1. Place the bananas into a food processor, and process until the mixture is creamy and resembles soft-serve ice cream
  2. Transfer half the mixture into a bowl, and place in the freezer
  3. Add the cherries to the food processor, and process with the other half of the nice cream until combined
  4. Transfer the cherry nice cream into a bowl, and place in the freezer
  5. Take the original, unflavored nice cream from the freezer and place back into the food processor. Add the cacao powder and process until combined
  6. (Optional, freeze until it reaches your desired consistency. Depending on your food processor, the nice cream might be too soft and melty for you)
  7. Swirl the two flavors together in a bowl and serve with your favorite toppings

Sugar-free Chocolate Chip Chickpea Blondies (Clean)

Holy moly, these are amazing. The best part? They’re 100% sweetened with dates. I’ve always doubted date-sweetened recipes. I’ve never been the biggest fan of dates. While everyone else was raving on about dates being the most delicious snack, I sat back and enjoyed my bananas and almonds. Anyways, if you take a closer look at the ingredients, you’ll notice that this recipe is gluten-free and vegan as well. Win!

Chocolate_Chip_Blondies

(C’mon, you can’t go wrong with this cookie dough look-alike!)

Chocolate_Chip_Blondies.jpg_3Chocolate_Chip_Blondies.jpg_4Chocolate_Chip_Blondies.jpg_13

By the way, this recipe is absolutely PERFECT if you want to try making my two-ingredient vegan meringues. Both recipes require a can of chickpeas. However, to make this recipe, you’ll need the chickpeas. For the meringues, you’ll need the water from the can (don’t believe me? Go see for yourself!). So yeah, no waste. Win! (Again!)

Vegan_MeringuesVegan_Meringues_2Vegan_Meringues_3Vegan_Meringues_6Chocolate_Chip_Blondies.jpg_10Chocolate_Chip_Blondies.jpg_12

If you’re wondering what I did with the meringue mixture here, I simply didn’t bake the meringue batter. In my meringue recipe, I stated to bake the meringue. However, in this case, if you want to eat the meringue and blondies together, then just don’t bake the mixture (there’s no egg whites, so it’s safe!) and pipe the mixture onto the blondies. It’s kinda like a marshmallow fluff and it’s so yummy!

Chocolate_Chip_Blondies.jpg_5Chocolate_Chip_Blondies.jpg_6

I swear, this recipe couldn’t get much more perfect. They don’t look like they’re insanely delicious, but they are. My mom didn’t eat any on the day that I made them. The next day, she had one, and she couldn’t stop eating them (same with me). They’re incredibly addicting and super snack-able.

Chocolate_Chip_Blondies.jpg_8 Chocolate_Chip_Blondies.jpg_7Chocolate_Chip_Blondies.jpg_11

Caramel Chocolate Chip Chickpea Blondies

Adapted from Nadia’s Healthy Kitchen

Makes 15 blondies

Ingredients:

  • 1 can (400g) chickpeas, drained (SAVE THE WATER IN THE CAN!)
  • 1 cup (165g) medjool dates (or other dates, soaked in boiling water for 10 minutes and drained)
  • 1/4 (4 tbsp) cup coconut oil
  • 1 tsp vanilla extract
  • 1/2 (55g) cup oat flour
  • 1 tsp baking powder
  • 1/4 tsp salt
  • 1/3 cup (55g) chocolate chips
  • Vegan meringue (you can pipe this onto the blondies instead of baking them, so it acts as marshmallow fluff as opposed to baked meringues)

Method:

  1. Preheat oven to 180 degrees Celsius or 350 degrees Fahrenheit
  2. In a food processor, process the chickpeas, dates, coconut oil, and vanilla extract
  3. Add in the oat flour, baking powder, and salt, and pulse to combine until the dough resembles a cookie dough
  4. Transfer the mixture into a bowl and stir in the chocolate chips
  5. Press the mixture into a lined or greased baking pan (approx. 8 inches)
  6. Bake for 20-25 minutes
  7. Allow to cool, and pipe on your marshmallow fluff!

Black Bean Chocolate Lava Cake (Clean) + Free Cookbook!

BREAKING NEWS, YOU GUYS!

I wrote a cookbook.

What? I know, I barely did any pre-publishing advertising, but anyways, you can download it for free here!

DSC_0791.

I shouldn’t be blogging right now. I should be doing homework because I just got back home late from my MYP Celebration. I’m sorta done with the MYP (bring it on, IB), which means that I’ve done the Personal Project.

Anyways there’s this thing called the Personal Project, where students must identify something that they’re passionate about, and they’ll plan, research, and then create a product in the area. Obviously, I did mine on clean eating and baking. Therefore, I created a cookbook consisting of healthy chocolate-based recipes, as well as information on what it means to be “healthy”. Maybe you already know about how I began this journey if you’ve read my About Me page, but I’ve always loved to bake, and I’ve got to dedicate a lot of it to SORTED Food. However, most baked goods are full of sugar and butter and whatnot, which sucked, until I discovered that it’s possible to eat clean and bake delicious goods at the same time. That’s what inspired me to make my cookbook. Healthy chocolate? Could it be? Absolutely.

DSC_0792.DSC_0821.

DSC_0823.

I have acknowledgements at the end of my cookbook, but I’d like to give a special shoutout to my InstaFriends who I “interviewed” about why they ate the way they did. Ning, Chelsea, Hillary, Marie, and Sarah, I love you guys and thanks so much for your help x ❤

IMG_4052.DSC_0833.IMG_4047.

Sorry for all the writing, I’m just really excited about this. Here’s a preview to my cookbook. I decided to share the recipe that’s on the cover of my cookbook. It’s a chocolate lava cake! Healthified? No way! (Yes way!) It’s made with black beans, which are preettyy healthy. There is dark chocolate required in the recipe, but the sugars don’t have such a negative effect on the human body (read about it in my cookbook).

I was so delighted to discover that I got that gooey, melty, chocolate center surrounded by such a soft, flavorful cake. I promise that you can’t taste the black beans.

IMG_4051.

Once again, please please please go download my cookbook. It’s free for all and I’d really appreciate if you guys could just go look through it and maybe it could inspire you guys. I love you all x

Notes: 

Black Bean Chocolate Lava Cake

Taken from my free cookbook, Health-ified Chocolate

Makes 4 lava cakes

Ingredients

  • 1 15oz can of black beans, rinsed and drained
  • 1/4 cup honey
  • 1/4 cup unsweetened applesauce
  • 1 tsp apple cider vinegar
  • 1 egg
  • 1 tsp vanilla extract
  • 1/2 tsp sea salt
  • 1/3 cup cacao powder
  • 1/4 cup almond meal, or ground almonds
  • 1 tbsp dry stevia
  • 1 tsp baking powder
  • 25g dark chocolate, broken into 4 pieces

Method

  1. Preheat the oven to 350 degrees Fahrenheit
  2. In a food processor, process the black beans until very smooth
  3. Add in the honey, applesauce, apple cider vinegar, egg, vanilla extract, and sea salt, and pulse to combine
  4. Transfer the mixture into a medium bowl
  5. Fold in the cacao powder, almond meal, stevia, and baking powder
  6. Grease 4 ramekins or lava cake moulds
  7. Place a few tablespoons of the mixture into each ramekin/mould, and place one piece of chocolate in the center of each one. You should use about half the mixture for this step
  8. Use the remaining mixture to fill the ramekins/moulds and shake gently so that the mixture spreads out evenly
  9. Bake for 25 minutes, and allow them to cool for 10 minutes before removing them from the ramekins/moulds
  10. Serve warm

Honey Almond Quinola (Clean)

DSC_0085.

Oh the relief of Spring Break.

DSC_0093.

It’s timed perfectly this year. Beijing’s at that point where it’s generally 10-20 degrees, except this period will last less than a week. Spring and Autumn are practically non-existent in Beijing, which is hella depressing, especially since they’re my favorite seasons.

DSC_0083.

Naturally, I decided to make a batch of granola. This time, I used uncooked quinoa as well as oats. I’ll admit, I was pretty skeptical about it at first, but it turns out that it adds a different texture. It’s hard to explain, but you’ll understand once you’ve tried it. I’m calling it quinola. I’m so creative.

DSC_0091. DSC_0094.

Throw on some vanilla soy milk ❤ (Pour on the Goodness!)

DSC_0095.

Notes: Granola is one of the most customizable recipes ever, so you could use pecans instead of almonds, you could omit the spices and chia seeds, etc.

Honey Almond Quinola

Adapted from Pastry Affair

Makes 5-6 cups

Ingredients:

  • 2 cups (180 grams) old-fashioned oats
  • 1 cup (170 grams) quinoa, uncooked
  • 1 cup (120 grams) sliced almonds
  • 1 tbsp chia seeds
  • 2 tsp cinnamon
  • 1/4 tsp nutmeg
  • 1/3 cup (78 ml) coconut oil, melted
  • 1/2 cup (170 grams) honey
  • 1 tsp vanilla extract
  • 1/2 tsp salt
  • 1 egg white, whisked lightly until foamy (optional)

Method:

  1. Preheat oven to 170 degrees Celsius, or 325 degrees fahrenheit
  2. In a large bowl, mix the oats, quinoa, almonds, chia seeds, cinnamon, and nutmeg
  3. In another bowl, mix the coconut oil, honey, vanilla, salt, and egg white
  4. Stir the wet ingredients into the dry ingredients until everything is well mixed
  5. Spread the mixture onto a lined baking sheet and bake for 20-25 minutes
  6. Store in an airtight container

Vegan Cherry-Coconut Cream Tarts For Two (Clean)

So…here’s how to make small-batch cherry-coconut cream tarts for two.

Or, um, one.

I’M SORRY NOBODY ELSE WAS HOME AND I COULDN’T HELP IT. DSC_0618.

These little guys are so easy to make, and you really just need five ingredients.

Five.

Essentially, you could go with four.

Four.

For this amazing little tart! Plus, they’re no-bake.

DSC_0622.

Are you excited yet? I’m excited.

DSC_0629.

Essentially, you could pair any fruit with the coconut in these tarts. I chose cherries because I think the flavor pairs well, and maybe because I have 5 kilos of cherries at home right now…

DSC_0634.

DSC_0639.

^It took me 3 minutes to finish the first tart. I kid you not. I checked the time stamps on my photos.

Notes: Feel free to use any fruit you want, and to add more/less sweetener to taste. Also, if you don’t have almonds on hand, you could use pecans or walnuts. Lastly, for the coconut milk/cream thing, if you don’t have coconut cream, simply refrigerate a can of full-fat coconut milk overnight and scoop out the thick, white part that separates from the watery part. Use the thick, white part as coconut cream.

Cherry-Coconut Cream Tarts For Two

Makes 2 small tarts

Ingredients:

  • 10 medjool dates, pitted (approx. 1/3 cup or 75 grams, unpitted)
  • 1/4 cup (50g) almonds
  • 1 can coconut cream (approx. 300ml), or 1 can coconut milk (approx. 500ml, see notes)
  • 5 cherries, pitted and roughly chopped (plus more for topping)
  • 1 tbsp honey or 1 tsp powdered stevia (more/less, to taste)

Method:

  1. Process the dates and almonds in a food processor until they are thoroughly mixed and there are no large chunks
  2. Line two small cupcake/tart tins with parchment paper
  3. Divide the date/almond mixture and press into the the cupcake/tart tin to act as a base
  4. In a medium-sized mixing bowl, whip the coconut cream with the honey/stevia using a hand or stand mixer for about 3 minutes
  5. Add in the chopped cherries and whip for another minute
  6. Spoon the coconut mixture into the tarts and garnish with cherries and grated chocolate
  7. Refrigerate for 20 minutes (optional. If your coconut filling is thick, then skip this step)
  8. Serve

Sugar-Free Blueberry Pecan Oatmeal Muffins (Clean)

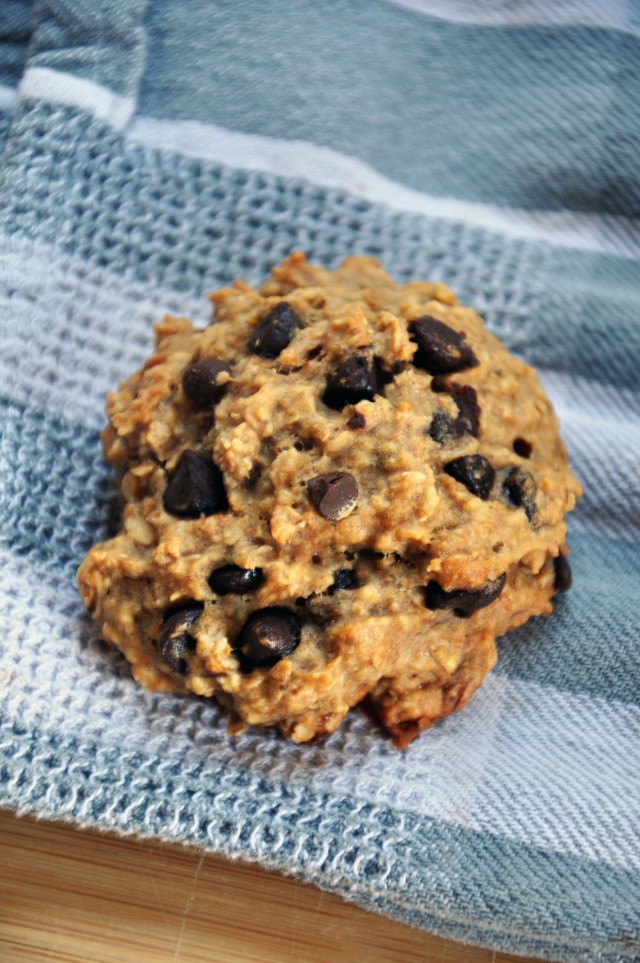
I feel like these muffins are going to become a staple in my house. They’re just so snackable and yummy.

DSC_0685.DSC_0669.

You won’t understand how addicting they are until you make them. I was so surprised at how sweet and flavorful they tasted. There’s hardly any added sugar. No refined sugar, no coconut sugar, no agave syrup, no honey, no maple syrup, nada. There is a tablespoon of powdered stevia, but still.

DSC_0671.

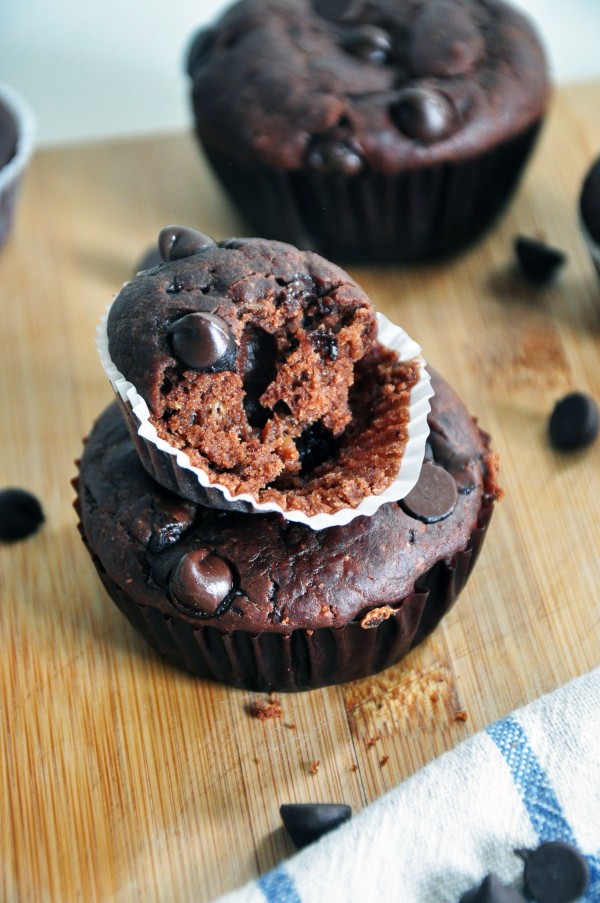
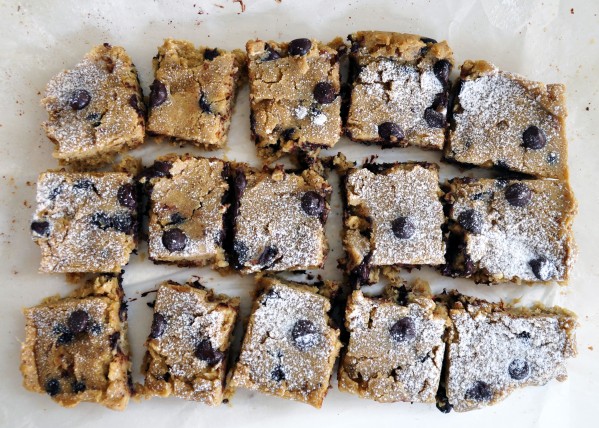
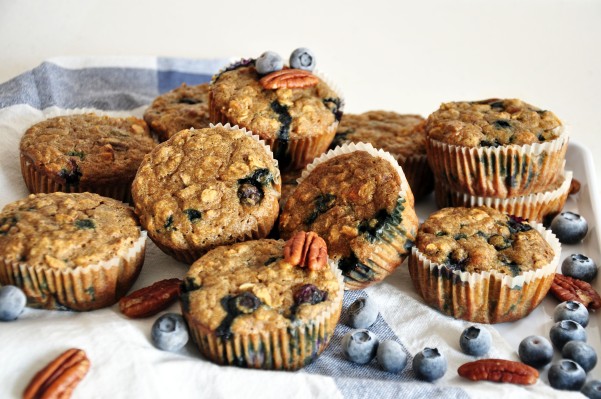
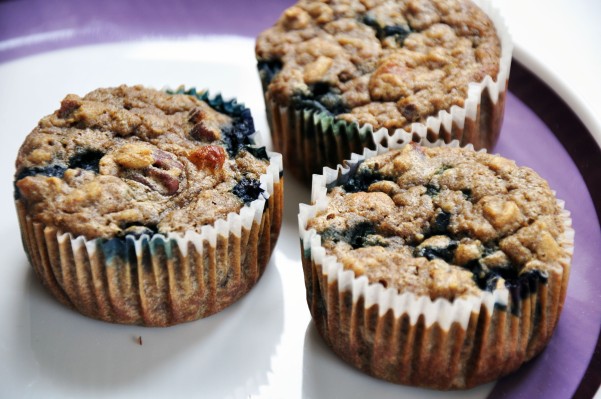
They’re really flavorful too. There’s plenty of plump blueberries in each muffin, which pairs beautifully with oats and buttery pecans. JUST TRUST ME ON THIS ONE.

DSC_0672.DSC_0673.

Before I give you guys the recipe (technically you already have it, if you just scroll down, but shh), I just wanted to talk about something I saw on Youtube the other day.

Generally, I don’t talk about anything except for food in my posts, but I felt like this is important and something that we all have to keep in mind. I watched Why Our Hearts Ache by Carrie Hope Fletcher yesterday, and I just can’t stop thinking about it. Carrie explained that the amount of heartache you feel reflects how much you cared about whatever it is that caused the heartache. (You guys should still go watch the video, because it sounds so much nicer and makes more sense coming from her…I think. Plus, she’s perfect and kind and inspiring and gorgeous and wonderful and I love her.)

Sometimes you put a lot of work into something, and when it doesn’t come out right, whether its a relationship or a project or something, you won’t really care too much. Other times, you’ll feel like your world has collapsed and it’ll take you days or months or even years to get over. Those are the times where you realize how much you truly cared about whatever it is that you did.

It makes perfect sense, and I couldn’t agree more. I’m slightly surprised that I hadn’t come to the same conclusion, but it just makes so much sense.

And on a more personal note, the video made me realize what I really care about, and I found that to be fascinating. For example, some days, I’ll be in the kitchen and I’ll put all my effort into creating amazing food. When they don’t turn out right, I do get really really upset. I’ve gotten used to kitchen experiments not working out, but when I spend hours baking with tons of effort, and not ending up with a good product, I’ll essentially feel heartache. Not in the lovey-dovey way, but I will truly feel disappointed.

Then again, there is that lovey-dovey stuff.

Take this example.

A guy liked you two years ago, and you treated him badly without thinking twice, but then, he was all you wanted, and it was too late. You spend the next two years missing him and wishing that you were closer, though you get all anxious and nervous and jittery around him and when he’s around you can’t focus on anything and you practically forget how to speak and be yourself. You want the best for him, and you’d do anything to make him happy. He’s the only one who can make you smile just by saying your name in that special way, or just by giving you that look. Sometimes you’ll talk for hours and you’ll never want to stop. Then, in the middle of math class, your friend tells you that he’s moving at the end of the year, and you nearly break down crying in the middle of class. The rest of your high school life seems to crash and you can’t bear with the thought of him leaving. You wish that he told you earlier, and that he’d told you himself. On the bus ride home, you cry, and on your walk home, you cry. At night, you can’t fall asleep because you’re so filled with grief, so you click open your phone and you say, “hi”. He says, “hii. I’m sorry for not telling you >.<” and endless waves of tears stream down your cheeks as you type back, “It’s okay”, even though its not. And then you tuck your phone away and curl up under the covers and you cry and you cry and you cry your f***ing eyes out.

And that’s when you know how much you cared.

DSC_0676.

Oh. I didn’t expect for all of that to end up being typed up. What the hell, though. Maybe it’ll help you guys get through difficulties in life and maybe you can relate. When things go bad and you feel like everything is breaking down, at least you’ll know how much you cared and to know how much you could possibly care for something or someone.

DSC_0677. DSC_0679. DSC_0680.

BACK TO THE MUFFINS.

DSC_0690.

They’re delicious. Full stop.

DSC_0699.

Blueberry Pecan Oatmeal Muffins

Adapted from Sugar Free Mom

Makes 14-15 muffins

Ingredients:

  • 1 cup old-fashioned oats
  • 1 cup buckwheat flour
  • 1 tsp ground cinnamon
  • 1/2 tsp sea salt
  • 1 tsp baking powder
  • 1 tsp baking soda
  • 1 tbsp powdered stevia
  • 2 eggs
  • 1 cup unsweetened applesauce
  • 1/4 cup coconut oil, melted
  • 3/4 cup milk of choice
  • 1 tsp pure vanilla extract
  • 1 cup blueberries, frozen or fresh (I used fresh)
  • 1/2 cup pecans, chopped roughly

Method:

  1. Preheat oven to 175 degrees Celsius or 350 degrees Fahrenheit
  2. In a medium mixing bowl, stir together the oats, buckwheat flour, ground cinnamon, sea salt, baking powder, baking soda, and powdered stevia
  3. Stir in the eggs, applesauce, coconut oil, milk, and vanilla extract until just combined
  4. Fold in the blueberries and pecans
  5. Pour the batter into a lined cupcake/muffin tin, filling them about 2/3 to 3/4 of the way, and bake for 25-30 minutes, until a toothpick inserted into a muffin comes out clean
  6. Serve!