Vegan Peanut Butter Blossoms (Clean)

dsc_0001

dsc_0018

Christmas is only 4 days away! These past few days have been fully dedicated to Christmas prep, and I mean purely Christmas prep. Yesterday, I spent the entire morning putting up Christmas window stickers with my mom, spent the afternoon shopping for more gifts, and spent the night wrapping gifts. I’ve probably spent at least 5 hours wrapping gifts in the past few days, but it’s all worth it. Not to brag or anything, but those gifts are looking pretty damn good. I’d show you now, but I think I’ll save that for a separate Christmas post where I can show off how festive my house is at the moment.

dsc_0038

dsc_0011

Pop quiz: Why did I choose to make peanut butter blossoms?

dsc_1095

Answer: Because Hershey’s kisses were on buy-one-get-one-free and I didn’t know what to do with all of them ^_^ (If anyone has suggestions, I’d be happy to hear them!)

dsc_1114

dsc_1123

dsc_0014

Let’s focus on these peanut butter blossoms. I do realise that the cookie-to-chocolate proportion is a little off, but hey – more chocolate is never a bad thing, right?

dsc_0012

dsc_0049

These cookies are so easy to make and are perfect for sharing during Christmas! You could even wake up half an hour early on Christmas Eve to bake these cookies – they’re that quick! You just throw together a bunch of ingredients, bake them for just under 10 minutes, stick a Hershey’s kiss on top of each one and voila! Cookies!

dsc_0029

What I love about these is the perfect pairing of both textures and flavours. The cookie has the wonderful texture of a crunchy cookie, while the chocolate just melts in your mouth. In terms of flavour – peanut butter and chocolate is a classic flavour combo, and all classics exist for a reason – because they pair so damn well together!

dsc_1118

This may perhaps be my last post before Christmas, so I wish you all a Merry Christmas and I hope that you get to spend time with your loved ones, receive lots of gifts, and eat delicious food. I know I will 😉

dsc_0005

dsc_0024

Vegan Peanut Butter Blossoms

Adapted from Amy’s Healthy Baking

Ingredients

  • 1 cup (120g) white whole wheat flour
  • 3/4 teaspoon baking powder
  • 1/2 teaspoon salt
  • 1 large egg white, room temperature or 3 tbsp aquafaba
  • 1 tablespoon (15mL) almond milk
  • 1 teaspoon pure vanilla extract
  • 1/4 cup (64g) natural peanut butter
  • 1/2 cup (96g) coconut sugar
  • 15-20 dark chocolate kisses

Method

  1. Preheat oven to 175 degrees Celsius or 350 degrees Fahrenheit
  2. In a small bowl, whisk together the flour, baking powder, and salt
  3. In a medium bowl, whisk together the aquafaba/egg white, almond milk, and vanilla extract
  4. Stir in the peanut butter until fully combined
  5. Stir in the coconut sugar
  6. Stir in the flour mixture (you may want to use your hands for this part) until a dough forms
  7. Roll the dough into 15-20 spheres and place onto a baking sheet lined with a parchment paper or a silicone baking sheet. Flatten each sphere until it’s larger than the base of the chocolate kisses
  8. Bake for 8-10 minutes. While the cookies bake, unwrap the chocolate kisses
  9. As soon as the cookies come out of the oven, press a chocolate kiss into the centre of each one*
  10. Allow the cookies to cool and the chocolate kiss to set before serving. Serve at room temperature

*If you don’t want the kisses to soften and have a truffle-like consistency at room temperature, place the cookies into the freezer immediately to prevent the kisses from warming up

Chocolate Cupcakes with Pink Buttercream and Chocolate Cupcake-Toppers (Cheat)

Happy birthday, Mommy!! ❤

dsc_0854jpg

dsc_0669

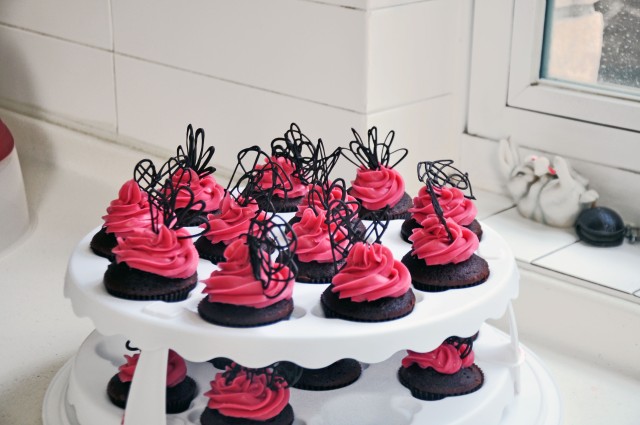
I made these cupcakes a couple of days ago for a bake sale, but the main reason I made cupcakes was so that I could reserve three of them for today – my mom’s birthday. I don’t like making small-batch cupcakes because making a batch of 24 cupcakes requires the same effort as making 3. (Hence, why I always make cupcakes for bake sales).

dsc_0632 dsc_0651

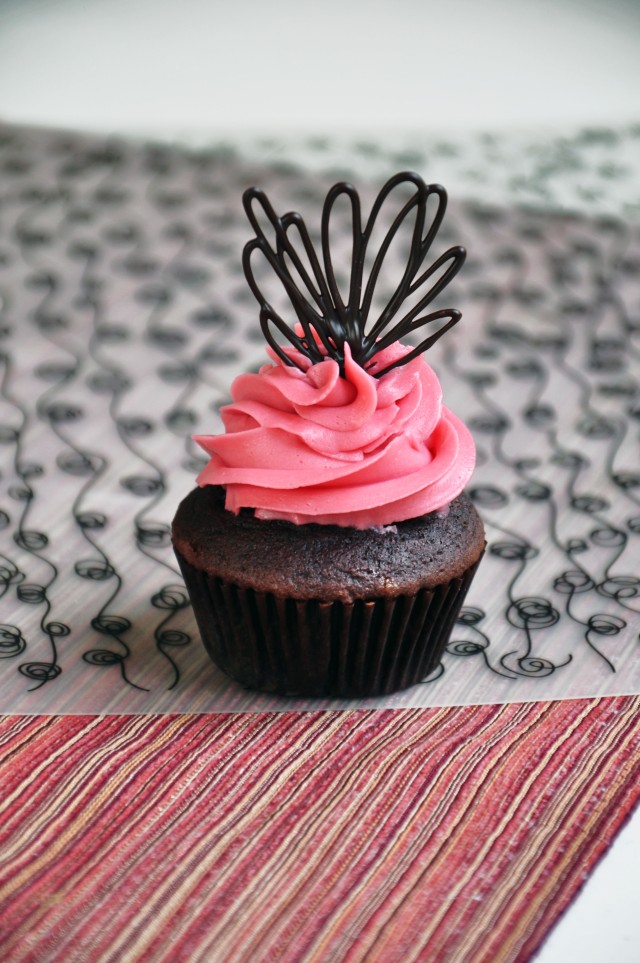
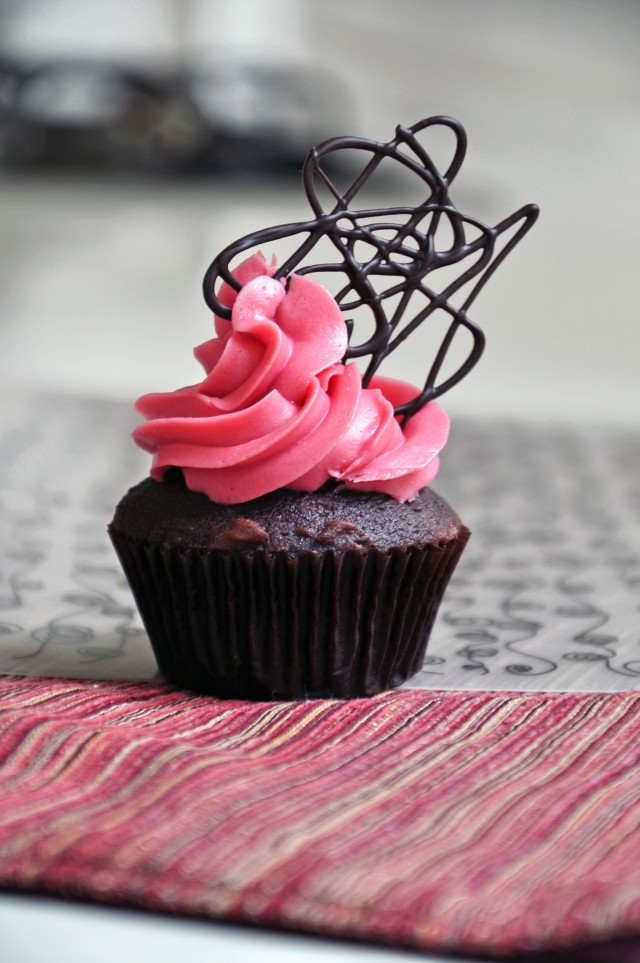
This is the first time that I’ve used chocolate cupcake toppers, but it definitely won’t be the last. They’re deceivingly easy to make, and they look gorgeous! They take the cupcakes to a whole new level, while only requiring an extra 5 minutes.

dsc_0737

I forgot to take photos while I was making the chocolate toppers, but basically, you just melt down some dark chocolate and pipe it out on parchment paper. If you’ve melted the chocolate gently, they should harden at room temperature and peel off easily, giving you these beaautiful cupcake toppers!

dsc_0660

dsc_0706

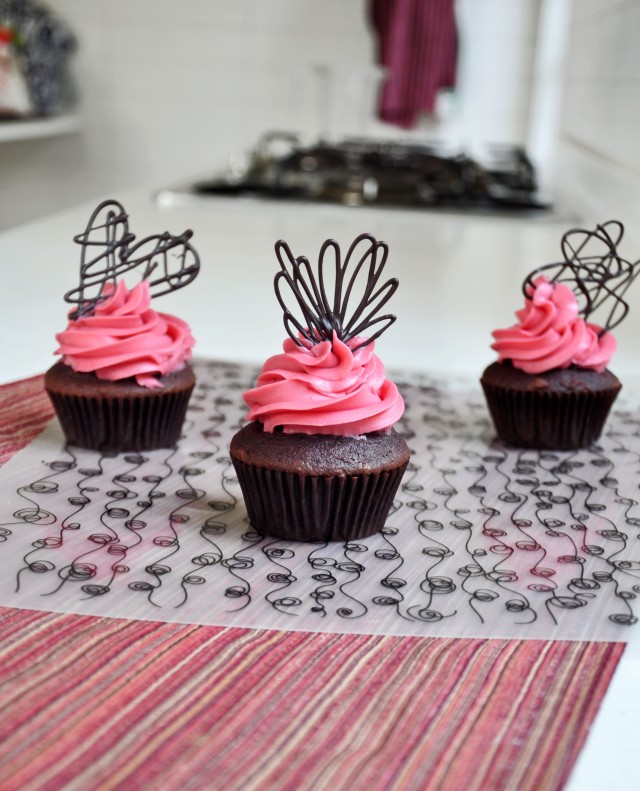
There are so many things that you can pipe out using the chocolate. I stuck to some simple shapes. I used stars, hearts, flowers, the little thingy in the photo below, and random squiggles. Next time, I’d definitely try words and maybe I’ll challenge myself to piping out a puppy or something. We’ll see~

dsc_0746

dsc_0699

dsc_0727

With the frosting, feel free to choose any color you wish! I like the way that the pink contrasts with the darkness of the chocolate, but I’m sure that blue would be gorgeous as well.

dsc_0716

dsc_0741

Chocolate Cupcakes with Pink Buttercream and Chocolate Cupcake-Toppers

Makes 24 cupcakes

Ingredients

For the cupcakes:

  • 200g all-purpose flour
  • 40g cocoa powder
  • 280g granulated sugar
  • 3 teaspoons baking powder
  • 1 teaspoon salt
  • 80g unsalted butter, cubed and room temperature
  • 240ml  milk, room temperature
  • 2 eggs, room temperature
  • 1 teaspoon pure vanilla extract

For the frosting:

  • 300g unsalted butter
  • *400g-600g powdered sugar, sifted
  • 15ml (1 tablespoon) whipping cream
  • 1 teaspoon pure vanilla extract
  • Gel food colouring of choice

For the chocolate cupcake-toppers:

  • 100g dark chocolate

*To taste

Method

  1. For the cupcakes, preheat oven to 170 degrees Celsius or 325 degrees Fahrenheit
  2. In a large mixing bowl or in the bowl of a stand mixer with the paddle attachment, combine the flour, cocoa, sugar, baking powder, and salt
  3. Add in the butter and beat until the mixture has a sandy consistency
  4. In a separate bowl, whisk together the milk, eggs, and vanilla until combined
  5. Pour half the milk mixture in with the flour and beat on high speed until smooth
  6. Gently mix in the rest of the milk mixture until jut combined. Do not over mix
  7. Transfer the mixture into a lined cupcake tin and bake for 20-23 minutes, until a toothpick inserted into the centre comes out clean
  8. For the frosting, in a mixing bowl or in the bowl of a stand mixer, beat the butter until light and fluffy
  9. Beat in the powdered sugar for 5 minutes or so, before adding the whipping cream and vanilla extract and beating for another minute
  10. For the chocolate cupcake-toppers, chop or break the dark chocolate into equal-sized chunks and place in a microwave-safe bowl
  11. Microwave the chocolate for 15 seconds at a time, stirring in between each interval so that the chocolate heats evenly. When the chocolate has 80-90% melted, stir the chocolate until it’s fully melted
  12. Transfer the melted chocolate into a piping bag or into a sandwich bag with a TINY corner cut off
  13. Pipe designs of your choice onto a sheet of parchment paper. Allow to harden before carefully removing and placing on your frosted cupcakes. Enjoy!

Best Banana Cake with Cream Cheese Frosting (Cheat)

I don’t bake with fruit much, but bananas are an exception.

dsc_0183

Banana bread and banana cakes – I could never get enough.

dsc_0162

dsc_0160

dsc_0200

I had such a difficult time letting the cake cool enough to be frosted. As soon as I took the beautifully baked cake out of my oven, the entire kitchen was filled with the aroma of banana cake. It might not sound that appealing, but trust me, it took so much mental effort to not eat the entire cake right there and then. It smelled that good. It was honestly driving me crazy, and I went on this rampage around the house, desperately trying to find something to satisfy my cravings so that I wouldn’t eat the cake before frosting it. I was so keen on eating banana cake that I didn’t even want chocolate truffles, and let me tell you – I never turn down chocolate truffles…well, until now.

Finally, I had no other choice but to eat something completely different. I microwaved a plate of homemade dumplings leftover from yesterday, covered them in vinegar (I love vinegar), and ran away from the banana-scented kitchen. At last, my taste buds had calmed down and I could focus on other things again as my banana cake cooled in the kitchen.

Soon enough, my cravings started up again and I figured it was time to frost the cake up and start eating.

dsc_0203

dsc_0205 dsc_0207

dsc_0211 dsc_0215

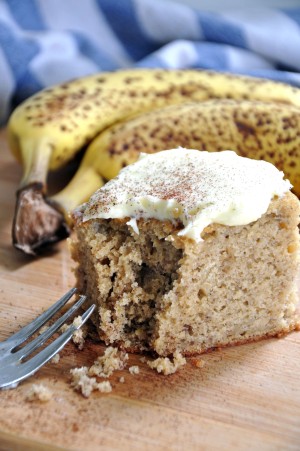
I think I knew how good this cake was going to be, but nevertheless, tasting it for the first time blew me away. The banana cake is everything you’d want a cake to be. It had a crumb similar to banana bread, only fluffier. The flavour of banana was definitely there, and it paired so beautifully with the cream cheese frosting. I mean, the cake itself was amazing, but the cake and the frosting go together like peanut butter and jelly. It was a perfect combination of flavours and I’m so in love.

dsc_0212

Oh, and in case you were wondering, the cake was gone within two days. It was that good.

dsc_0209

Best Banana Cake

Adapted from Sally’s Baking Addiction

Ingredients

For the cake:

  • 3 large ripe bananas, mashed (1 and 1/2 cups)
  • 1 teaspoon baking powder
  • 1 teaspoon baking soda
  • 1/2 teaspoon ground cinnamon
  • 1/2 teaspoon salt
  • 3/4 cup (170g) unsalted butter, softened
  • 1 cup (200g) granulated sugar
  • 1/2 cup (100g) packed light brown sugar
  • 3 large eggs, at room temperature
  • 2 teaspoons pure vanilla extract
  • 3 cups (375g) all-purpose flour
  • 1 and 1/2 cups (360ml) buttermilk, room temperature

For the frosting:

  • 8 ounces (224g) cream cheese, softened
  • 1/2 cup (115g) unsalted butter, softened
  • 3 cups (360g) powdered sugar
  • 1 teaspoon pure vanilla extract
  • 1/8 teaspoon salt

Method

  1. Preheat the oven to 180 degrees Celsius or 350 degrees Fahrenheit
  2. For the cake, whisk together the flour, baking powder, baking soda, cinnamon, and salt
  3. In another bowl, use an electric hand mixer or in a stand mixer, beat the butter on high speed until smooth and creamy. Add the sugar and brown sugar and beat until creamed together
  4. Mix in the eggs and vanilla, before adding in the mashed bananas
  5. Add the dry ingredients into the wet ingredients, 1/3 of a time and alternating with the buttermilk (Stir in 1/3 of the dry ingredients, stir in 1/3 of the buttermilk, and repeat with the remaining). Do not over mix
  6. Spread the batter into a greased and/or lined 9×13 inch baking pan and bake for around 50 minutes until a toothpick inserted in the centre comes out clean. Allow to cool completely before frosting
  7. For the frosting, using an electric hand mixer or a stand mixer, beat the cream cheese and butter together until smooth. Add the powdered sugar, vanilla, and salt.. Beat on low speed for 30 seconds, then switch to high speed and beat for 2 minutes
  8. Spread the frosting on the cooled cake. Refrigerate for 30 minutes before serving
  9. Cover leftover cake tightly and store in the refrigerator for 5 days

Banana Bread Waffles (Clean)

So relieved that it’s October break. It’s a very well-needed break. I wrote up a list on my whiteboard of all the things I need to accomplish over these next 7 days, but just looking at it makes me want to cry…UGH LIFE.

dsc_0102

dsc_0100

On the bright side, not having school early in the mornings means that I can take a little more time to put together the perfect breakfasts (best meal of the day amiright?). I realise that my last post was also a breakfast post, but this just goes to show how important breakfast is. If you’re into pancakes, go check out that post, but if you’re into waffles, stay right where you are. I’ve got a hella good banana bread waffle recipe for you.

dsc_0111

dsc_0122

Anyways, I’m going to take a few minutes here to just focus on how wonderful these banana bread waffles are, and hopefully forget about all my troubles for a bit.

dsc_0179

dsc_0180

dsc_0004

You’ll notice that I pretty much always top my waffles with ice cream. I’m not really sure why, I just think that waffles and ice cream are the best way to go. Especially when you drizzle over some melted chocolate and let it set and cover it with all sorts of delicious sprinkles and toppings and whatever you like. You know all the little pockets in waffles? The little indents? I’m pretty sure you’re supposed to fill those with ice cream so that you get 50% waffle and 50% ice cream in each bite.

God, I totally need to host a waffle party sometime. Look at all these different combinations! I’d be lying if I said that I didn’t have a great time making these.

dsc_0125

dsc_0178

dsc_0186

The waffles themselves are just what you’d expect from a recipe called “Banana Bread Waffles”. They taste just like banana bread – but in the form of a waffle! They have that sweet flavour of banana infused in a light, fluffy waffle with a wonderfully crisp edge. Yumm! *insert heart-eyes emoji here*

dsc_0116

dsc_0126

dsc_0129

Banana Bread Waffles

Ingredients

  • 1 1/2 cup white whole wheat flour
  • 2 tablespoons coconut sugar
  • 2 teaspoons baking powder
  • 1/2 teaspoon salt
  • 1/2 teaspoon cinnamon
  • 1/3 cup melted coconut oil
  • 1/2 cup almond milk (or milk of choice)
  • 1 cup overripe mashed bananas (about 2 bananas)
  • 1 large egg or 1 flax egg
  • 1/2 teaspoon pure vanilla extract
  • Vanilla ice cream, melted chocolate (optional, highly recommended)
  • Other toppings (banana, berries, granola, nuts etc.) (optional)

Method

  1. In a medium bowl, whisk together the flour, sugar, baking powder, salt, and cinnamon
  2. In another bowl, whisk together the melted coconut oil, almond milk, mashed bananas, egg, and vanilla extract
  3. Pour the banana mixture into the flour mixture and stir until just combined. Do not over mix.
  4. Heat a waffle iron. When it’s ready, spray or brush it, to cover it in a layer of oil. Pour the batter into the heated waffle iron, adding enough to just cover the bottom layer of the iron. Everyone’s waffle iron is different, so just estimate this and make adjustments as you go. Cook the waffle according to the waffle iron’s instructions.
  5. Top with vanilla ice cream, melted chocolate, and topping of your choice

My 17th Birthday Cake (Cheat)

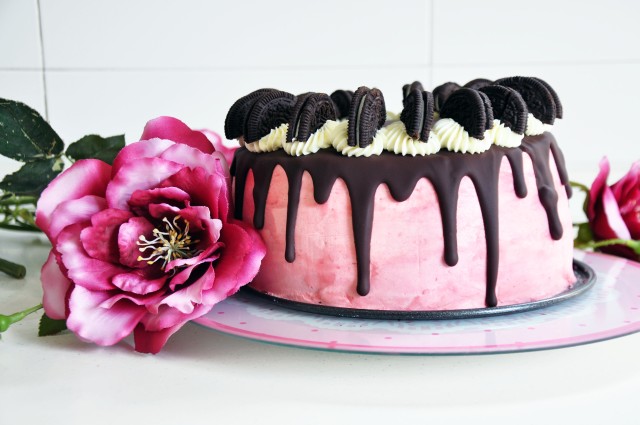
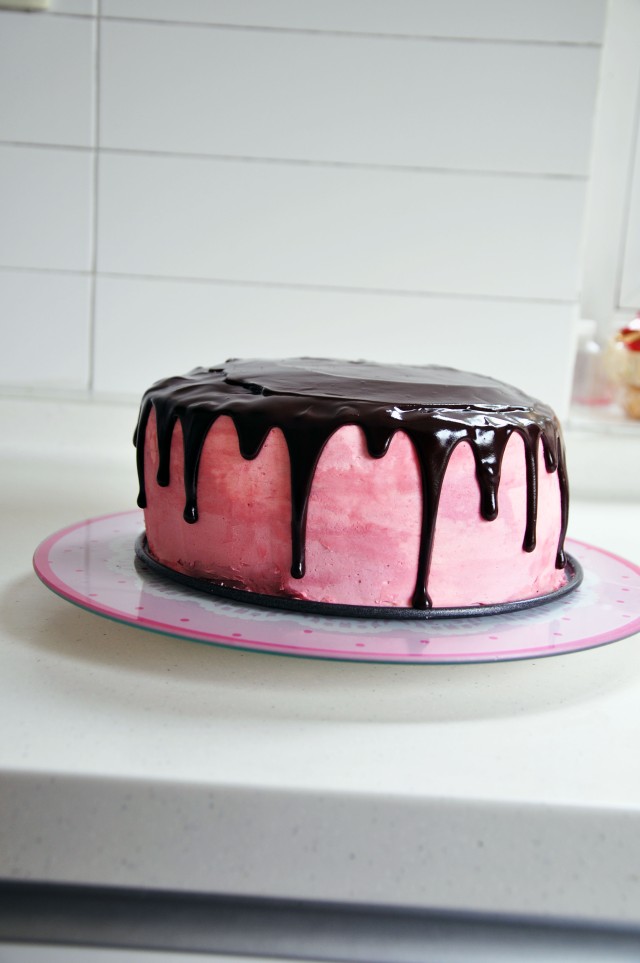
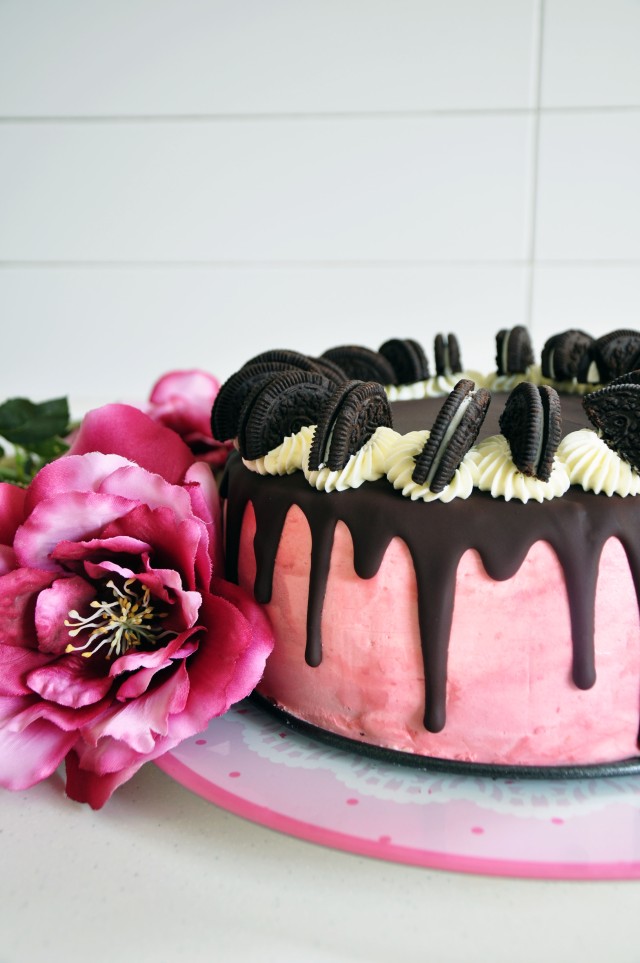
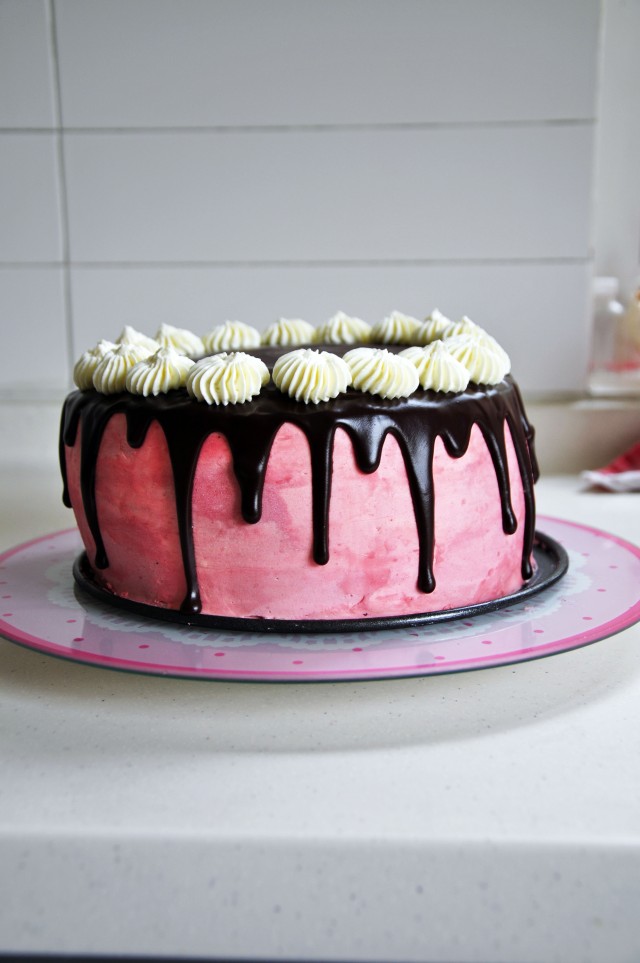
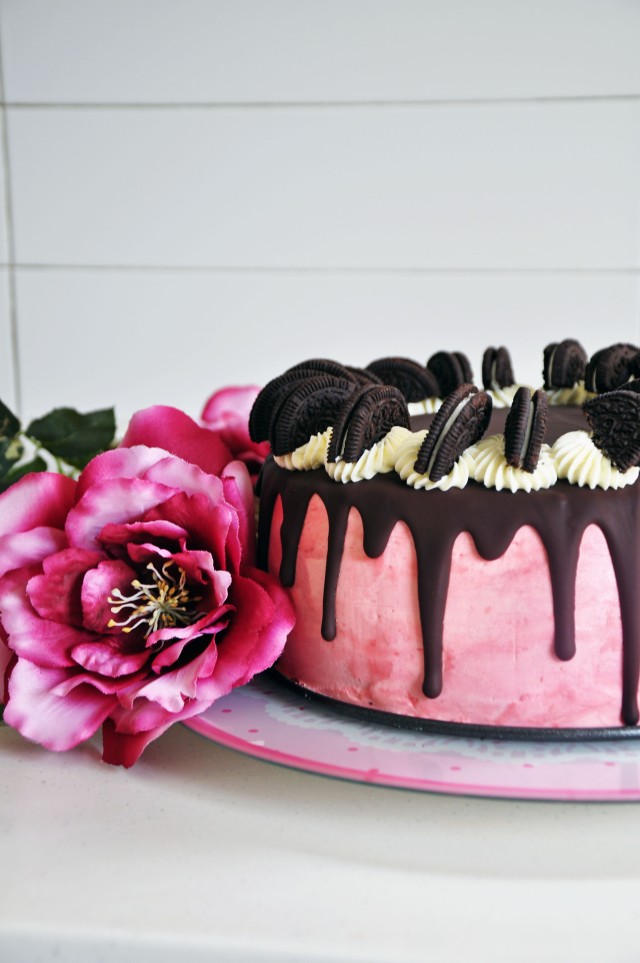
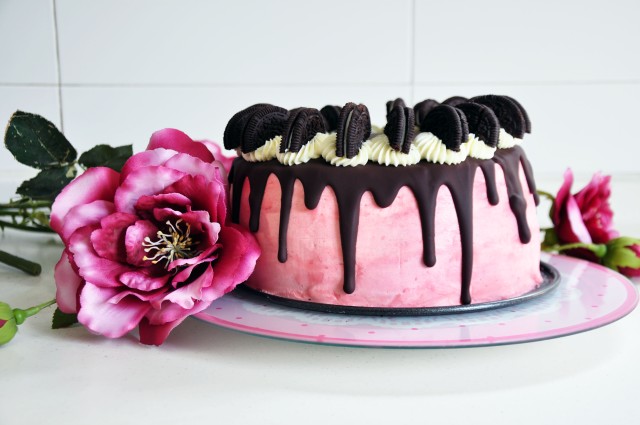
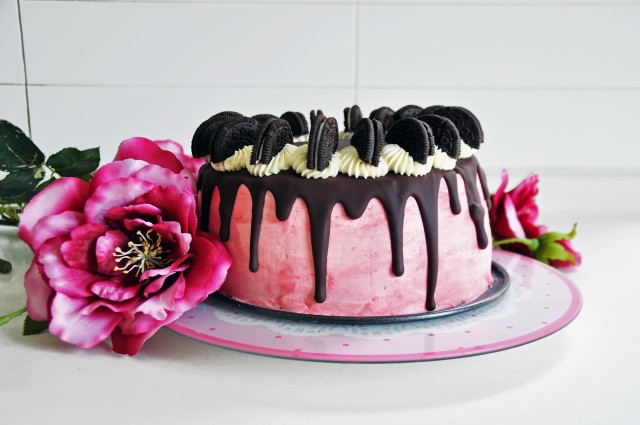
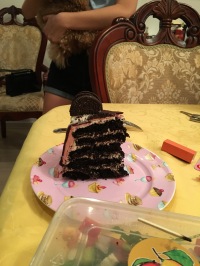
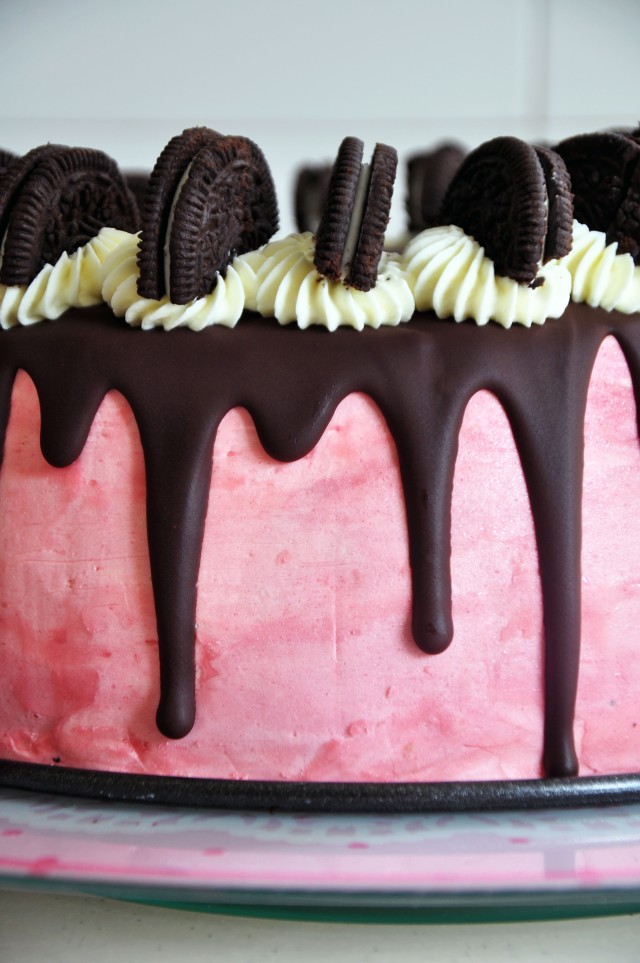
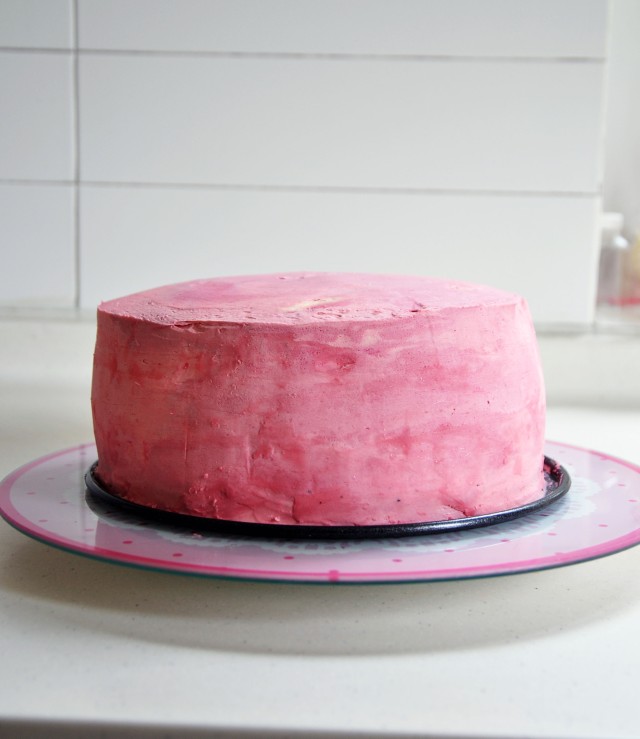
~5-layer midnight cake with cheesecake filling, covered with a generous layer of pink buttercream, glossy chocolate ganache, and topped with whipped cream and Oreos~
dsc_0910

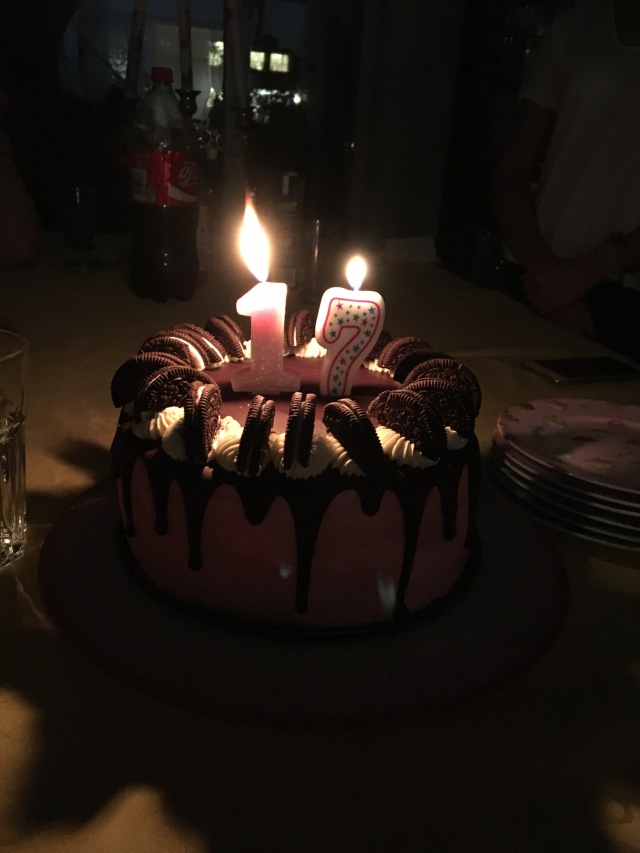
Guess who’s 17 years old!

dsc_0898

I have a love-hate relationship with birthdays. I love everything about them, except the fact that I’m another year older. I prefer other people’s birthdays, with all the celebrations and games and cakes and gift-opening, but without me being consciously aware of my ageing.

It’s weird, isn’t it? The way that day by day, hour by hour, we age, but it’s only once a year for 24 hours that we actually acknowledge it. Then again, acknowledging our constant ageing would take some of the fun out of birthdays.
dsc_0860

dsc_0872

dsc_0881

dsc_0894

I don’t understand why people want to get older. A pessimistic way of putting is is that every year, you’re a year closer to death. You become more likely to get sick. You have more responsibilities. Then again, an optimistic way of seeing is is that every year, you are faced with new opportunities. You’ll graduate and start a new chapter of your life. You might get a job. You might meet “the one”. You might get married. You might have kids. Who knows? In the end, the best way to predict your future is to live it the way you want. Sometime’s it’s just easier to be passive to all that happens around you, so that when things go wrong, you can blame the world and carry on, but wow, that must get boring. The happiest people are those who take control of their lives and steer it the way they want to go. When things go wrong, they acknowledge their mistakes and learn from them, and when things go right, they’re living Heaven on Earth. You pick (hint: I’d go with the second one).

I always seem to get really reflective on my birthday. Is it just me?
dsc_0877

dsc_0880

dsc_0887

But let’s focus on the real reason you’re here: CAKE!

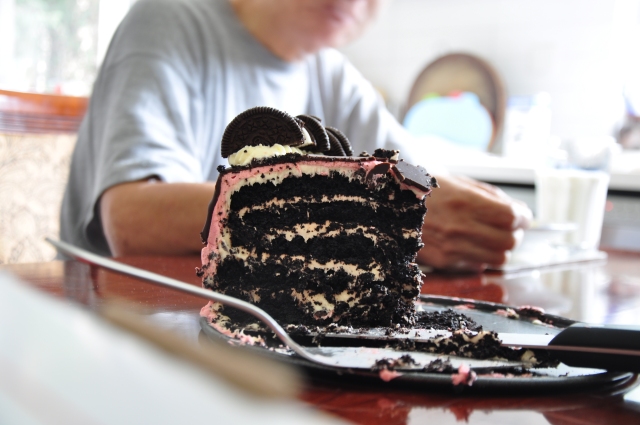
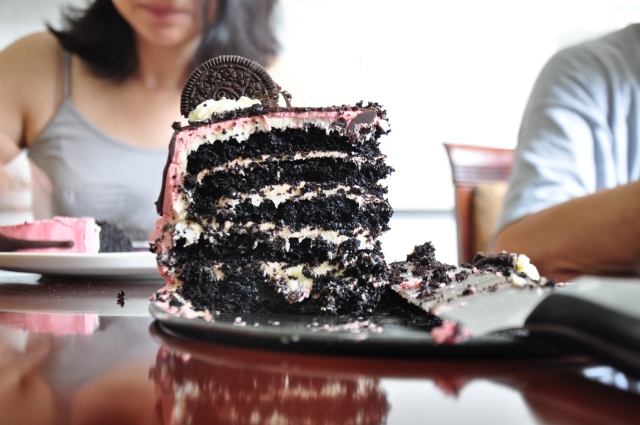
Another reason why I always get excited about birthdays – cake. This year, I decided to bake myself a 5-layer midnight cake with cheesecake filling, covered with a generous layer of pink buttercream, glossy chocolate ganache, and topped with whipped cream and Oreos. Helll yes.
dsc_0960

dsc_0899

To be honest, the cake is pretty much just a chocolate cake with black food colouring added. I used to not like chocolate cake. I thought that it was too rich. I’d always opt for vanilla or red velvet. Chocolate cake just wasn’t my thing, but alas, times have changed. Maybe I’d been deprived of chocolate cake for too long, but this chocolate cake was the bomb. Even before I baked the cake, the cake batter was waving chocolatey scents at me, trying to get me to give in and admit that chocolate cake is one of the best kinds of cake. While I was trimming the cakes, I nibbled on some of the cake crumbs and I was in awe, trying to understand how I had ever disliked chocolate cake. This chocolate cake is velvety. It’s suuper moist and it’s perfectly sweet. It has a wonderful cocoa flavour that isn’t overwhelming, and it pairs beautifully with all the other flavours going on in this cake.

Speaking of other flavours…THE CHEESECAKE FILLING. I don’t know how many times I’ve said it, but cream cheese frostings are magical. Maybe that’s a biased opinion because they’re my favourite, but tbh I’ve never met anyone who dislikes cream cheese frosting. The cheesecake filling tastes pretty much just like cream cheese frosting, but there isn’t as much butter. The butter’s replaced with whipped cream, which is just folded in at the end, so that you end up with filling that’s extra fluffy and light, but definitely is not missing any flavour.

I don’t want to be writing an essay here, so I’m just going to tell you that the buttercream, chocolate ganache, whipping cream, and Oreos are perfect. Simply, utterly, perfect.
dsc_0963

img_6205

dsc_0902

5-Layer Midnight Cake with Cheesecake Filling and Pink Buttercream

Adapted from various sources (linked below)

Ingredients

For the cake

  • 2 1/4 cups (285 g) all-purpose flour
  • 2 1/4 cups (450 g) superfine sugar
  • 1 cup (120 g) “black” unsweetened cocoa powder (or regular cocoa powder with 1 teaspoon black gel food colouring)
  • 1 tablespoon baking soda
  • 1 1/2 teaspoons baking powder
  • 1 teaspoon salt
  • 1 1/2 cups (360 ml) buttermilk, room temperature
  • 1 cup (240 ml) hot coffee
  • 3/4 cup (180 ml) vegetable oil
  • 2 teaspoons pure vanilla extract
  • 3 eggs, room temperature

For the cheesecake filling

  • 500g cream cheese, softened
  • 100g unsalted butter, softened
  • 200g freshly whipped cream
  • 200g icing sugar, sifted

For the pink buttercream

  • 1 cup (226g) unsalted butter
  • 4 cups (500g) powdered sugar
  • 1 tablespoons whipping cream
  • 1 teaspoon pure vanilla extract
  • 1/2 teaspoon pink food colouring

For the chocolate ganache

  • 5 ounces (150 g) best-quality dark chocolate, chopped (I used Lindt)
  • 3/4 cup (90 g) unsalted butter
  • 1 tablespoon light corn syrup or honey

For the whipping cream

  • 1/2 cup whipping cream
  • 1-2 tablespoons powdered sugar, to taste
  • Oreos, for topping

Method

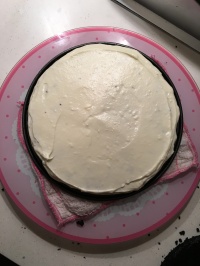
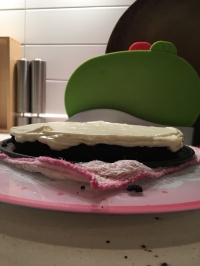
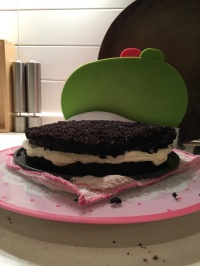
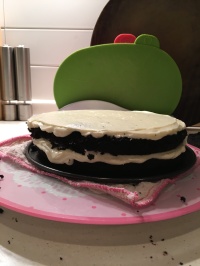
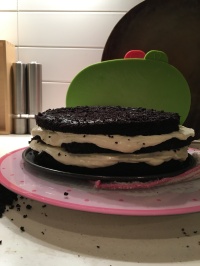
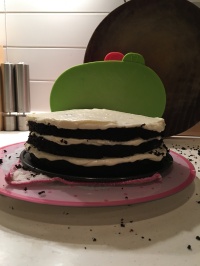
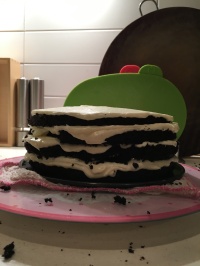
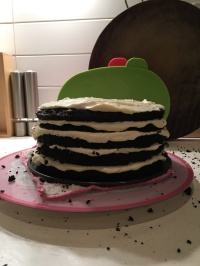
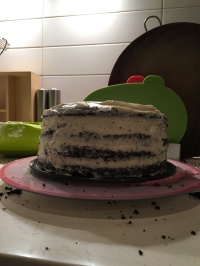
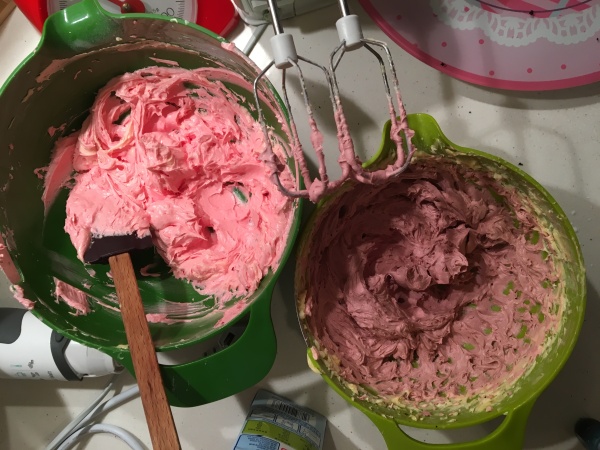
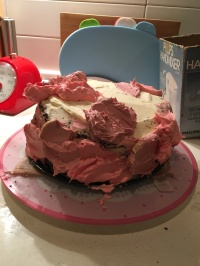
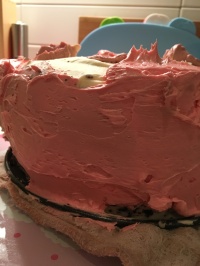
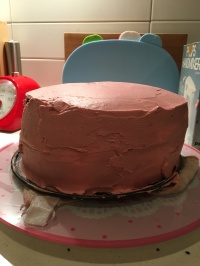
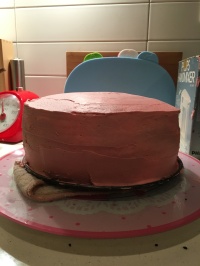
I’ve included generic bad-quality, unedited photos that I took while I was assembling the cake for reference. Let me know if you have any questions!

  1. For the cake, preheat oven to 180 degrees Celsius or 350 degrees Fahrenheit
  2. In a large mixing bowl, sift flour, sugar, black cocoa powder, baking soda, baking powder, and salt
  3. In a medium bowl or measuring cup, combine the buttermilk, coffee, oil, and vanilla, and then mix in eggs
  4. Add liquid mixture to dry ingredients and whisk until smooth, about 1 minute. Divide batter equally among the three lined and greased 8-inch cake pans or weigh for accuracy. Each pan should weigh about 600 grams
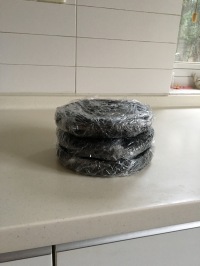
  5. Bake the first two layers until a wooden pick inserted into the centre of the cake comes out clean, about 23 minutes. Allow the cakes to cool in pans on a wire rack for 10 minutes, and then turn onto rack to cool completely. Repeat with the final cake layer. When ready to assemble the cake, wrap the layers in plastic wrap and chill for about 30 minutes.
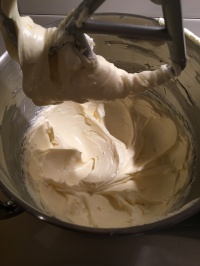
  6. For the cheesecake filling, use an electric mixer to whip cream cheese, butter, and icing sugar until pale and fluffy. Fold in whipped cream until combined
  7. For the pink buttercream, use an electric mixer to beat the butter until pale and fluffy. Add in the icing sugar, vanilla extract, food colouring, and 1 tablespoon of whipping cream and beat until combined
  8. To assemble the cake, trim the cake layers, and then halve them so that each cake becomes two layers.
  9. Place approximately 1/2 tablespoon of the cheesecake filling (or buttercream) on the center of a cake board, and place your bottom cake layer onto the cake board. Add about 1/2-3/4 cup of cheesecake filling onto the top of the cake, and using a small offset spatula, spread the filling so that it covers the top of the cake. It’s okay to let a little bit of filling go over the side. Add the next cake layer and repeat until you’ve reached your final cake layer
  10. Cover the cake with a thin layer of the cheesecake filling (or buttercream), also known as crumb coating it, and chill in fridge for at least 30 minutes
  11. Cover the cake in pink buttercream and chill in fridge for at least 15 minutes
  12. In the meantime, make the chocolate ganache. In a small bowl, melt the chocolate, butter, corn syrup and salt in the microwave, about 50 seconds, and stir until smooth. Let cool until it thickens slightly, about 15 minutes
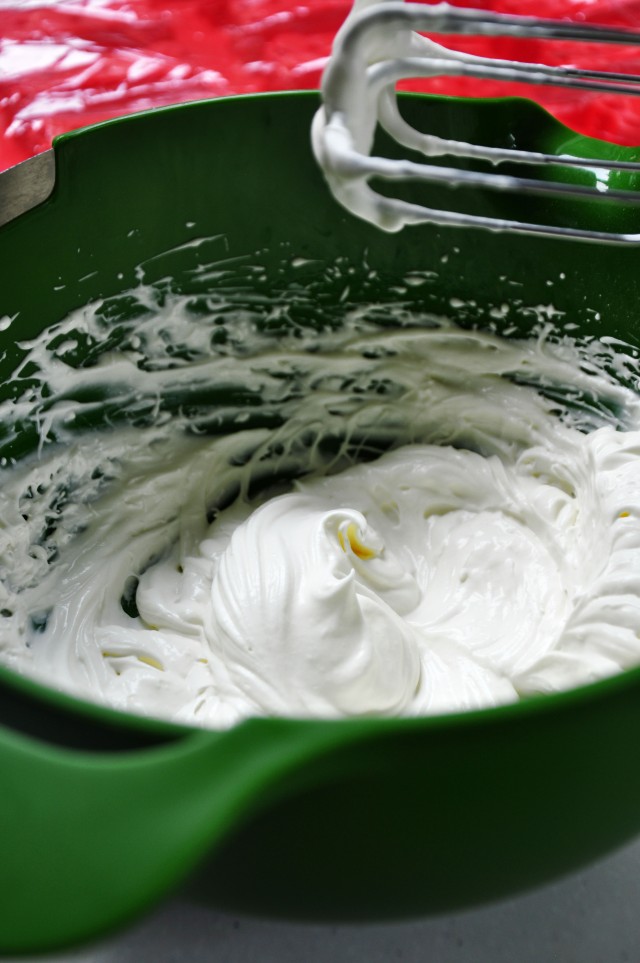
  13. For the whipping cream, use a whisk or electric hand mixer to whip the cream until stiff peaks form. Whisk in the powdered sugar. Transfer the mixture into a piping bag fitted with a star tip
  14. (Assembling, continued) Remove the cake from the fridge and spoon the chocolate glaze to the edges of the cake, gently pushing some over the side and letting it dribble down. When you’ve finished putting chocolate glaze on the edges of the cake, spoon chocolate glaze into the centre until covered
  15. When the chocolate has set slightly, pipe the whipped cream around the edges of the cake and top each swirl with half an Oreo
  16. Serve!

img_5968img_5972img_5976

img_5977img_5981img_5983img_5987img_5992img_5994img_5997img_6002img_6009

img_6105

img_6106img_6109img_6112img_6114img_6118img_6212

Fluffy Blueberry Muffins – SORTED (Cheat)

DSC_0695.

I know that I ramble about SORTED Food a lot, but I usually ramble about how they’ve changed my life by igniting the side of me that loved baking. Now, I’m gonna continue rambling, but this time, about how insanely amazing their recipes are. In particular – this recipe: “American Blueberry Muffins“.

DSC_0673.

DSC_0684.

DSC_0718.

Firstly, you’re probably wondering why I decided to rename the recipe, changing “American” to “fluffy”. Well, here’s why: they’re fluffy as hell.

I don’t think I need to say more to that.

In all seriousness though, these muffins are so damn fluffy and so damn delicious and I found my new favorite muffin recipe. Mind you, I make muffins all the time, but these muffins are so good. They rise mile-high and have a soft, delicate crumb with a textured top layer. Not to mention, they’re filled with juicy blueberries that break open so that you get blueberry in every bite.

DSC_0689.

DSC_0703.

DSC_0708.

I’ve never really used vanilla sugar much. I just use vanilla extract. This time, I decided to just go with the recipe and use vanilla sugar and it was so worth it. When my mom first tried it, she commented about how it was a vanilla blueberry muffin, and when I tried it out myself, I was in awe – the vanilla flavor was there. Not just a barely-noticeable sweet flavor, but vanilla.

But – on that note. I wouldn’t recommend going out and buying vanilla sugar, cause let’s be honest – that stuff is expensive. So what do you do? Why, you make your own, of course.

Last year when I went to Bali, I stocked up on vanilla pods because they’re really cheap there. I used the seeds and pod to make creme brulée, and then dried out the pod. I placed the pod into a jar and filled it with sugar and left it on my counter. Now, a few months later, the sugar has absorbed all that wonderful flavor of vanilla. Not only does it smell amazing, but it seriously heightens your baked goods! Vanilla sugar is my new favorite thing.

DSC_0710.

These muffins are little bundles of heaven, I tell you. Little bundles of heaven…

DSC_0722.

Fluffy Blueberry Muffins

Adapted from SORTED Food

Makes 10-12 muffins

Ingredients

  • 350g all-purpose flour
  • 3 teaspoons baking powder
  • 1 generous pinch of salt
  • 200g vanilla caster sugar
  • 2 eggs
  • 240ml buttermilk
  • 120ml sunflower oil
  • 1 teaspoon vanilla extract
  • 225g blueberries
  • 1 tablespoon demerara (raw) or brown sugar

Method

  1. Preheat oven to 220 degrees Celsius and prepare a muffin tray
  2. In a large bowl, whisk together the flour, baking powder, salt, and sugar
  3. In a medium bowl, whisk together the eggs, buttermilk, oil, and vanilla extract
  4. Add the wet mixture into the dry mixture and fold gently until just combined. Do not over mix. The batter should be slightly thick and sticky
  5. Fold in about 3/4 of the blueberries
  6. Divide the mixture between the muffin cases, filling them 3/4 of the way up. Top with the rest of the blueberries and sprinkle with demerara/brown sugar
  7. Place into oven and immediately turn heat down to 180 degrees Celsius. Bake for 25 minutes until golden and an inserted toothpick comes out clean

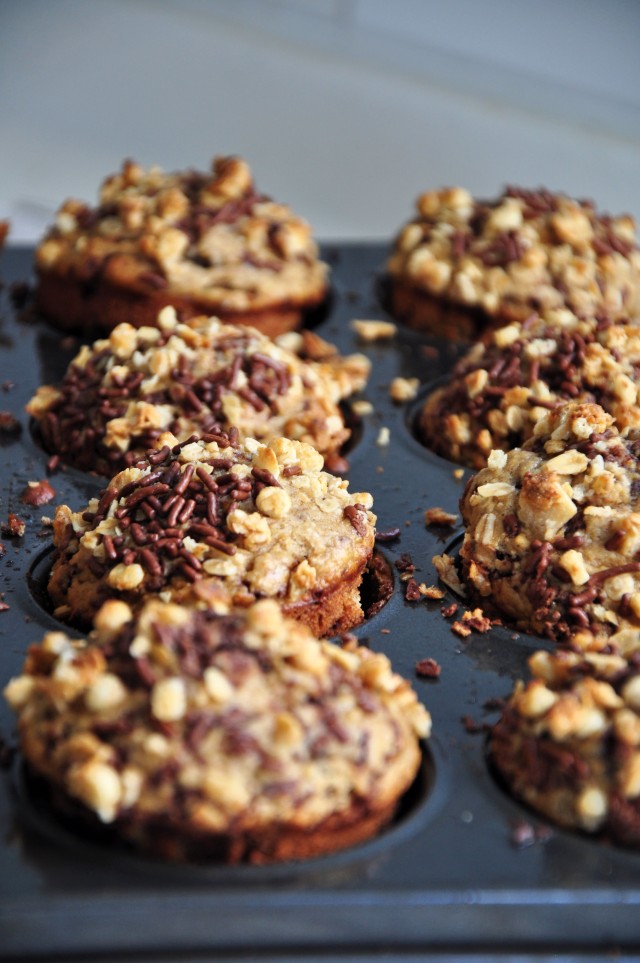
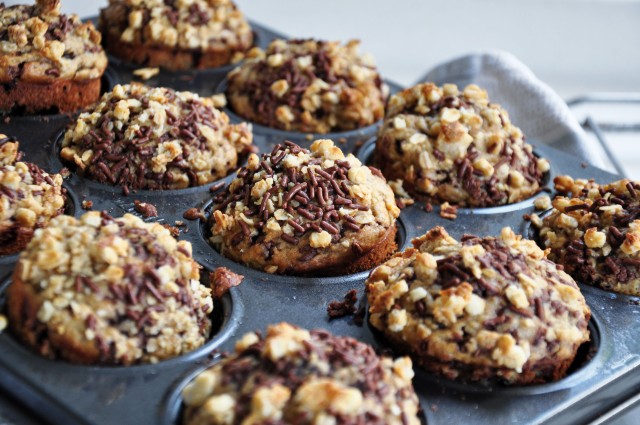
Chocolate Sprinkle Banana Bran Muffins (Clean)

You guys should probably all know by now that I love muffins. They’re perfectly sized on-the-go snacks, especially when traveling! In a couple of weeks, I’ll be heading off to Sri Lanka, so I’m going to need lots of yummy snacks for my long hours of traveling, and that’s where these guys come in – chocolate sprinkle banana bran muffins!

They’re not only suuper delicious, but they’re healthy too! They’re sweetened with coconut sugar and naturally sweetened thanks to the bananas, and I’ve reduced the oil to just 1/4 cup of coconut oil! But going back to the bananas – do you guys have any idea how good bananas are for you? A friend of mine just wrote an extensive article about it with 24 scientifically-backed reasons why bananas are your best friend. You guys can check out the article here (or http://www.well-beingsecrets.com/bananas-health-benefits/).

DSC_0003.

DSC_0007.

These muffins are everything you could want. They’re fluffy, and are covered in chocolate sprinkles and granola (my favorite part).

DSC_0016.

DSC_0018.

DSC_0021.

I’m literally getting hungry just from looking at these photos. I really want a muffin now.

DSC_0030.

DSC_0048.

In case any of you were wondering, the chocolate sprinkles I used in these muffins is “hagelslag”, which is a Dutch chocolate sprinkle for putting on bread. We always buy a ton of them when we go back to the Netherlands, but I seem to be the only one who eats them, so I figured I’d incorporate them into these muffins to get the rest of my family to eat them. It’s not that they don’t like chocolate, but they just don’t actively crave chocolate like I do.

DSC_0059.

DSC_0062.

DSC_0069.

DSC_0075.

DSC_0083.

Chocolate Sprinkle Banana Bran Muffin

Ingredients

  • 2 eggs
  • 2/3 cup coconut sugar
  • 1 cup mashed ripe bananas
  • 1 cup soy or almond milk
  • 1/2 teaspoon apple cider vinegar
  • 1 cup unprocessed wheat bran
  • 1/4 cup coconut oil, melted and cooled
  • 1 teaspoon pure vanilla extract
  • 1 3/4 cup white whole wheat flour
  • 1 1/2 teaspoons baking powder
  • 1/2 teaspoon baking soda
  • 1/2 teaspoon ground cinnamon
  • 1/4 teaspoon salt
  • 1/2 + 1/4 cup chocolate sprinkles, divided
  • 1/4 cup banana nut granola (or granola of choice)

Method

  1. Preheat oven to 180 degrees Celsius or 370 degrees Fahrenheit
  2. In a medium bowl, whisk together the eggs and coconut sugar, before whisking in the bananas, milk of choice, apple cider vinegar, wheat bran, coconut oil, and vanilla
  3. In a large bowl, whisk together the flour, baking powder, baking soda, cinnamon, and salt
  4. Pour the wet ingredients into the dry, and fold together gently until just combined
  5. Fold in 1/2 cup chocolate sprinkles
  6. Scoop the batter into a greased muffin tin and sprinkle with the remaining 1/4 cup chocolate sprinkles and the granola
  7. Bake for 20-25 minutes, until a toothpick inserted in the middle comes out clean

Sugar-Free One-Bowl Apple Oatmeal Muffins (Clean)

Apple_Oatmeal_Muffins-2

DSC_0034-1

I’ve posted muffin recipes before, but all of the classics – blueberry oatmeal muffins, double chocolate muffins, chocolate chip…but never apple oatmeal. In fact, I barely even have any apple recipes around here. I think it’s start I adding to that collection.

Apple_Oatmeal_Muffins-1

DSC_0041-3

I always seem to have too many apples in my fridge. My brother loves apples. He’d literally eat an apple every day, so we’d be perfectly fine buying a bag of apples every time we went grocery shopping (which, with me in the house, happened pretty often). Now, he’s off at college, and we seem to always have apples in the fridge. My mom tries to get me into the same healthy apple-a-day routine as my brother, but to be honest, I’m not a huge fan of apples.

Not to say that I dislike apples, but like, in terms of texture and flavor, I’m kinda meh about them. What I do love, though, is incorporating them in baked goods. Remember that apple pie I made ages ago? Yeah, that was a damn good pie and one of my favorites.

Point is, to me, apples are okay on their own, but they get so much better when combined into baked goods and paired with some good old-fashioned spices.

Apple_Oatmeal_Muffins-3

I love this recipe because it’s so easy, and if you’re like me (with a fridge full of apples 24/7), you can whip these up pretty much anytime you want. The whole recipe comes together in one bowl, and only takes 5 minutes or so.

Not to mention, they’re so good for you! They’re naturally sweetened with applesauce and stevia, with only 2.9 grams of sugar per serving! That’s practically nothing. FYI – a 46g Kit Kat bar has 22g of sugar.

DSC_0040-2

Apple_Oatmeal_Muffins-5

Sugar-Free Apple Oatmeal Muffins

Makes 12 muffins

Ingredients

  • 1 cup old fashioned oats
  • 1 cup white whole wheat flour
  • 1 teaspoon baking powder
  • 1/2 teaspoon baking soda
  • 1 teaspoon ground cinnamon
  • 1/2-1 tablespoon powdered stevia (adjust to taste)
  • 1/2 teaspoon salt
  • 1 cup unsweetened applesauce
  • 2 eggs
  • 1/4 cup coconut oil, melted and cooled
  • 3/4 cup almond or soy milk
  • 1 teaspoon vanilla extract
  • 1 medium or large apple, peeled, cored, and chopped
  • 1/4 cup chopped nuts (optional)

Method

  1. Preheat oven to 205 degrees Celsius or 400 degrees Fahrenheit
  2. In a bowl, stir together oats, flour, cinnamon, baking soda, baking powder, stevia, and salt
  3. Mix in the applesauce, eggs, coconut oil, milk of choice, and vanilla extract
  4. Stir in the chopped apple and chopped nuts, if using
  5. Transfer batter into a greased or lined muffin tin and bake for 20 minutes

Black Sesame Chiffon Cake (Cheat)

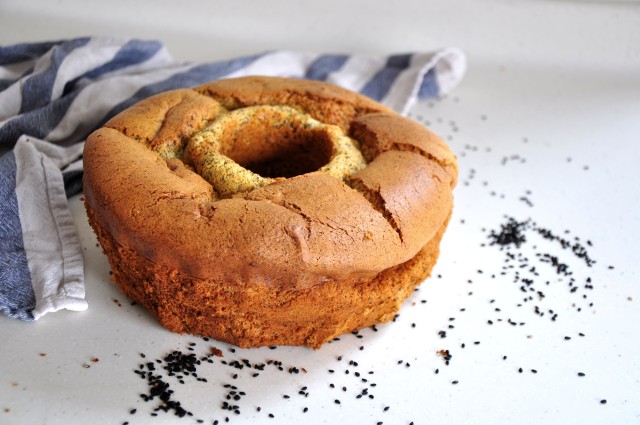
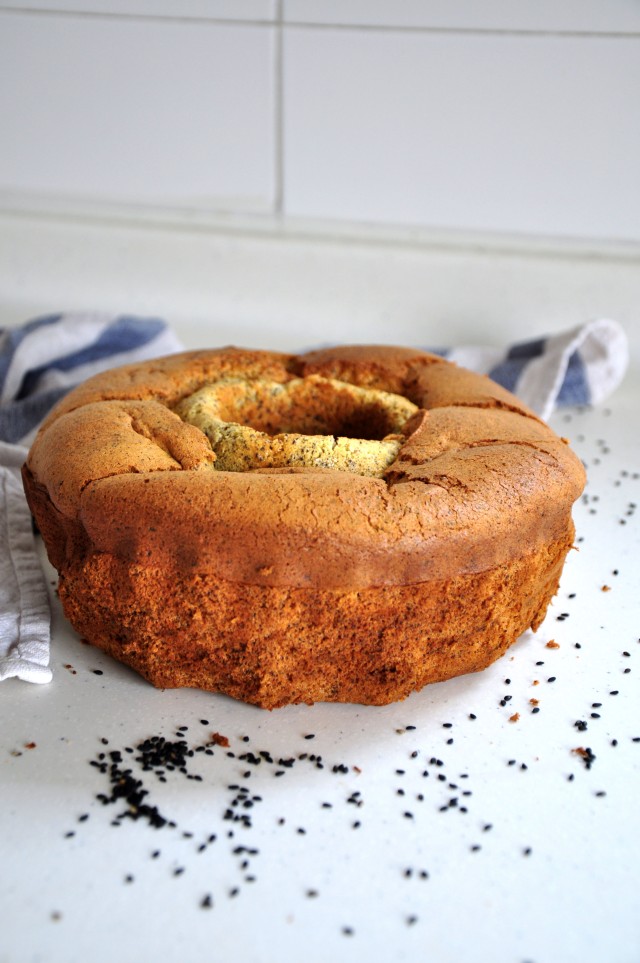
Think of the fluffiest cake in the world.

Just think of the fluffiest cake in the world. You’d better be thinking about this cake, cause this is as fluffy as they get.

DSC_0048.

DSC_0025.

DSC_0032.

DSC_0043.

I’ve only just posted a souffléd recipe, but here I am, doing it again. I’m obsessed. Soufflé foods are just so damn fluffy. So damn fluffy! It’s like eating a cloud, except there is that undeniable texture of cake and you get a hint of sweetness and black sesame. It all makes sense once you take a bite into a slice of this cake, trust me.

DSC_0046.

Because this cake is so fluffy, it never leaves me feeling uncomfortably full. I can eat half the cake before realizing that, oops, I ate half the cake. Then again, I’m not consumed by guilt the way I normally would, because to be honest, even though I labelled this as a “cheat” recipe, it’s pretty healthy.

You’re probably wondering why I didn’t just go the extra mile and turn this into a full-on clean recipe, and it’s because this recipe is already perfect, and what’s the point in perfecting perfection?

DSC_0035.

DSC_0050.

DSC_0053.

Also – this recipe is super easy to make. It comes together with just 6 main ingredients that you probably already have in your pantry.

DSC_0057.

DSC_0044.

Black Sesame Chiffon Cake

Adapted from Green Cilantro

Ingredients

  • 100g cake flour
  • 1/3 cup + 4 tbsp granulated sugar
  • 1 1/2 teaspoon baking powder
  • 1/2 teaspoon salt
  • 50g ground black sesame seed powder*
  • 4 large eggs, separated
  • 1/4 cup vegetable oil
  • 1/2 cup milk

*Alternatively, you could simply grind up black sesame seeds in a blender/food processor until it reaches a powdery consistency. That being said – don’t over-blend the seeds or else you’ll end up with black sesame paste!

Method

  1. Preheat oven to 160 degrees Celsius or 325 degrees Fahrenheit
  2. In a large bowl, sift together the cake flour, 1/3 cup of the sugar, baking powder and salt. Add the black sesame powder and whisk until well combined
  3. In a small bowl, beat the egg yolks until pale yellow and slowly add in the vegetable oil. Beat until the mixture is thick
  4. Add the egg yolk mixture and milk into the sesame seed mixture and mix until well combined
  5. Using a stand mixer or an electric mixer, beat the egg whites until foamy. With the mixer running, add in the remaining 4 tablespoons of sugar, 1 tablespoon at a time. Continue to beat until stiff peaks form. Set aside
  6. Gently fold the egg whites, 1/3 of the egg whites at a time, into the other batter using a spatula or a balloon whisk
  7. Transfer the mixture into a bundt pan or an angel food cake pan and bake for 45 minutes until a toothpick inserted comes out clean
  8. Allow to cool completely before serving

Red Velvet Beetroot Pancakes (Clean)

DSC_0130.

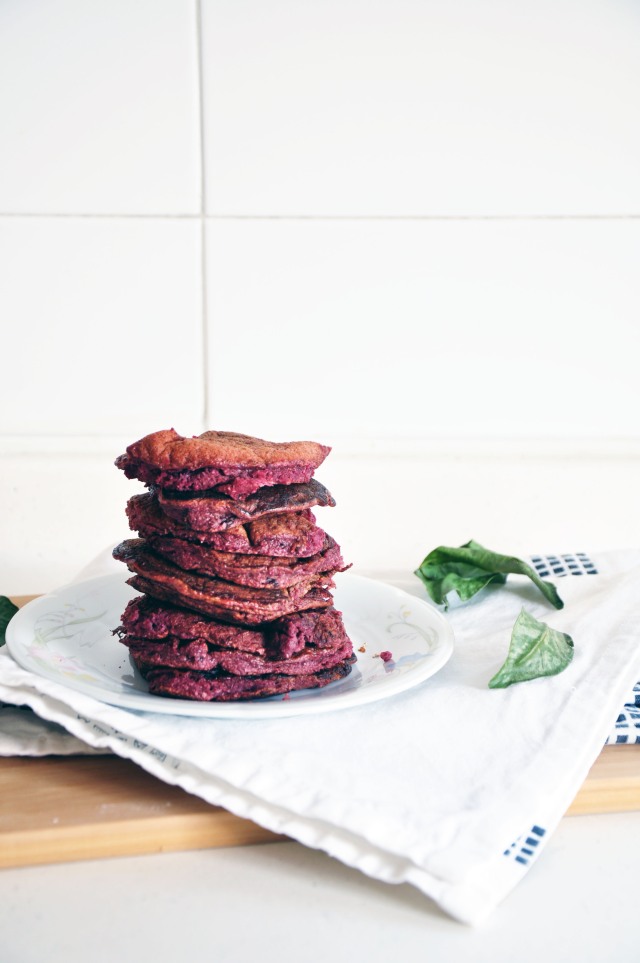
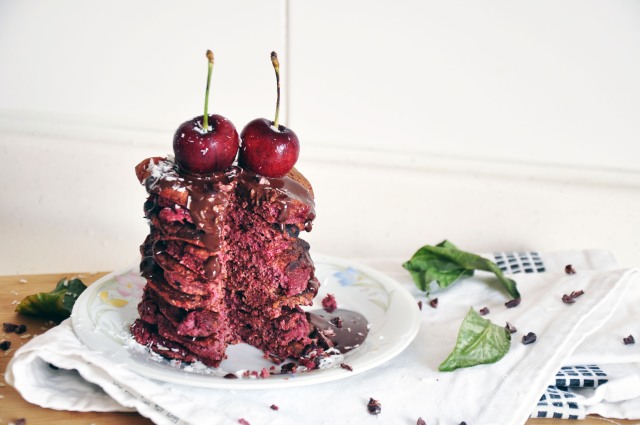
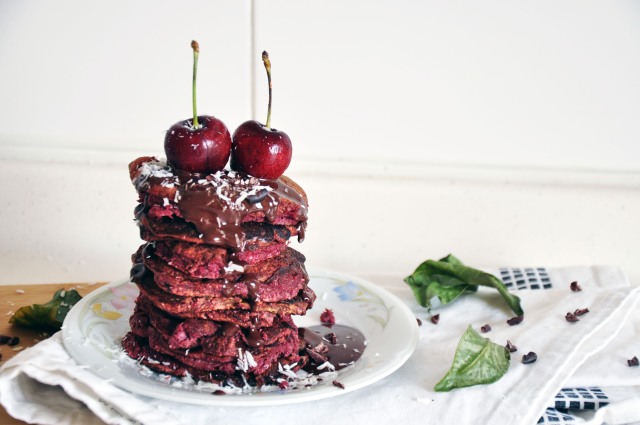
A few weeks ago in mid-January, I was scrolling through Foodgawker as I always do, and I noticed that people had already started posting Valentine’s Day recipes, and I was pretty confused – it wasn’t even February yet! Well, now that it’s actually February, here’s a “Valentine’s Day”-inspired recipe, because you can’t go wrong with pink food on Valentine’s! Not to mention – gluten-free, sugar-free, and oil-free pink!

DSC_0091.

Might I add that you don’t need to have a significant other or a Valentine to make these? Yeah, yeah, Valentine’s is usually about those you love romantically, but that doesn’t mean that love stops there. Make these to show your appreciation for your mother, your father, your brother, or even for yourself, because you should love yourself no matter what. There will always be times where you get down and feel like you aren’t worthy and capable of achieving the expectations that society throws at you, and your mind may automatically begin to close out all the things you love about yourself until you feel worthless. Times like that, take a break from the world and recall all the amazing things you’ve achieved in life and kind things you’ve done, no matter whether it was winning a race or taking the time to donate a little to a charity you support. All of those moments, added up, will be infinite. Thus, your love for yourself should be just that – infinite.

DSC_0140.

DSC_0157.

With all that deep life talk aside, let’s just appreciate these pancakes.

DSC_0129.

DSC_0143.

These pancakes are quite fluffy and the beetroot flavor isn’t evident at all (good for those who don’t like beetroot – if you do, I guess you could add in double the amount of beetroot and see how that goes…). If you have a heart-shaped cookie cutter or egg-shaper, that would just bring these to the next level and make them look so gorgeous. Plus, I wouldn’t omit the melted chocolate, because that just contributes so much to the appearance, flavor, and Valentine-feel. As for fruit, chocolate-dipped strawberries or raspberries would be beautiful as well if you’re short on cherries!

DSC_0164.

DSC_0161.

Oh, and may I also add that these photos were taken nearly a year ago? Obviously, my photography and editing have come a long way, but this recipe is too good not to share. Plus, I’m quite happy with this gif:

Red-Velvet-Beetroot-Pancakes DSC_0142.

Red Velvet Beetroot Pancakes

Adapted from Dessert With Benefits

Makes 6-10, depending on size

Ingredients

  • 1/3 cup coconut flour
  • 1 tablespoon raw cacao powder
  • 2 teaspoons powdered stevia
  • 1 teaspoon baking powder
  • Pinch of salt
  • 3/4 cup beetroot purée*
  • 2 large eggs
  • 3/4 cup milk of choice
  • 1 teaspoon pure vanilla extract
  • 1 teaspoon apple cider vinegar
  • Melted chocolate/fresh fruit, for serving (optional, but recommended)

*To make the beetroot purée, stick the beetroots (unpeeled) in a big pot of boiling water until they’re soft, peel them, and purée them in a food processor. Use leftovers for any of these recipes calling for beetroot purée.

Method

  1. In a small bowl, whisk together the coconut flour, cocoa powder, stevia, baking powder, and salt
  2. In a large mixing bowl, whisk together the beetroot purée and eggs, before whisking in the milk of choice, vanilla extract, and vinegar
  3. Heat a pancake pan or a relatively flat saucepan over medium heat. Spray with oil and spoon about 1/4-1/3 cup of mixture onto the pan, spreading them into circles. Cook until the edges are dry and the surface is slightly dry. The pancakes take longer to cook than regular pancakes, so about 3-5 minutes.
  4. Flip and cook for about a minute on the other side, before flipping out onto a plate. Continue to cook the batter until all of it is used up.
  5. Stack them up, top with melted chocolate and fresh fruit, and serve!


White Chocolate Blueberry Oatmeal Cookies (Cheat)

I need to make cookies more often.

DSC_0465.

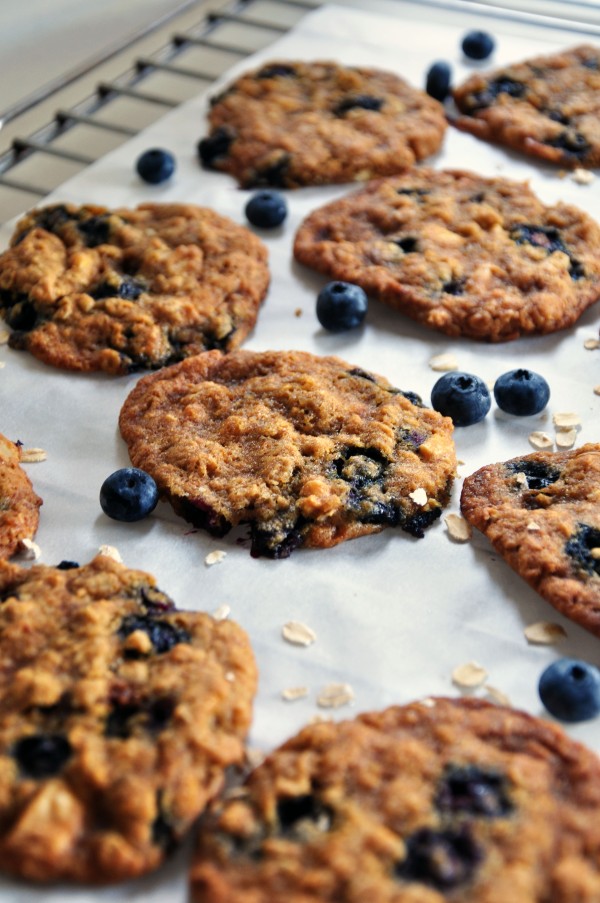
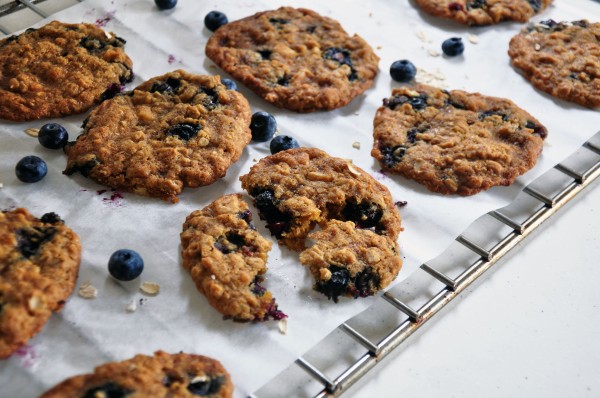
I’ve always loved oatmeal cookies, but the addition of fresh, plump blueberries and sweet, smooth white chocolate take these cookies to a whole new level of yum.

DSC_0462.

DSC_0459.

These cookies are crispy on the edges, yet still soft and chewy in the center. I didn’t chill my cookie dough before baking it, so they turned out to be a little flat, which personally, I don’t mind. If you want them to be more puffy and cakey, then I’d recommend chilling them for an hour or two before baking.

DSC_0467.DSC_0481.DSC_0472.DSC_0478.

White Chocolate Blueberry Oatmeal Cookies

Adapted from Broma Bakery

Makes 14-16 large cookies

Ingredients
  • ½ cup unsalted butter, room temperature
  • ½ cup white sugar
  • ½ cup light brown sugar
  • 1 large egg, room temperature
  • 2 teaspoons pure vanilla extract
  • 1 cup plus 2 tablespoons all-purpose flour
  • 2 teaspoons cornstarch (optional, omit for a crunchier cookie)
  • ½ teaspoon salt
  • ½ teaspoon baking soda
  • ¼ teaspoon baking powder
  • 1 cup old-fashioned oats
  • ⅔ cup white chocolate chips or chopped white chocolate
  • 1 cup fresh blueberries

Method

  1. Preheat oven to 175 degrees Celsius, or 350 degrees Fahrenheit
  2. In a standing mixer fitted with a paddle attachment, or in a medium mixing bowl with an electric hand mixer, cream the butter and both sugars until light and fluffy, about 3 minutes. Beat in the egg and vanilla extract.
  3. In a separate bowl, whisk together the flour, cornstarch, salt, baking soda, and baking powder. With the wet ingredients mixing on low speed, slowly incorporate in the dry ingredients until almost combined. Fold in oats and white chocolate chips with a spatula until fully combined, and finally carefully fold in the blueberries, making sure not to break them
  4. Using a cookie scoop, scoop the dough onto a lined baking sheet (or just roll them into balls using your hands), leaving 2 inches in between each cookie. If you want a more puffy and cakey cookie, chill the cookie dough in the fridge for 1-2 hours before baking (I didn’t)
  5. Bake cookies for 19 minutes, or until just beginning to brown. Allow to cool on cooling rack before serving

Whole Wheat Double Chocolate Muffins (Clean)

DSC_0808.

Considering the fact that healthy muffins and brownies are a staple in my house, it’s quite abnormal that I haven’t posted a muffin recipe in a while.

To make up for the lack of muffin posts, I’ll give you one of my favorites.

DSC_0815.


DSC_0805.

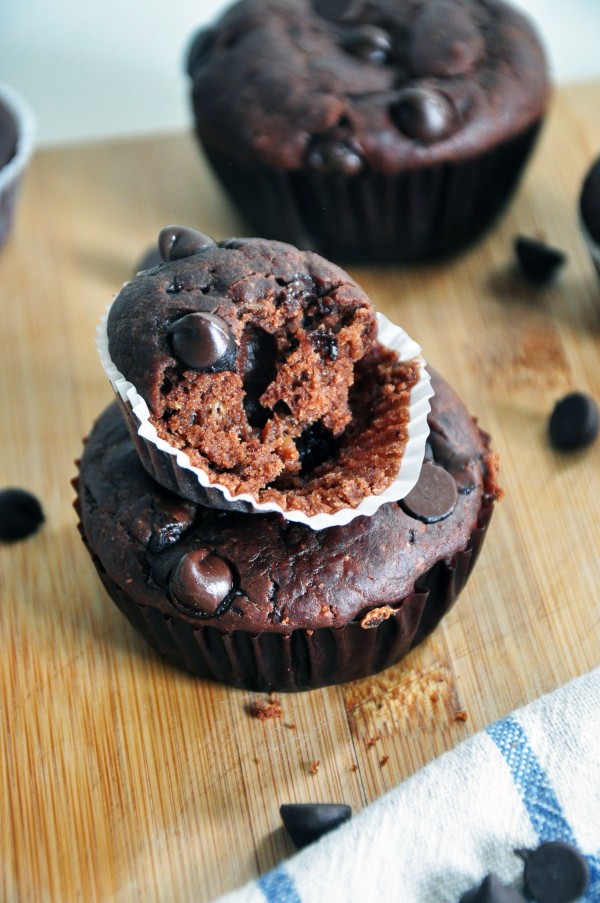
Now, I have a few chocolate muffin recipes, but this is one that I favor in particular. They’re chocolatey, super fluffy, light, and perfectly sweet.

DSC_0810.

While making these, I was baking two recipes at a time – the other being blueberry bagels. I pulled these muffins out of the oven and planned on letting them cool before going back to the bagels. But they looked so incredibly fluffy, I couldn’t resist, so I ate one of the mini muffins.

It was a bite of fluffy, yet moist, chocolate-y goodness studded with gooey pockets of melted chocolate chips. H-e-a-v-e-n.

Naturally, I had another one.

Then it was back to bagels.

Then my mom came in and eyed the muffins, asking if I had taken photos yet. I told her I hadn’t, but let her have one anyways. She took one and happily left the kitchen.

About five minutes later, she came back and asked if I had taken photos yet. Again, I said no. She told me to hurry up and take them, because she wanted another one, and wanted me to share some with my grandparents. So I took my photos, ate another mini one (as seen in the second to last pic), and then gave my mom, grandpa, and grandma a full muffin each. They loved them.

Mission Fluffiest Chocolate Muffins: Success.

DSC_0809.


I love them chilled, straight out of the fridge, or steaming hot.

When I grab one straight from the fridge, the chocolate chips are slightly cold and aren’t soft, which provides great contrast compared to the softness of the muffin. The chocolate chips are colder, too, and you get that satisfying bite as if you were eating a bar of chocolate.

Whereas, if you choose to microwave a muffin for half a minute or so, the muffin begins to steam and seems like it’s just been taken out of the oven. The chocolate chips melt and get all gooey while the muffin itself becomes more tender and moist, resulting in a big, pillow-y, melty-chocolate-y bite.

Whichever one floats your boat. I love them equally.

DSC_0819.

DSC_0803.

Whole Wheat Double Chocolate Muffins

Adapted from Whole and Heavenly Kitchen

Makes 12 standard + 6 mini muffins (or 15 standard muffins)

Ingredients

  • 1/2 cup coconut oil, melted
  • 2 large eggs
  • 1/4 cup unsweetened yoghurt
  • 1 medium ripe banana, mashed (approx. 1/2 cup)
  • 3/4 cup buttermilk
  • 2 teaspoons pure vanilla extract
  • 2 cups white whole wheat flour
  • 3/4 cup unrefined coconut sugar
  • 1/2 cup raw cacao powder
  • 3 teaspoons baking powder
  • 1/2 teaspoon salt
  • 1 cup dark chocolate chips

Method

  1. Preheat oven to 200 degrees Celsius or 400 degrees Fahrenheit
  2. In a medium bowl, whisk together the oil, eggs, yogurt, mashed banana, buttermilk, and vanilla until smooth
  3. In a separate bowl, whisk together flour, coconut sugar, cacao powder, baking powder, and salt until combined.
  4. Fold the dry mixture into the liquid mixture until just combined. Do not over mix. Fold in chocolate chips.
  5. Transfer the mixture into a greased or lined muffin tin until almost full and bake for 5 minutes before reducing heat to 190 degrees Celsius or 375 degrees Fahrenheit, and bake for 15 more minutes, until a toothpick comes out clean
  6. Allow to cool in muffin tin for 5 minutes before transferring to a wire rack to cool completely
  7. Serve. Store in an airtight container at room temperature or in fridge, and reheat in microwave if desired