Chocolate Cupcakes with Pink Buttercream and Chocolate Cupcake-Toppers (Cheat)

Happy birthday, Mommy!! ❤

dsc_0854jpg

dsc_0669

I made these cupcakes a couple of days ago for a bake sale, but the main reason I made cupcakes was so that I could reserve three of them for today – my mom’s birthday. I don’t like making small-batch cupcakes because making a batch of 24 cupcakes requires the same effort as making 3. (Hence, why I always make cupcakes for bake sales).

dsc_0632 dsc_0651

This is the first time that I’ve used chocolate cupcake toppers, but it definitely won’t be the last. They’re deceivingly easy to make, and they look gorgeous! They take the cupcakes to a whole new level, while only requiring an extra 5 minutes.

dsc_0737

I forgot to take photos while I was making the chocolate toppers, but basically, you just melt down some dark chocolate and pipe it out on parchment paper. If you’ve melted the chocolate gently, they should harden at room temperature and peel off easily, giving you these beaautiful cupcake toppers!

dsc_0660

dsc_0706

There are so many things that you can pipe out using the chocolate. I stuck to some simple shapes. I used stars, hearts, flowers, the little thingy in the photo below, and random squiggles. Next time, I’d definitely try words and maybe I’ll challenge myself to piping out a puppy or something. We’ll see~

dsc_0746

dsc_0699

dsc_0727

With the frosting, feel free to choose any color you wish! I like the way that the pink contrasts with the darkness of the chocolate, but I’m sure that blue would be gorgeous as well.

dsc_0716

dsc_0741

Chocolate Cupcakes with Pink Buttercream and Chocolate Cupcake-Toppers

Makes 24 cupcakes

Ingredients

For the cupcakes:

  • 200g all-purpose flour
  • 40g cocoa powder
  • 280g granulated sugar
  • 3 teaspoons baking powder
  • 1 teaspoon salt
  • 80g unsalted butter, cubed and room temperature
  • 240ml  milk, room temperature
  • 2 eggs, room temperature
  • 1 teaspoon pure vanilla extract

For the frosting:

  • 300g unsalted butter
  • *400g-600g powdered sugar, sifted
  • 15ml (1 tablespoon) whipping cream
  • 1 teaspoon pure vanilla extract
  • Gel food colouring of choice

For the chocolate cupcake-toppers:

  • 100g dark chocolate

*To taste

Method

  1. For the cupcakes, preheat oven to 170 degrees Celsius or 325 degrees Fahrenheit
  2. In a large mixing bowl or in the bowl of a stand mixer with the paddle attachment, combine the flour, cocoa, sugar, baking powder, and salt
  3. Add in the butter and beat until the mixture has a sandy consistency
  4. In a separate bowl, whisk together the milk, eggs, and vanilla until combined
  5. Pour half the milk mixture in with the flour and beat on high speed until smooth
  6. Gently mix in the rest of the milk mixture until jut combined. Do not over mix
  7. Transfer the mixture into a lined cupcake tin and bake for 20-23 minutes, until a toothpick inserted into the centre comes out clean
  8. For the frosting, in a mixing bowl or in the bowl of a stand mixer, beat the butter until light and fluffy
  9. Beat in the powdered sugar for 5 minutes or so, before adding the whipping cream and vanilla extract and beating for another minute
  10. For the chocolate cupcake-toppers, chop or break the dark chocolate into equal-sized chunks and place in a microwave-safe bowl
  11. Microwave the chocolate for 15 seconds at a time, stirring in between each interval so that the chocolate heats evenly. When the chocolate has 80-90% melted, stir the chocolate until it’s fully melted
  12. Transfer the melted chocolate into a piping bag or into a sandwich bag with a TINY corner cut off
  13. Pipe designs of your choice onto a sheet of parchment paper. Allow to harden before carefully removing and placing on your frosted cupcakes. Enjoy!

My 17th Birthday Cake (Cheat)

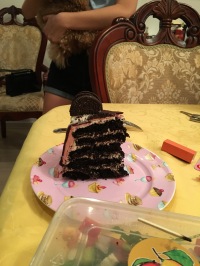
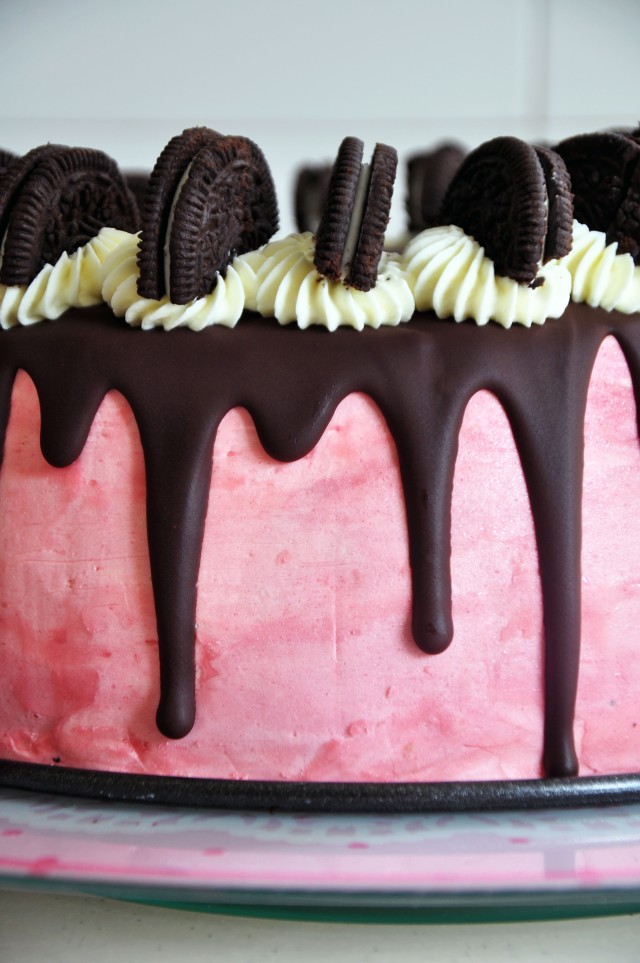
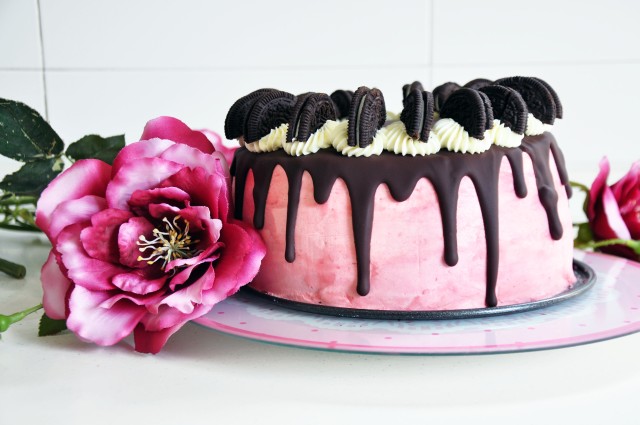
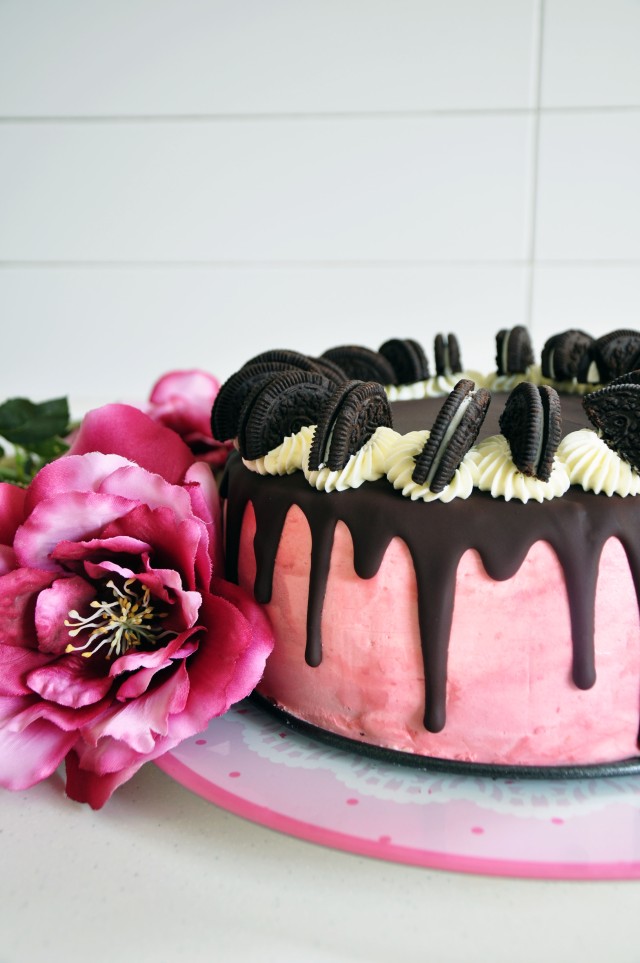
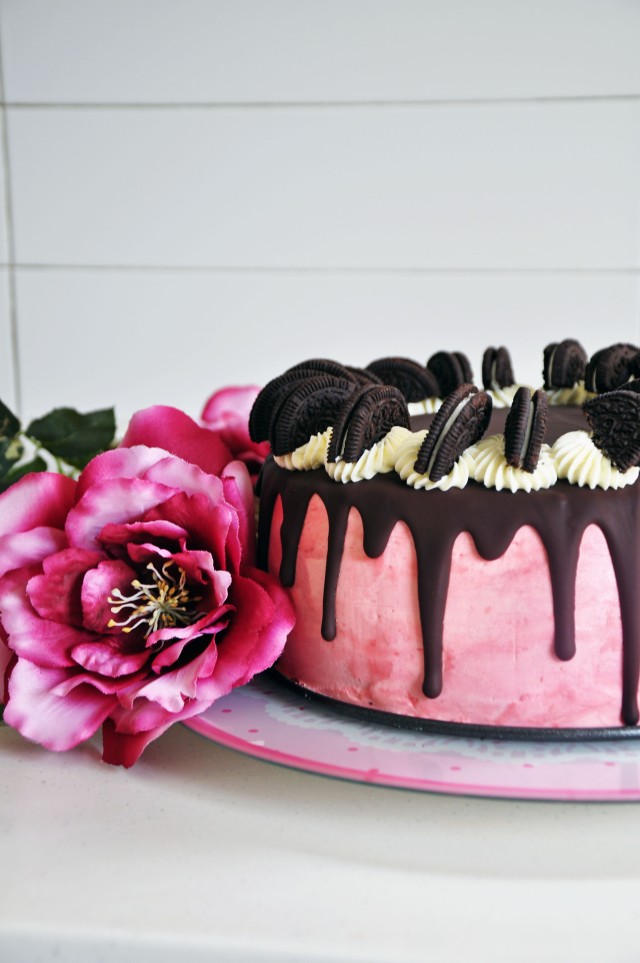
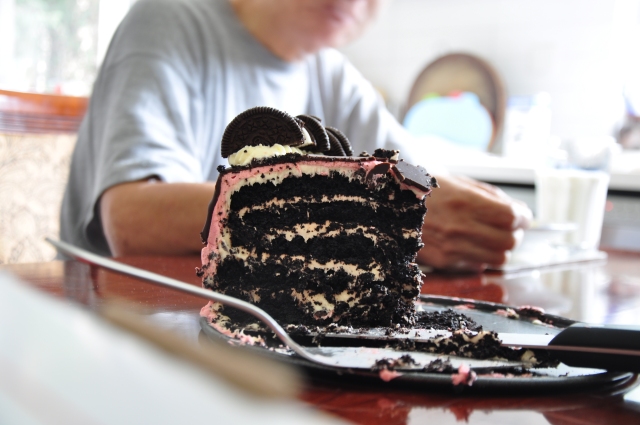
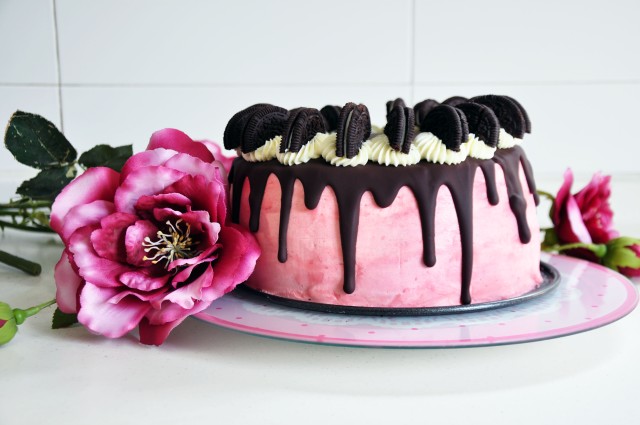
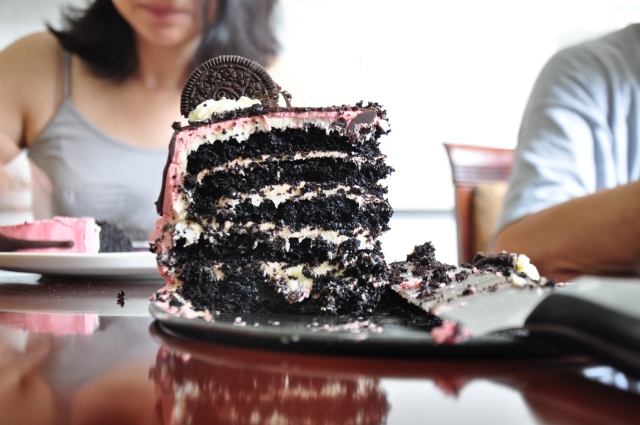
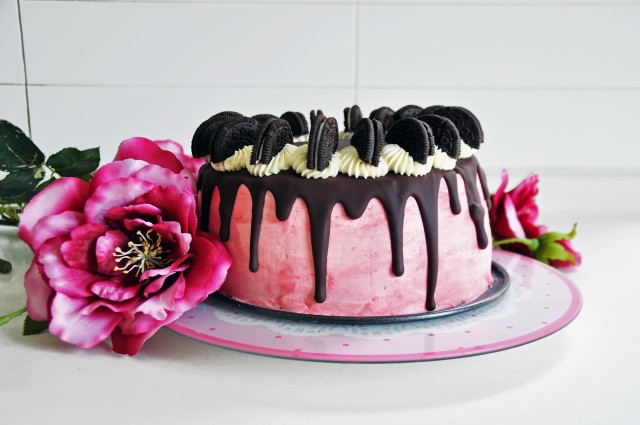
~5-layer midnight cake with cheesecake filling, covered with a generous layer of pink buttercream, glossy chocolate ganache, and topped with whipped cream and Oreos~

dsc_0910

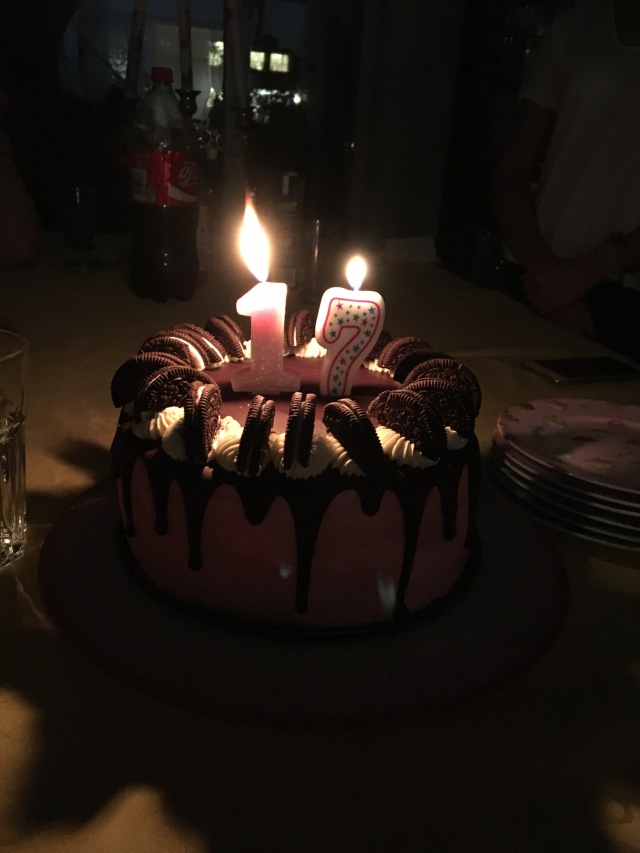
Guess who’s 17 years old!

dsc_0898

I have a love-hate relationship with birthdays. I love everything about them, except the fact that I’m another year older. I prefer other people’s birthdays, with all the celebrations and games and cakes and gift-opening, but without me being consciously aware of my ageing.

It’s weird, isn’t it? The way that day by day, hour by hour, we age, but it’s only once a year for 24 hours that we actually acknowledge it. Then again, acknowledging our constant ageing would take some of the fun out of birthdays.

dsc_0860

dsc_0872

dsc_0881

dsc_0894

I don’t understand why people want to get older. A pessimistic way of putting is is that every year, you’re a year closer to death. You become more likely to get sick. You have more responsibilities. Then again, an optimistic way of seeing is is that every year, you are faced with new opportunities. You’ll graduate and start a new chapter of your life. You might get a job. You might meet “the one”. You might get married. You might have kids. Who knows? In the end, the best way to predict your future is to live it the way you want. Sometime’s it’s just easier to be passive to all that happens around you, so that when things go wrong, you can blame the world and carry on, but wow, that must get boring. The happiest people are those who take control of their lives and steer it the way they want to go. When things go wrong, they acknowledge their mistakes and learn from them, and when things go right, they’re living Heaven on Earth. You pick (hint: I’d go with the second one).

I always seem to get really reflective on my birthday. Is it just me?

dsc_0877

dsc_0880

dsc_0887

But let’s focus on the real reason you’re here: CAKE!

Another reason why I always get excited about birthdays – cake. This year, I decided to bake myself a 5-layer midnight cake with cheesecake filling, covered with a generous layer of pink buttercream, glossy chocolate ganache, and topped with whipped cream and Oreos. Helll yes.

dsc_0960

dsc_0899

To be honest, the cake is pretty much just a chocolate cake with black food colouring added. I used to not like chocolate cake. I thought that it was too rich. I’d always opt for vanilla or red velvet. Chocolate cake just wasn’t my thing, but alas, times have changed. Maybe I’d been deprived of chocolate cake for too long, but this chocolate cake was the bomb. Even before I baked the cake, the cake batter was waving chocolatey scents at me, trying to get me to give in and admit that chocolate cake is one of the best kinds of cake. While I was trimming the cakes, I nibbled on some of the cake crumbs and I was in awe, trying to understand how I had ever disliked chocolate cake. This chocolate cake is velvety. It’s suuper moist and it’s perfectly sweet. It has a wonderful cocoa flavour that isn’t overwhelming, and it pairs beautifully with all the other flavours going on in this cake.

Speaking of other flavours…THE CHEESECAKE FILLING. I don’t know how many times I’ve said it, but cream cheese frostings are magical. Maybe that’s a biased opinion because they’re my favourite, but tbh I’ve never met anyone who dislikes cream cheese frosting. The cheesecake filling tastes pretty much just like cream cheese frosting, but there isn’t as much butter. The butter’s replaced with whipped cream, which is just folded in at the end, so that you end up with filling that’s extra fluffy and light, but definitely is not missing any flavour.

I don’t want to be writing an essay here, so I’m just going to tell you that the buttercream, chocolate ganache, whipping cream, and Oreos are perfect. Simply, utterly, perfect.

dsc_0963

img_6205

dsc_0902

5-Layer Midnight Cake with Cheesecake Filling and Pink Buttercream

Adapted from various sources (linked below)

Ingredients

For the cake

  • 2 1/4 cups (285 g) all-purpose flour
  • 2 1/4 cups (450 g) superfine sugar
  • 1 cup (120 g) “black” unsweetened cocoa powder (or regular cocoa powder with 1 teaspoon black gel food colouring)
  • 1 tablespoon baking soda
  • 1 1/2 teaspoons baking powder
  • 1 teaspoon salt
  • 1 1/2 cups (360 ml) buttermilk, room temperature
  • 1 cup (240 ml) hot coffee
  • 3/4 cup (180 ml) vegetable oil
  • 2 teaspoons pure vanilla extract
  • 3 eggs, room temperature

For the cheesecake filling

  • 500g cream cheese, softened
  • 100g unsalted butter, softened
  • 200g freshly whipped cream
  • 200g icing sugar, sifted

For the pink buttercream

  • 1 cup (226g) unsalted butter
  • 4 cups (500g) powdered sugar
  • 1 tablespoons whipping cream
  • 1 teaspoon pure vanilla extract
  • 1/2 teaspoon pink food colouring

For the chocolate ganache

  • 5 ounces (150 g) best-quality dark chocolate, chopped (I used Lindt)
  • 3/4 cup (90 g) unsalted butter
  • 1 tablespoon light corn syrup or honey

For the whipping cream

  • 1/2 cup whipping cream
  • 1-2 tablespoons powdered sugar, to taste
  • Oreos, for topping

Method

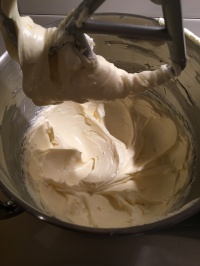
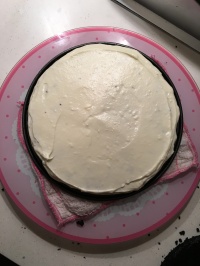
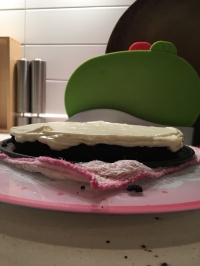
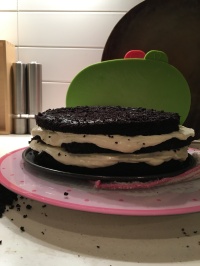
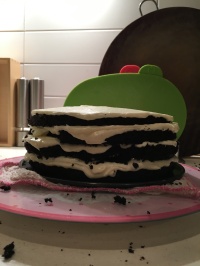
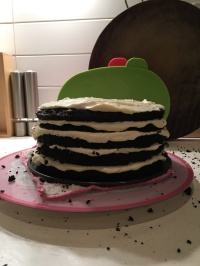
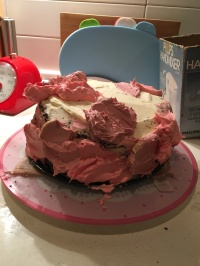
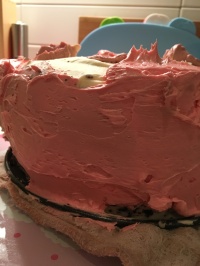
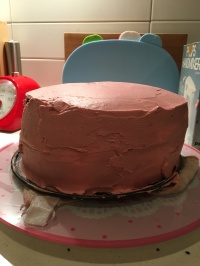
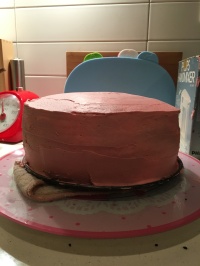
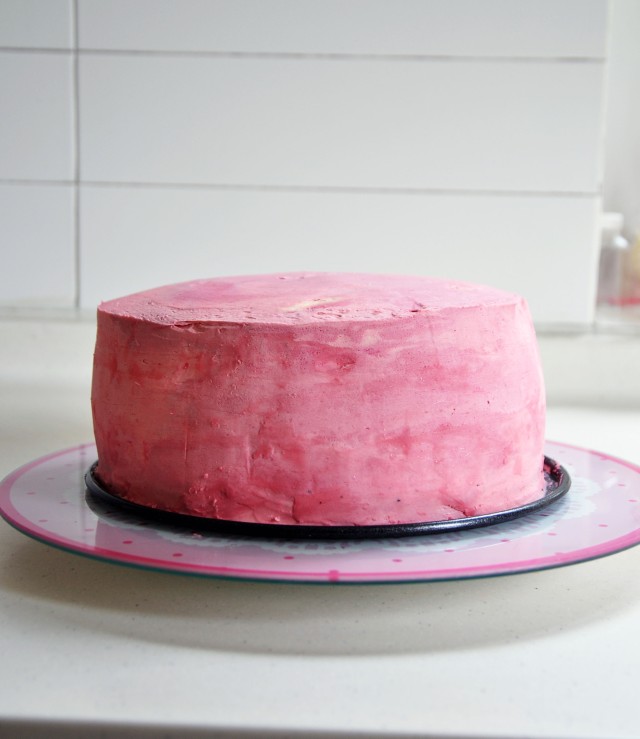
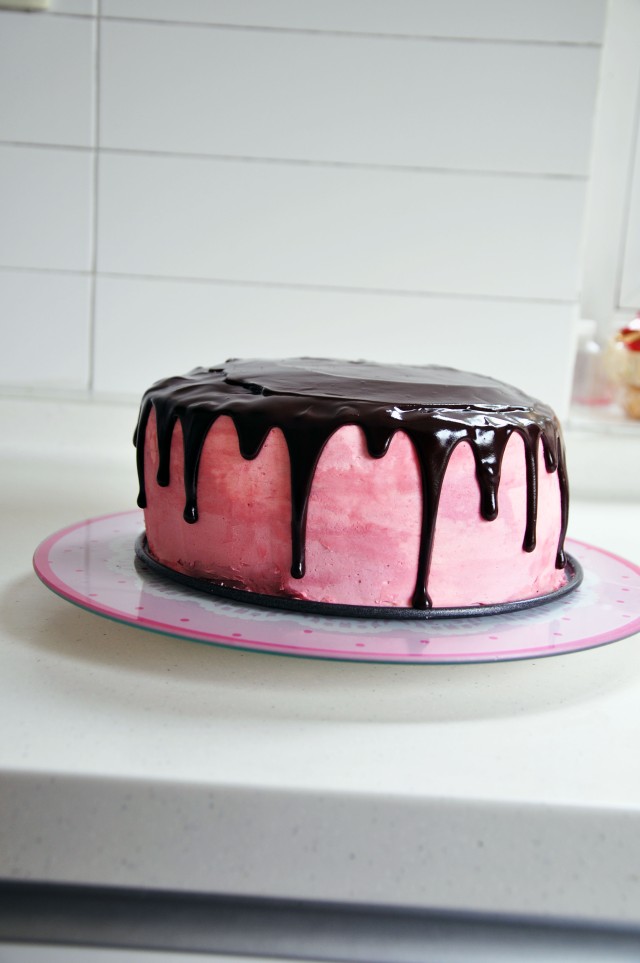
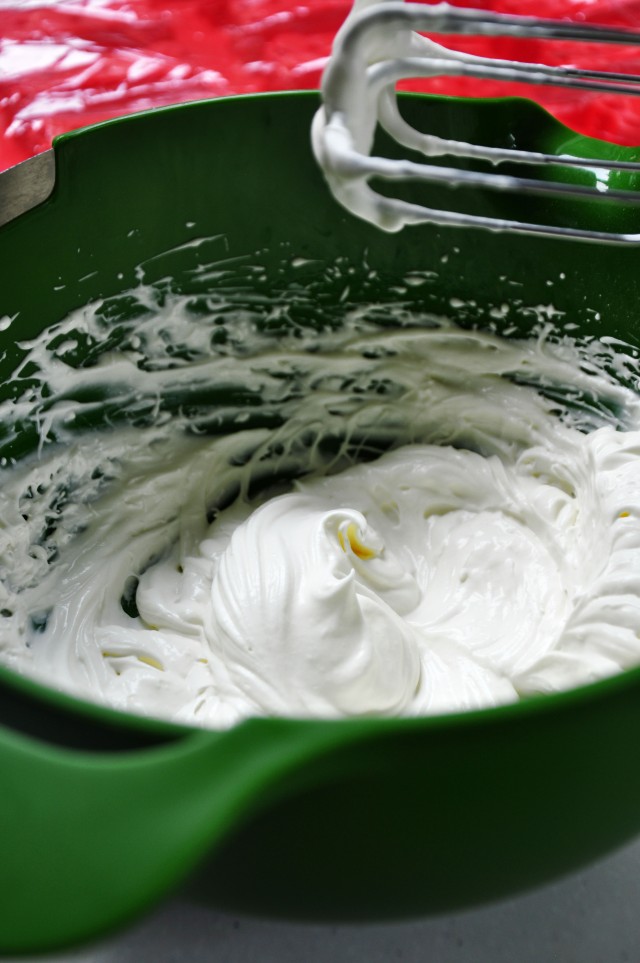
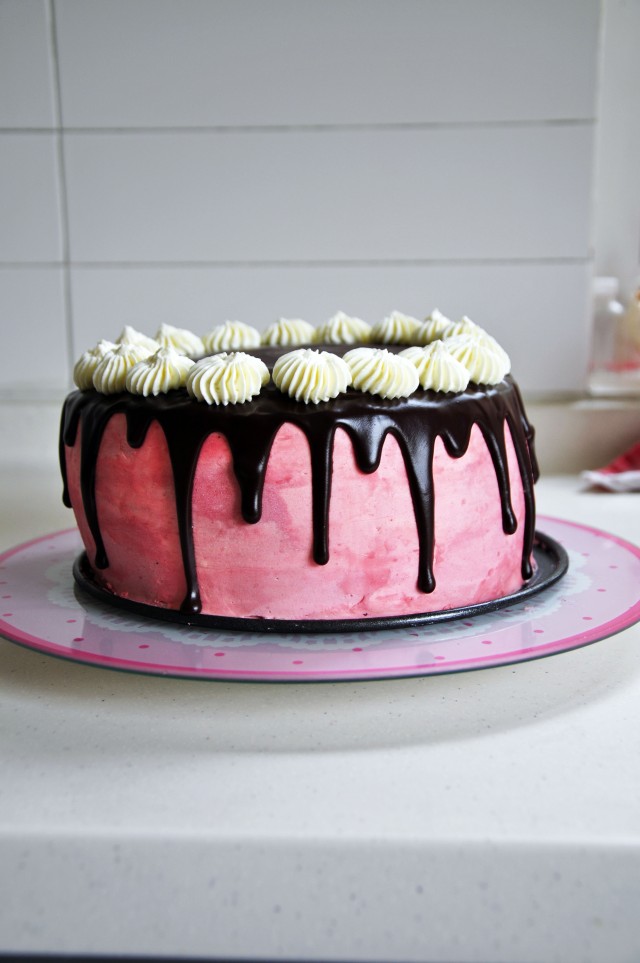
I’ve included generic bad-quality, unedited photos that I took while I was assembling the cake for reference. Let me know if you have any questions!

  1. For the cake, preheat oven to 180 degrees Celsius or 350 degrees Fahrenheit
  2. In a large mixing bowl, sift flour, sugar, black cocoa powder, baking soda, baking powder, and salt
  3. In a medium bowl or measuring cup, combine the buttermilk, coffee, oil, and vanilla, and then mix in eggs
  4. Add liquid mixture to dry ingredients and whisk until smooth, about 1 minute. Divide batter equally among the three lined and greased 8-inch cake pans or weigh for accuracy. Each pan should weigh about 600 grams
  5. Bake the first two layers until a wooden pick inserted into the centre of the cake comes out clean, about 23 minutes. Allow the cakes to cool in pans on a wire rack for 10 minutes, and then turn onto rack to cool completely. Repeat with the final cake layer. When ready to assemble the cake, wrap the layers in plastic wrap and chill for about 30 minutes.
  6. For the cheesecake filling, use an electric mixer to whip cream cheese, butter, and icing sugar until pale and fluffy. Fold in whipped cream until combined
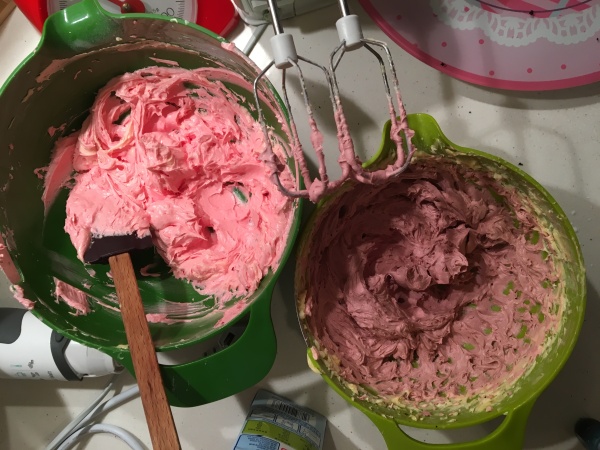
  7. For the pink buttercream, use an electric mixer to beat the butter until pale and fluffy. Add in the icing sugar, vanilla extract, food colouring, and 1 tablespoon of whipping cream and beat until combined
  8. To assemble the cake, trim the cake layers, and then halve them so that each cake becomes two layers.
  9. Place approximately 1/2 tablespoon of the cheesecake filling (or buttercream) on the center of a cake board, and place your bottom cake layer onto the cake board. Add about 1/2-3/4 cup of cheesecake filling onto the top of the cake, and using a small offset spatula, spread the filling so that it covers the top of the cake. It’s okay to let a little bit of filling go over the side. Add the next cake layer and repeat until you’ve reached your final cake layer
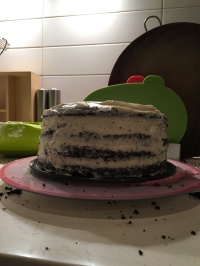
  10. Cover the cake with a thin layer of the cheesecake filling (or buttercream), also known as crumb coating it, and chill in fridge for at least 30 minutes
  11. Cover the cake in pink buttercream and chill in fridge for at least 15 minutes
  12. In the meantime, make the chocolate ganache. In a small bowl, melt the chocolate, butter, corn syrup and salt in the microwave, about 50 seconds, and stir until smooth. Let cool until it thickens slightly, about 15 minutes
  13. For the whipping cream, use a whisk or electric hand mixer to whip the cream until stiff peaks form. Whisk in the powdered sugar. Transfer the mixture into a piping bag fitted with a star tip
  14. (Assembling, continued) Remove the cake from the fridge and spoon the chocolate glaze to the edges of the cake, gently pushing some over the side and letting it dribble down. When you’ve finished putting chocolate glaze on the edges of the cake, spoon chocolate glaze into the centre until covered
  15. When the chocolate has set slightly, pipe the whipped cream around the edges of the cake and top each swirl with half an Oreo
  16. Serve!

img_5968img_5972img_5976

img_5977img_5981img_5983img_5987img_5992img_5994img_5997img_6002img_6009

img_6105

img_6106img_6109img_6112img_6114img_6118img_6212

Rose Meringues (Cheat)

A long time ago, I made my first ever batch of meringues. They were shaped like roses and crossed between pink and white. They were perfect.

DSC_0781.

I made them for a bake sale, actually, and let me tell you now, that they are possibly the best things you could sell at a bake sale. Input – 3 egg whites and some sugar. Output – $$$. They’re actually insanely easy and cheap to make, and you can sell each one for a decent profit.

DSC_0755.

DSC_0757.

DSC_0771.

DSC_0781.

DSC_0788. DSC_0791.

DSC_0793.

Rose Meringues

Ingredients

  • 3 egg whites, room temperature
  • 3/4 cup (150g) fine sugar
  • Pinch of cream of tartar
  • 1 teaspoon pure vanilla extract
  • Pink food coloring (preferably powdered)*

*Meringues call for preferably powdered food coloring, as it keeps them dry. If you use liquid-based food colouring, as long as you keep them in an airtight container in the fridge, you should be fine. I’ve also had success using beetroot powder as colouring.

Method

  1. Preheat oven to 90 degrees Celsius or 200 degrees Fahrenheit
  2. In the bowl of a stand mixer or a medium bowl with an electric hand mixer, whip the egg whites with the cream of tartar until you get soft peaks. Add in the sugar a tablespoon at a time, and then turn the mixer to the highest speed and whip until meringue is stiff and glossy. This should take a few minutes. Beat in vanilla extract.
  3. Divide the meringue into bowls and tint them using food coloring of your choice. Transfer into a piping bag with a 1M piping tip and pipe roses (spirals that start from the middle and circulate outwards) onto baking sheets lined with parchment paper.
  4. Bake both trays until crisp, but not browned. This can take anywhere from 1-1.5 hours depending on the size and humidity. You should be able to remove the meringues from the parchment paper without them sticking. Store in an airtight container in the fridge

Pink Beetroot Crepes (Clean)

So Mother’s Day is this Sunday. Make these for her, and she’ll probably forgive you for every phone (or, in my case, every watch) you’ve ever lost.

DSC_0129.

These crepes look fancy and all, but trust me, you have no idea how incredibly easy they are to make. The batter is just 4 main ingredients, and you cook them just like you cook regular crepes. If you haven’t cooked crepes before, don’t worry, it’s not as hard as it looks.

DSC_0107.

If you want non-pink crepes, I do have a recipe for regular, healthy buckwheat crepes, just so you know.

DSC_0111.

In terms of decoration, feel free to just throw any fruits and sprinkles of sorts that you want onto it. It’s actually so much fun to make and incredibly easy. I’d recommend always having banana, unless you (or your mom) don’t like banana. You can come up with your own creations (recommended), or just try to imitate some of the designs that I did:

DSC_0158.DSC_0135.DSC_0146.DSC_0123.

By the way, did I mention how pretty the edges were? You know how crepes get that pretty, crispy, wavy, almost-lacy kind of edge? Check this out:

DSC_0145.

#legitcrepes

DSC_0119.

Anyways, don’t forget to tell your mom how beautiful she is and how much you love her this Sunday, and wake up just a little earlier to make her these crepes and show her how much you care about her. In case anyone was wondering what I’m doing for my mommy this Mother’s Day, I’m making her these pink, beetroot crepes for breakfast, baking her favorite cheesecake, taking her out for lunch, and giving her a watercolor painting of a botanical wreath with the hand-scripted gold quote, “Mothers hold their children’s hands for a short while, but their hearts forever”

DSC_0137.DSC_0128.DSC_0147.DSC_0156.DSC_0131.DSC_0118.DSC_0150.DSC_0159.

Notes: To make the beetroot purée, just stick the beetroots (unpeeled) in a big pot of boiling water until they’re soft, peel them, and purée them in a food processor. It may seem like a lot of work, but you can use it to make all your food pretty and pink, or use it to make beetroot nut butter chocolate cups or beetroot vanilla rice pudding with dark chocolate.

Pink Beetroot Crepes

Ingredients

  • 3/4 cup buckwheat flour
  • 3 eggs
  • 1 cup milk of choice
  • 4 tbsp (50g) grated/pureed beetroot (preferably cooked)
  • Pinch of salt
  • Toppings (e.g.):
    • Banana, raspberries, cherries, blueberries, mandarins, kiwi, flaked almond, cacao nibs, melted chocolate, shredded coconut, bee pollen, etc.

Method

  1. Mix all the ingredients into a bowl
  2. Place a pan over medium heat and spray the pan with cooking oil (or brush on a little coconut oil or butter)
  3. Turn the heat down to medium low and spoon 1/3-ish cup of the batter into the center of the pan
  4. Lift the pan up using the handle and turn the pan so that the batter spreads evenly into a thin layer
    • Note: If the batter doesn’t spread evenly, or cooks before you can spread it out, turn the heat down a little, or add a little bit of your milk of choice into the batter
  5. When the crepe looks dry, flip it over with a spatula and cook briefly on the other side
  6. Slide it out onto a plate to cool
  7. Repeat with the rest of the batter
  8. Serve!

Beetroot Vanilla Rice Pudding with Dark Chocolate (Clean/Cheat)

I love rice.

DSC_0061.

Being from a Chinese family ensures that I get to eat rice (almost) daily. When I was younger, my parents and grandparents would call me a “fan tong”, which literally translates to “rice bucket”. In other words, I mostly ate rice.

We usually eat rice prepared the traditional way – steamed. Simple. Steamed. Perfect. Sometime’s we’d have it as “zhou” or congee. At restaurants, if pineapple rice was on the menu, we would order it. No questions asked.

My point is, I’ve always loved rice, but for some reason, rice pudding wasn’t really something that I ate. In fact, I’m not really sure if I had ever eaten rice pudding before this recipe. Kinda sad, I know.DSC_0012. DSC_0014. DSC_0015.


Whether this was my first experience with rice pudding or not, it definitely left a good impression on me. The rice was simply so creamy. The texture was unlike anything I’d really ever had before. And since I just threw a beetroot recipe at you, I may as well throw you another one.

DSC_0057.

The rice pudding itself isn’t immensely flavorful. It makes up the texture and the base, and it carries a subtle vanilla sweetness, but that’s where the chocolate comes in. It adds, well, chocolate, which pairs beautifully with the creaminess of the coconut milk and the hint of shredded coconut. I promise that the beet doesn’t affect the flavor at all. It may look like there’s a lot of beet added to make the color, but beet dyes food really easily, and you don’t need much, so you won’t be able to taste it.

DSC_0059.

Visually, beet and chocolate has got to be one of the most appealing combinations. Pink and chocolate, what’s not to love?

DSC_0062.

In case anyone was wondering, I considered this recipe to be a clean/cheat recipe, because c’mon, it makes quite a lot of rice pudding and has 1/4 cup sugar, which you could probably replace for honey if you really wanted. I wanted to stick to traditional rice pudding, so I used sugar.

DSC_0066. DSC_0074. DSC_0075.

Notes: Feel free to use white chocolate, or any type of chocolate of your choosing. Plus, you might want to use more chocolate, or less. Depends on what you like, 70g is just an approximation. To make the beetroot purée, just stick the beetroots (unpeeled) in a big pot of boiling water until they’re soft, peel them, and purée them in a food processor. It may seem like a lot of work, but you can use it to make all your food pretty and pink, or save it to make beetroot nut butter chocolate cups!

Beetroot Vanilla Rice Pudding with Dark Chocolate (Cheat)

Ingredients:

  • 500ml (2 cups) coconut milk
  • 250ml (1 cup) + 30ml (2 tbsp) water
  • 50g (1/4 cup) sugar
  • 200g (1 cup) short-grain rice
  • 250g (1 1/2 cups) beetroot purée (see notes)
  • 70-100g dark chocolate, melted (see notes)
  • Fresh fruit, to garnish (optional)
  • Shredded coconut, to garnish (optional)

Method:

  1. In a medium saucepan heat the coconut milk, water, sugar, and vanilla over medium heat, until hot but not boiling. Turn off heat.
  2. In a large saucepan, heat the rice and oil, and stir them together over medium-low heat
  3. Add in 2 tbsp of water into the large saucepan and mix until mostly absorbed
  4. Stir in a few tablespoons of the coconut milk mixture and allow the coconut milk to fully absorb before stirring in another few tablespoons, until all of the coconut milk mixture is mixed into the rice and the rice is fully cooked through. This should take 20-30 minutes
  5. Stir in the beetroot purée until fully mixed, and remove from heat
  6. Serve the rice pudding immediately with melted chocolate, fresh fruit, and shredded coconut